
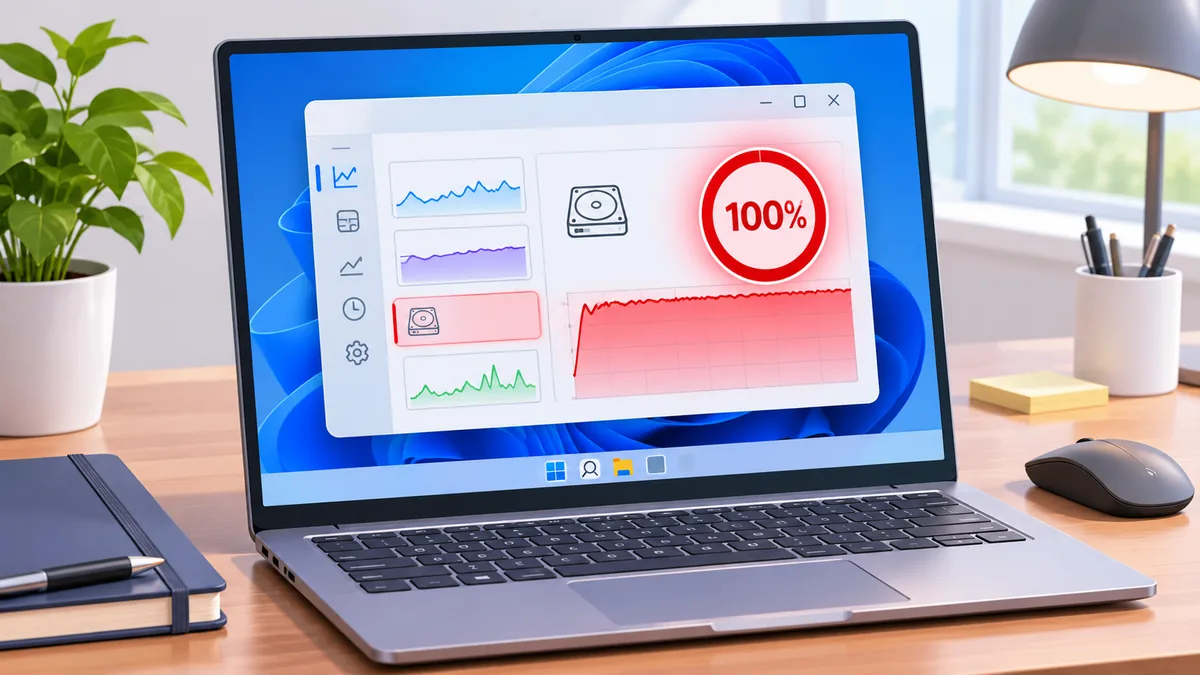
Is your Windows 11 laptop running painfully slow, freezing when you open applications, or taking forever to respond? One possible reason is 100% disk usage in Windows 11. When your disk usage reaches 100% and stays there, your laptop’s storage drive is completely busy handling requests, leaving little capacity for anything else. The good news? You don’t necessarily need a new laptop. Background services, Windows Search indexing, outdated drivers, malware, or a failing drive can all cause the problem. This guide explains 11 ways to fix 100% disk usage on Windows 11, starting with the easiest solutions and moving toward advanced troubleshooting. If your laptop feels slow in general and not just disk-bound, our laptop lagging fix guide covers the wider problem too.
How to Check if Your Disk Usage Is Really at 100%
Before changing anything, confirm that your storage drive is causing the slowdown.
- Press Ctrl + Shift + Esc to open Task Manager.
- Select Processes from the left sidebar.
- Find the Disk column near the top.
- Check whether it consistently shows 100%.
- Select the Disk column heading to sort processes by disk activity.
- Open Performance > Disk 0 to view your drive’s activity graph.
If disk activity briefly reaches 100% while installing updates or opening programs, that can be normal. However, if it stays at 100% while your laptop is mostly idle, something deserves attention.
Important: Disk usage percentage measures how busy your drive is — its “active time” — not how much storage space is occupied. A drive can be completely full, yet show low disk activity, or mostly empty while still reaching 100% usage.
1. Restart Your Laptop and Find the Process Using Your Disk
A temporary Windows service, stuck application, or unfinished background task can cause excessive disk usage. Restarting clears temporary processes and gives Windows a fresh start, making it easier to identify the actual cause.
Steps to restart and identify the problem
- Save your open documents and close applications.
- Select Start > Power > Restart.
- After restarting, allow Windows to finish loading.
- Press Ctrl + Shift + Esc to open Task Manager.
- Select Processes and click the Disk column.
- Identify which application or service is performing the most disk activity.
Common processes include:
- System: Windows or storage-related operations.
- Service Host: SysMain: Background performance optimization.
- Microsoft Windows Search Indexer: File indexing.
- Antimalware Service Executable: Microsoft Defender scanning.
- Windows Modules Installer Worker: Windows maintenance or updates.
If a normal application is consuming excessive disk resources, close it and check again. Avoid ending unfamiliar Windows system processes. Doing so can cause instability or interrupt important operations.
Check the result: If disk activity returns to normal and your laptop responds smoothly, you may not need any additional fixes. If disk usage remains high, continue with the next steps.
2. Disable SysMain (Previously Called Superfetch)
SysMain is a Windows service designed to improve performance by anticipating which applications you are likely to use and loading their data in advance. However, on some laptops, especially older models with mechanical hard drives (HDDs), its background activity can keep the disk busy. Temporarily disabling SysMain can help determine whether it is responsible.
Steps to disable SysMain
- Press Windows + R to open Run.
- Type services.msc and press Enter.
- Scroll down and locate SysMain.
- Double-click the service.
- Select Stop under Service status.
- Change Startup type to Disabled.
- Select Apply > OK.
- Restart your laptop and check Task Manager.
If performance improves noticeably, SysMain may have been contributing to the problem. If nothing changes, return to Services and set Startup type back to Automatic, then start the service.
Tip: Disabling SysMain isn’t a universal speed improvement. Keep it enabled unless testing shows that it makes a clear difference.
3. Reduce or Temporarily Disable Windows Search Indexing
Windows Search makes finding files and applications faster by maintaining an index of searchable content. When Windows indexes large folders or frequently changing files, it may generate significant disk activity. Try reducing indexing before completely disabling the service.
Steps to reduce search indexing
- Press Windows + I to open Settings.
- Navigate to Privacy & security > Searching Windows (shown as Search on some builds).
- Under Find my files, select Classic instead of Enhanced, if available.
- Locate the excluded folders section.
- Add folders containing large numbers of files that you rarely search.
- Check Task Manager to see whether disk activity decreases.
You can also temporarily stop indexing:
- Press Windows + R, type services.msc, and press Enter.
- Find Windows Search.
- Right-click it and select Stop.
- Monitor disk usage for several minutes.
Stopping the service is temporary; Windows may start it again later. Disabling indexing permanently can make searches slower and affect applications that depend on Windows Search. Microsoft recommends adjusting indexed locations to control indexing workload.
4. Run a Full Antivirus Scan
Malware can run hidden background tasks, repeatedly access files, or interfere with normal Windows processes. This sometimes causes unexplained high disk usage even when you haven’t opened any applications. Windows 11 includes Microsoft Defender Antivirus, so you don’t need to install additional software to perform a thorough scan.
Steps to scan for malware
- Open Start > Settings.
- Navigate to Privacy & security > Windows Security.
- Select Virus & threat protection.
- Under Current threats, select Scan options.
- Choose Full scan.
- Select Scan now.
- Allow the scan to finish and follow any recommended actions.
- Restart your laptop if Windows requests it.
A full scan can temporarily increase disk activity because Microsoft Defender must read files across your system. Let the scan finish rather than interrupting it. If malware is detected, follow Windows Security’s instructions to quarantine or remove the threat.
Check the result: After the scan finishes, return to Task Manager and see whether disk usage remains unusually high.
5. Check Your Hard Drive or SSD Health
Sometimes 100% disk usage isn’t caused by Windows settings at all. A failing storage drive may struggle to read or write data, resulting in freezing, delays, and continuous disk activity. Before making further system changes, check your drive’s health.
Method A: Check drive health in Windows Settings
- Open Settings > System > Storage.
- Expand Advanced storage settings.
- Select Disks & volumes.
- Select the appropriate physical drive and open Properties.
- Look for available drive-health information or warnings.
Windows may display health indicators such as estimated remaining life, available spare capacity, or temperature. These details aren’t available for every drive. Windows generally doesn’t provide complete SMART diagnostics through this screen. SMART (Self-Monitoring, Analysis and Reporting Technology) helps identify certain drive-health problems before they become serious. If Windows reports a critical storage warning, back up your important files immediately.
Method B: Check the file system using CHKDSK
- Right-click Start.
- Select Terminal (Admin).
- Approve the User Account Control prompt.
- Enter the following command:
chkdsk C: /scan
- Press Enter and allow the scan to complete.
- Review the results for file-system errors.
Replace C: if Windows is installed on another drive. This command checks the file system without immediately requiring an offline repair. If Windows reports errors requiring repairs, back up your data first and follow the recommended repair process.
Method C: Repair corrupted Windows system files with DISM and SFC
Corrupted Windows system files can make services misbehave and retry the same work over and over, which keeps the disk busy. Windows has two built-in repair tools — run DISM first, then the System File Checker:
- Right-click Start and select Terminal (Admin).
- Enter this command and wait for it to complete (it can take several minutes):
DISM /Online /Cleanup-Image /RestoreHealth
- Then enter:
sfc /scannow
- Restart your laptop when both have finished and check Task Manager again.
Important: CHKDSK checks file-system consistency. It doesn’t prove that your physical drive is healthy. Avoid running repair commands while your data is unbacked up.
6. Disable Compatibility Telemetry Temporarily
Windows uses compatibility diagnostic tasks to collect information that helps assess application and driver compatibility. One related component is Microsoft Compatibility Appraiser, associated with the CompatTelRunner.exe process. Occasionally, compatibility assessment activity can contribute to disk spikes. If Task Manager or Resource Monitor identifies this component as a problem, you can temporarily disable the task to test whether it helps.
Steps to disable the compatibility task
- Press Windows + S and search for Task Scheduler.
- Open Task Scheduler.
- Expand Task Scheduler Library > Microsoft > Windows.
- Select Application Experience.
- Find Microsoft Compatibility Appraiser.
- Right-click the task and select Disable, if available.
- Restart your laptop.
- Check disk activity again.
The task may be unavailable or managed by your organization on certain devices. Disabling it can reduce compatibility diagnostic activity, but may also limit information Windows uses for compatibility checks. To reverse the change, return to the same location and select Enable.
Note: Don’t disable every diagnostic service or delete CompatTelRunner.exe. This particular fix is worth trying only if compatibility telemetry appears responsible for the high disk activity.
7. Fix the AHCI Storage Driver Issue (ADVANCED)
Some older Windows configurations using Microsoft’s storahci.sys AHCI driver have experienced excessive disk activity related to storage-controller interrupt handling. A commonly documented workaround changes a registry setting called MSISupported. This is an advanced, hardware-specific troubleshooting step — not a general Windows 11 performance fix. Changing the wrong registry entry can cause driver problems or prevent Windows from starting correctly.
Before continuing
- Back up important files.
- Create a Windows restore point.
- Confirm that your controller actually uses Microsoft’s storahci.sys driver.
- Skip this method if you’re uncertain about your storage-controller configuration.
Step A: Create a restore point
- Press Windows + S and search for Create a restore point.
- Open the matching Control Panel result.
- Under System Protection, select your system drive.
- If protection is off, select Configure, enable system protection, and apply the change.
- Select Create.
- Enter a descriptive restore-point name and confirm.
Step B: Identify your storage controller
- Right-click Start and select Device Manager.
- Expand IDE ATA/ATAPI controllers, if present.
- Open your SATA AHCI controller’s Properties.
- Select Driver > Driver Details.
- Check whether storahci.sys appears.
- Under Details, select Device instance path from the Property dropdown.
- Record the complete instance path.
If your laptop uses an NVMe controller or Intel RST driver instead, skip this workaround.
Step C: Check the registry setting
- Press Windows + R, type regedit, and press Enter.
- Navigate to:
HKEY_LOCAL_MACHINE\SYSTEM\CurrentControlSet\Enum\PCI
- Locate the matching device-instance keys recorded earlier.
- Look for this subkey beneath the matching device:
Device Parameters\Interrupt Management\MessageSignaledInterruptProperties
- Export the relevant registry key as a backup.
- If the MSISupported DWORD exists and is set to 1, change it to 0.
- Close Registry Editor and restart your laptop.
Do not create missing keys or modify unrelated controllers. This setting disables Message Signaled Interrupts for the selected controller. It should only be considered when you’ve confirmed that your system uses the Microsoft AHCI driver. If performance doesn’t improve, restore the original value.
8. Adjust Virtual Memory Settings
Virtual memory allows Windows to use part of your storage drive when physical RAM is insufficient. If your laptop runs out of available memory, excessive paging can create sustained disk activity. Incorrectly configured paging-file settings can also cause problems. For most users, the safest solution is to let Windows manage virtual memory automatically.
Steps to adjust virtual memory
- Press Windows + R.
- Type sysdm.cpl and press Enter.
- Open the Advanced tab.
- Under Performance, select Settings.
- Open the Advanced tab in Performance Options.
- Under Virtual memory, select Change.
- Enable Automatically manage paging file size for all drives.
- Select OK to close the windows.
- Restart your laptop if prompted.
If automatic management was already enabled, leave it unchanged. Avoid disabling the paging file or choosing arbitrary custom sizes. Those changes may cause application errors or system instability.
Tip: If Task Manager shows consistently high memory usage alongside 100% disk activity, insufficient RAM could be contributing to the problem. And if it is your CPU that sits pinned at 100% instead, work through our laptop high CPU usage fix as well.
9. Turn Off Windows Tips and Unnecessary Background Apps
Windows 11 runs various background processes for notifications, app updates, syncing, and suggestions. Most use very few resources. However, an app repeatedly accessing your drive can contribute to performance problems. Reducing unnecessary background activity may help.
Steps to turn off Windows tips
- Open Settings > System > Notifications.
- Expand Additional settings, if shown.
- Uncheck Get tips and suggestions when using Windows.
- Disable other optional welcome or setup suggestions you don’t need.
Options may vary slightly between Windows 11 releases.
Steps to reduce background app activity
- Open Settings > Apps > Installed apps.
- Find an app you rarely use.
- Select its three-dot menu > Advanced options, if available.
- Under Background apps permissions, select Never.
- Repeat for other unnecessary apps that support this setting.
Not every desktop application offers background permissions here.
For startup applications:
- Open Settings > Apps > Startup.
- Review the applications listed.
- Turn off unnecessary apps that automatically launch when Windows starts.
If your laptop is also slow to boot in the first place, our guide on laptop startup taking too long goes deeper on trimming the startup list. Keep security software, essential drivers, and applications you depend on enabled. These changes may reduce unnecessary disk activity, although turning off Windows tips alone is unlikely to solve persistent 100% disk usage.
10. Update Your Storage and Chipset Drivers
Outdated or incompatible storage drivers can interfere with communication between Windows and your SSD or HDD. This can sometimes result in slow transfers, unexpected delays, or sustained disk activity. Updating the appropriate drivers may resolve compatibility problems.
Steps to check Windows updates
- Open Settings > Windows Update.
- Select Check for updates.
- Install available updates.
- Navigate to Advanced options > Optional updates, if available.
- Review relevant driver updates.
- Install appropriate updates from trusted sources.
- Restart your laptop.
Steps to update drivers through Device Manager
- Right-click Start > Device Manager.
- Expand Storage controllers.
- Right-click the relevant controller.
- Select Update driver.
- Choose Search automatically for drivers.
- Follow the on-screen instructions.
You can also check your laptop manufacturer’s official support website for updated chipset and storage drivers. For example, manufacturers may provide Intel RST or AMD chipset drivers for supported laptops.
Warning: Don’t randomly switch between AHCI, RAID, or Intel RST modes in BIOS/UEFI. Changing storage modes without the correct drivers and preparation can prevent Windows from starting. Avoid third-party driver-updater utilities that promise automatic performance fixes.
11. Replace a Failing Hard Drive or Upgrade to an SSD
If your laptop still shows persistent 100% disk usage after troubleshooting, the storage hardware itself may be the problem. Traditional mechanical hard drives are particularly vulnerable to slowdowns when Windows performs multiple background tasks. An SSD handles this type of activity much more efficiently.
Signs that an SSD upgrade or drive replacement may help
Compare what you see with the full checklist of signs your SSD is failing:
- Your laptop has an older mechanical HDD.
- Windows frequently freezes during ordinary tasks.
- Applications take unusually long to open.
- Disk usage stays high despite low transfer speeds.
- Drive-health checks report warnings.
- You hear unusual clicking or grinding sounds from an HDD.
Steps to identify your drive type
- Press Ctrl + Shift + Esc.
- Select Performance.
- Choose Disk 0.
- Look for the drive type, such as HDD or SSD.
- Check your laptop manufacturer’s specifications to determine compatible replacement options.
If your laptop uses an HDD and supports an SSD upgrade, replacing the HDD can substantially improve responsiveness. If it already uses an SSD, check its health and available capacity before assuming replacement is necessary.
Important: Back up your files before replacing any drive. If your existing drive is failing, prioritize recovering your data.
Quick Summary: What Causes 100% Disk Usage on Windows 11?
Use this table to match the likely cause with the appropriate solution.
| Possible cause | Recommended fix |
|---|---|
| Temporary background process | Restart and inspect Task Manager |
| SysMain causing excess activity | Temporarily disable SysMain |
| Windows Search indexing | Reduce indexed locations or stop indexing |
| Malware or unwanted software | Run a full Microsoft Defender scan |
| File-system errors or failing drive | Check drive health and run CHKDSK |
| Compatibility telemetry activity | Disable the Compatibility Appraiser task temporarily |
| Specific Microsoft AHCI driver issue | Investigate the advanced MSI registry workaround |
| Excessive paging or incorrect virtual memory | Enable automatic paging-file management |
| Unnecessary background applications | Reduce startup and background activity |
| Outdated storage or chipset driver | Install compatible driver updates |
| Slow HDD or failing SSD | Upgrade or replace the storage drive |
Best approach: After each fix, return to Task Manager and check whether disk activity improves. You don’t need to apply every solution — stop when the problem is resolved.
Does This Happen on Windows 10 Too?
Yes — 100% disk usage is just as common on Windows 10, and every fix in this guide applies there in the same order. SysMain, Windows Search indexing, Compatibility Telemetry and the paging file behave the same way, and the advanced storahci registry workaround was actually first documented for Windows 10. The menu names differ slightly in a few places (Task Manager has tabs across the top instead of a left sidebar), but the services and settings are in the same locations.
Frequently Asked Questions
1. Is 100% disk usage dangerous?
Not necessarily. Brief periods of 100% disk activity are normal when Windows installs updates, scans for malware, or indexes files. However, consistently high disk usage combined with freezing or unusual drive noises can indicate a hardware problem. If your laptop also displays drive-health warnings, back up important data immediately.
2. Why is my disk at 100% when nothing is open?
Windows continues running background tasks even when no applications are visibly open. These tasks may include Windows Update, Microsoft Defender, search indexing, cloud synchronization, and other maintenance activities. Open Task Manager > Processes, sort by Disk activity, and identify the busiest process. You can also press Windows + R, enter resmon, and open the Disk tab in Resource Monitor for more detailed information.
3. Does 100% disk usage happen on SSDs too?
Yes. SSDs can also reach 100% active time because of background activity, driver problems, excessive paging, or a failing drive. However, an SSD generally performs better than a traditional HDD when handling many small disk operations. If an SSD consistently reaches 100% usage while your laptop freezes, investigate the process responsible and check drive health.
4. Will adding RAM fix 100% disk usage?
Adding RAM may help if your laptop frequently runs out of memory. When available RAM becomes insufficient, Windows uses its paging file on the storage drive. Excessive paging can then contribute to high disk activity. Check Task Manager > Performance > Memory to see whether your RAM is consistently close to full. Adding RAM won’t fix every disk problem, especially one caused by a failing drive or incompatible storage drivers.
5. How do I know if my drive is failing?
Warning signs can include frequent freezing, file corruption, read/write errors, unexpected crashes, and unusually slow performance. Mechanical HDDs may also produce unusual clicking noises. Check Settings > System > Storage > Advanced storage settings > Disks & volumes for available health information. For more detailed SMART diagnostics, use a reputable tool provided by your drive manufacturer. Remember that a drive can fail without showing an obvious warning. Keep important files backed up even if your drive appears healthy.
Conclusion
Experiencing 100% disk usage on Windows 11 can make an otherwise usable laptop feel frustratingly slow. Fortunately, many causes can be identified and fixed without professional help. Start by restarting Windows and checking Task Manager. Then investigate SysMain, Windows Search, malware, drive health, and drivers. If your laptop still struggles and uses an older HDD, upgrading to an SSD may be the most effective long-term solution. The key is to identify what’s keeping your drive busy instead of changing every Windows setting at once. Work through the fixes carefully, check the results, and stop once your laptop is running smoothly again. And if the disk behaves now but programs still take forever to open, that guide picks up where this one ends.