
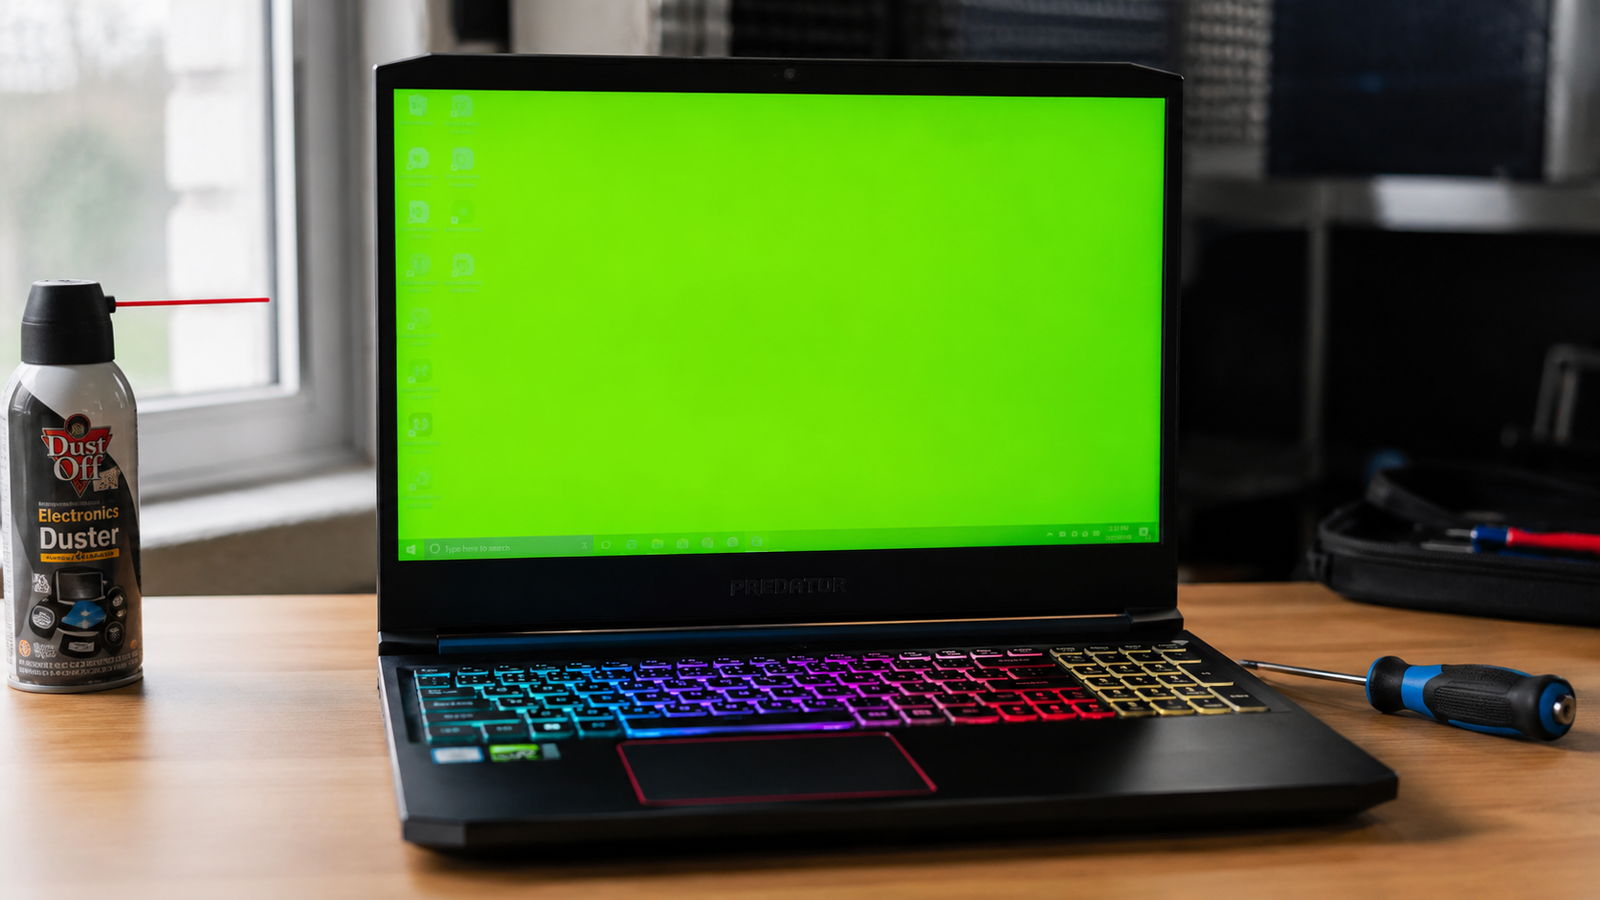
Quick Answer
A green laptop screen is almost always caused by a corrupted or outdated GPU driver, a loose internal display cable (LVDS/eDP), or a failing LCD panel. Start by connecting an external monitor. If the external screen looks normal, the problem is in your display cable or panel. If it also shows green, your GPU or drivers need attention first.
Introduction
You open your laptop and the screen is bathed in green. It might be a full solid green with nothing visible underneath, a green tint that makes everything look off, flickering green lines across the display, or a green overlay that only appears during videos. Each pattern points to a different root cause, and treating the wrong one wastes time and money.
This guide covers every version of the laptop green screen problem. You will know exactly which type you have by the time you finish the diagnosis section, and you will work through fixes in the right order rather than guessing. Most green screen issues are fixable at home without spending any money.
Symptoms of the Problem

- Full solid green screen with no content visible, even before Windows loads
- Green tint over the entire display, desktop icons and text still visible underneath
- Green overlay that appears only during video playback in Chrome, Firefox, or a media player
- Green horizontal or vertical lines across part or all of the screen
- Screen flickers green, especially when you tilt the lid backward or forward
- Screen goes green then returns to normal temporarily
- Green patches or blotches in specific areas of the display
- Green tint appeared after a Windows Update, driver install, or new software
- Screen shows green starting from the BIOS splash screen, before Windows loads
Start Here: Fast Diagnosis
Use this decision tree before touching anything else. It takes two minutes and tells you exactly where the fault is.
Step 1: Connect an external monitor via HDMI or connect to a TV.
Plug in and press Windows + P. Select Duplicate.
If the external screen looks completely normal: The problem is inside your laptop display. The GPU and drivers are fine. Focus on the display cable (LVDS/eDP) or the LCD panel itself. Skip straight to Fix 5 and Fix 6.
If the external screen also shows green or distortion: The GPU, graphics driver, or motherboard-level hardware is involved. Start from Fix 1 and work down.
Step 2: Boot into BIOS.
Shut down and power on. Press F2 or Del repeatedly to enter BIOS (key varies by brand; see Brand-Specific section). Watch the BIOS screen carefully.
If the BIOS screen looks normal (no green tint): This is a Windows software or driver problem. GPU driver issues are the most likely cause. Start from Fix 1.
If the BIOS screen also has a green tint or green artifacts: This confirms hardware failure. A corrupted driver cannot affect the BIOS display. You have a loose display cable, a failing LCD panel, or a GPU hardware fault. Skip to Fix 5.
Step 3: Tilt the lid slowly.
With the laptop open, very slowly tilt the screen forward and backward while watching closely.
If the green tint changes, flickers, or disappears at certain angles: The display cable is loose or damaged. This is one of the most common causes and does not require a new screen. See Fix 5.
If the green tint is completely stable regardless of lid angle: Unlikely to be the cable. Continue with the driver and software checks below.
Tools Needed
Built-in Windows tools:
- Device Manager
- Windows Color Calibration (colorcpl)
- Safe Mode
- Event Viewer
- Windows Update
Free software tools:
- DDU (Display Driver Uninstaller) from guru3d.com
- GPU driver from nvidia.com, amd.com, or intel.com
- HWiNFO64 for temperature monitoring (optional)
Hardware tools (for cable or panel work):
- Phillips screwdriver (small)
- Plastic pry tool or spudger
- Anti-static wrist strap
- Compressed air can
- External monitor with HDMI cable for diagnosis
Troubleshooting Matrix
| Symptom | Likely Cause | Fast Fix |
| Green tint, external monitor fine | Loose display cable or bad LCD | Reseat cable or replace panel |
| Green tint, external monitor also green | GPU driver corruption | Update or clean-install GPU driver |
| Green only during video playback | Hardware acceleration conflict | Disable hardware acceleration in browser |
| Green in BIOS before Windows loads | Hardware failure confirmed | Cable, LCD, or GPU hardware check |
| Green appeared after Windows Update | Driver conflict from update | Roll back or clean-install GPU driver |
| Green flickers when moving lid | Loose LVDS/eDP cable | Open laptop and reseat cable |
| Solid green, nothing visible | GPU crash or full cable disconnect | External monitor test first |
| Green lines alongside screen freezing | Failing GPU or RAM | GPU/RAM diagnosis required |
| Green tint with vertical lines | Display cable damaged or panel cracked | Physical hardware repair |
What Causes a Laptop Screen to Turn Green

Corrupted or Outdated GPU Driver
The most common software cause. Your GPU driver handles all color rendering between the graphics card and the display output. When this driver becomes corrupted, outdated, or replaced by an incompatible version from Windows Update, it can produce incorrect color output that manifests as a green tint across the entire display.
How to identify it: The green tint appeared after a Windows Update, after manually installing a new driver, or after installing a new game or software. The external monitor shows normal color. BIOS looks normal. The problem disappears in Safe Mode.
What users misunderstand: Clicking “Update Driver” inside Device Manager does not always fix a corrupted driver. Device Manager sometimes reinstalls the same broken version. A full clean install using DDU is required to completely remove corrupted driver files.
Confirmation sign: Entering Safe Mode removes the green tint completely.
Loose or Damaged Internal Display Cable (LVDS or eDP)
The thin ribbon cable connecting your motherboard to the LCD panel runs through the hinge area of the laptop lid. Every time you open and close the lid, that cable flexes slightly. Over months or years of use, the cable can loosen from its connector, develop micro-fractures, or start losing pin contact. A partially disconnected cable drops specific color channels, and green is a common result when red or blue data is not transmitted correctly.
How to identify it: The green tint changes, flickers, or temporarily disappears when you slowly tilt the lid. The problem may have started after the laptop was dropped or after an internal repair. External monitor shows normal output.
What users misunderstand: Many people assume a green screen means a new display is needed. A loose cable is a much cheaper fix and does not require buying any replacement parts.
Confirmation sign: Green tint shifts or disappears as you move the lid angle.
Incorrect Color Calibration or Night Light Settings
Windows stores color profiles for each display. A corrupted color profile, an accidentally adjusted calibration, or a Night Light setting misconfigured to add heavy color temperature shifting can create a green hue that looks like a serious problem but is entirely fixable in settings.
How to identify it: The green tint appeared gradually rather than suddenly, or it appeared after changing display settings. It may be consistent regardless of what application is open. BIOS looks normal and external monitor is fine.
What users misunderstand: Night Light normally shifts the screen toward yellow-orange, but a misconfigured third-party display calibration app can produce unintended green tints.
Confirmation sign: Opening colorcpl and resetting color profiles removes the tint.
Hardware Acceleration Conflict During Video Playback
When you play a video in Chrome, Firefox, Edge, or a media player, your GPU handles the video decoding to take the load off the CPU. This is called hardware acceleration. If the GPU driver is outdated or there is a conflict between the browser and the graphics chip, the GPU produces an incorrect green overlay on the video while the rest of the screen appears normal.
How to identify it: The green screen appears only during video playback. Normal desktop use, gaming, and other apps display correctly. Disabling hardware acceleration in the browser immediately fixes the problem.
What users misunderstand: This is very different from a hardware failure. The GPU is functional, but the video decoding pathway specifically is misconfigured.
Confirmation sign: Switching to a different browser that does not have hardware acceleration enabled, or disabling hardware acceleration in settings, makes the video play normally.
Failing or Damaged LCD Panel
LCD panels can fail from physical pressure, a crack that is not visibly obvious from the outside, liquid damage, or simply age and heat degradation. A failing panel can lose specific color channels, causing green to dominate. Unlike a cable issue, a damaged panel produces a consistently green display that does not change when you move the lid.
How to identify it: Green tint is completely stable regardless of lid position. External monitor shows normal output. BIOS also shows the green tint. No software changes preceded the problem.
What users misunderstand: Panels do not always crack visibly. Internal layer damage from pressure or heat is invisible from outside but produces permanent color shifts.
Confirmation sign: BIOS shows the same green tint. Moving the lid changes nothing.
Failing GPU (Graphics Processing Unit)
If a laptop GPU is failing from heat damage, aging solder joints, or a manufacturing defect, it can stop processing color information correctly. Unlike a driver issue, a hardware GPU failure produces green output even in BIOS and cannot be fixed by software. Gaming laptops and older thin-and-light models with dedicated GPUs are most at risk after years of thermal stress.
How to identify it: Green tint appears in BIOS. External monitor also shows green or visual artifacts. The laptop may crash, freeze, or shut down under graphics load. Green artifacts appear in 3D applications and games.
What users misunderstand: GPU failure is far less common than driver failure or cable issues. Diagnosing it correctly before spending money on a replacement is critical.
Confirmation sign: External monitor shows the same green artifacts. Temperature monitoring shows the GPU running at extreme heat.
Windows Insider Build (Green Screen of Death / GSOD)
If you are enrolled in the Windows Insider Program, you may encounter the Green Screen of Death, which is a variant of the Blue Screen of Death used specifically for Insider preview builds to visually distinguish it from stable release crashes. This is a software crash screen, not a display hardware issue.
How to identify it: The green screen includes text that reads “Your Windows Insider Build ran into a problem and needs to restart.” A stop code appears. The laptop restarts after the green screen. Regular use resumes normally afterward.
What users misunderstand: The GSOD looks alarming but means the Insider build encountered a crash, not that your display hardware is broken. Treat it like a BSOD and investigate the stop code.
Confirmation sign: Text and a stop code are visible on the green screen. Laptop reboots and returns to normal Windows.
What We See Most Often
In the shop, the breakdown for green screen calls is roughly three categories. The first is driver corruption, which is the most frequent. It arrives after a Windows Update pushes an incompatible GPU driver, the user notices the green tint within a day of the update, and a clean driver reinstall solves it completely. The second is the loose cable scenario, where the user has been noticing intermittent green flickering for weeks and finally brings the laptop in. Reseating the eDP or LVDS cable takes about 20 minutes and costs nothing in parts.
The third category is actual hardware failure, and it is the least common. When we see a panel that needs replacing, it is usually a laptop that took impact damage or a machine that ran extremely hot for an extended period. Users often arrive certain the panel is dead when the cable is actually the culprit. Testing external output first and checking the BIOS screen are the two fastest ways to confirm whether you are looking at a cable, a panel, or a GPU problem.
How to Diagnose the Problem

Step 1: Test with an external monitor
Connect to an external monitor, TV, or projector via HDMI. Press Windows + P and select Duplicate.
Expected Result: External screen shows correct color while laptop screen shows green. This confirms the GPU and drivers are fine; the fault is in the display hardware.
If Failed: External screen also shows green. Move to Step 2 and investigate drivers first before assuming GPU hardware failure.
Step 2: Boot into BIOS and check the display
Restart and press the BIOS key for your brand (F2 on Dell, F2 or Del on ASUS/Lenovo, Esc or F10 on HP). Watch the BIOS screen for green tint.
Expected Result: BIOS displays normal color. The problem is entirely within Windows and its drivers.
If Failed: BIOS also shows green tint. This confirms hardware involvement. Continue to the lid-tilt test and the hardware fixes.
Step 3: Perform the lid-tilt test
With the laptop running and the screen visible, very slowly tilt the lid from a near-closed position to fully open while watching the display.
Expected Result: Green tint changes, flickers, or momentarily disappears at certain angles. This confirms a loose or damaged LVDS/eDP cable.
If Failed: No change at any lid angle. The cable may still be the cause but is more likely a panel failure. Proceed to Safe Mode testing.
Step 4: Boot into Safe Mode
Press Windows key, go to Settings, then System, then Recovery, then Advanced Startup, then Restart Now. Choose Troubleshoot, Advanced Options, Startup Settings, Restart. Press 4 for Safe Mode.
Expected Result: Green tint disappears in Safe Mode. This confirms a Windows driver or software conflict.
If Failed: Green tint remains in Safe Mode. The problem is hardware-level. Skip software fixes and go directly to the cable and panel checks.
Step 5: Check Event Viewer for crash codes
Search for Event Viewer. Go to Windows Logs, then System. Filter for errors around the time the green screen appeared.
Expected Result: You find entries related to display or GPU drivers, such as “Display driver stopped responding and has recovered” or Windows Update installation records.
If Failed: No relevant entries found. The issue was hardware rather than a crash or driver event.
Which Fix Usually Works?
| Fix | Typical Success Rate | Cost | Difficulty |
| Disable hardware acceleration (video only) | Very Common | Free | Easy |
| Update or clean-install GPU driver | Very Common | Free | Easy |
| Roll back GPU driver after Windows Update | Common | Free | Easy |
| Reset color calibration profile | Common | Free | Easy |
| Reseat the display cable (LVDS/eDP) | Common | Free if done yourself | Moderate |
| SFC and DISM system file repair | Occasional | Free | Easy |
| LCD panel replacement | Occasional | $60-$180 | Hard |
| GPU hardware repair or replacement | Rare | $200-$500+ | Professional only |
Step-by-Step Fixes

Fix 1: Disable Hardware Acceleration (For Video-Only Green Screen)
Cost: Free Time: 5 minutes Difficulty: Easy
This fix applies only when the green screen appears during video playback and the desktop looks normal.
For Chrome:
- Click the three-dot menu in the top right corner.
- Go to Settings.
- Click System in the left sidebar.
- Toggle off “Use hardware acceleration when available.”
- Click Relaunch.
For Firefox:
- Click the menu button and go to Settings.
- Scroll to Performance.
- Uncheck “Use recommended performance settings.”
- Uncheck “Use hardware acceleration when available.”
- Restart Firefox.
For Microsoft Edge:
- Click the three-dot menu and go to Settings.
- Search for “hardware acceleration.”
- Toggle off “Use hardware acceleration when available.”
- Click Restart.
Expected Result: Video plays with correct color and no green overlay.
If Failed: Hardware acceleration was not the cause. Continue to Fix 2.
Technician Tip: After disabling hardware acceleration, update your GPU driver. Many users can then re-enable hardware acceleration without the green screen returning once the driver is correct.
Fix 2: Update GPU Driver Through Device Manager
Cost: Free Time: 10-15 minutes Difficulty: Easy
- Right-click the Start button and select Device Manager.
- Expand Display Adapters.
- Right-click your GPU (NVIDIA, AMD, or Intel).
- Select Update driver.
- Choose “Search automatically for updated driver software.”
- Restart the laptop after installation.
Expected Result: Driver updates, green tint disappears after restart.
If Failed: Device Manager did not find a newer driver, or the same version was reinstalled. Proceed to Fix 3 for a full clean install.
Technician Tip: Laptop manufacturers often provide driver versions optimized for their hardware on their support pages. Check dell.com, hp.com, lenovo.com, or support.asus.com for your model’s driver rather than relying solely on the GPU manufacturer’s generic version.
Fix 3: Clean Install GPU Driver Using DDU
Cost: Free Time: 25-40 minutes Difficulty: Moderate
This is the most effective driver fix. Device Manager’s reinstall often leaves corrupted files behind. DDU removes everything cleanly.
- Download DDU (Display Driver Uninstaller) from guru3d.com.
- Download the correct GPU driver from nvidia.com, amd.com, or intel.com for your specific GPU model. Save it to your desktop.
- Go to Settings, System, Recovery, Advanced Startup, Restart Now.
- Select Troubleshoot, Advanced Options, Startup Settings, Restart.
- Press 4 for Safe Mode.
- In Safe Mode, run DDU as Administrator.
- Set device type to GPU. Select NVIDIA, AMD, or Intel.
- Click “Clean and Restart.”
- After restart, immediately install the GPU driver you downloaded in Step 2.
- Do not connect to the internet until the driver is installed if you want to prevent Windows Update from reinstalling a generic version.
Expected Result: Fresh driver eliminates the green tint completely.
If Failed: The driver was not the cause. The green screen is hardware-related. Continue to Fix 4.
Expert Warning: Do not install GeForce Experience alongside the driver unless you specifically need it. It adds background processes and overlays that can conflict with the display on some laptops.
Fix 4: Roll Back GPU Driver
Cost: Free Time: 10 minutes Difficulty: Easy
This applies when the green screen started immediately after a Windows Update.
- Right-click the Start button and open Device Manager.
- Expand Display Adapters.
- Right-click your GPU and select Properties.
- Click the Driver tab.
- Click Roll Back Driver if the button is available.
- Confirm and restart.
Expected Result: Previous stable driver is restored and green tint disappears.
If Failed: Roll back option is greyed out, meaning Windows only has one version stored. Download the previous driver version from your GPU manufacturer’s website and install it manually.
Technician Tip: After rolling back, go to Settings, Windows Update, Advanced Options, and enable “Pause Updates” for 7 days to prevent the same problematic driver from installing again while you verify stability.
Fix 5: Reset Color Calibration Profile
Cost: Free Time: 5 minutes Difficulty: Easy
- Press Windows + R and type colorcpl. Press Enter.
- The Color Management window opens.
- Go to the Devices tab. Make sure your laptop screen is selected.
- Click the Advanced tab.
- Click Calibrate Display.
- Follow the on-screen wizard to reset color balance.
- Alternatively, remove any custom color profiles listed and click Set as Default Profile to restore Windows defaults.
Expected Result: Color balance returns to neutral and green tint disappears.
If Failed: Color profile was not the cause. Continue to Fix 6.
Technician Tip: Also check the Windows Night Light setting. Go to Settings, System, Display. Make sure Night Light is turned off. Third-party display calibration apps like f.lux can also produce unusual tints; uninstall them temporarily to test.
Fix 6: Run SFC and DISM to Repair System Files
Cost: Free Time: 30-60 minutes Difficulty: Easy
Corrupted Windows system files can interfere with display rendering even when the driver itself is correct.
- Search for Command Prompt. Right-click and Run as Administrator.
- Type: DISM /Online /Cleanup-Image /RestoreHealth
- Press Enter and wait for the process to complete (this takes 10-20 minutes).
- After DISM finishes, type: sfc /scannow
- Press Enter and wait for the scan to complete.
- Restart the laptop.
Expected Result: Corrupted system files are repaired and display renders correctly.
If Failed: System files were not the cause, or corruption was too severe to repair. Consider a Windows Reset as the next step.
Technician Tip: Always run DISM before SFC. DISM repairs the Windows image that SFC draws clean files from. Running SFC alone on a corrupted image can produce false results.
Fix 7: Reseat the Internal Display Cable (LVDS or eDP)
Cost: Free in parts (service fee $30-$80 if professionally done) Time: 20-40 minutes Difficulty: Moderate to Hard
This fix requires opening the laptop. Only proceed if you are comfortable with basic laptop disassembly.
- Power off the laptop completely and remove all power sources including the battery if removable.
- Use the manufacturer’s iFixit guide or a model-specific YouTube teardown to remove the back panel.
- Locate the display cable connector on the motherboard, typically near the hinge area. It is a thin, flat ribbon cable.
- Gently disconnect the cable by releasing the ZIF (zero insertion force) latch or carefully pulling the connector straight out.
- Inspect the cable and connector for bent pins, burns, fraying, or any visible damage.
- If the cable looks intact, firmly reseat it by pressing it straight back into the connector until it clicks or sits flush.
- If your laptop uses a ZIF connector, lock the retention clip back down.
- Reassemble the back panel.
- Power on and check the display.
Expected Result: Green tint disappears as the cable regains full contact with the connector.
If Failed: The cable may be damaged internally. Replace the display cable (cost $10-$30 from eBay or iFixit for most models). Alternatively, the LCD panel itself needs replacement.
Expert Warning: Anti-static precautions matter here. Touch a grounded metal surface or use an anti-static wrist strap before handling any internal components. Electrostatic discharge can silently damage your motherboard.
Fix 8: Replace the LCD Panel
Cost: $60-$180 depending on model Time: 30-60 minutes Difficulty: Hard
Use this fix when the external monitor is fine, the cable was reseated without improvement, and the BIOS shows the green tint.
- Look up your laptop’s exact model number (printed on the underside label or visible in Settings, System, About).
- Search for a replacement LCD panel using the model number on eBay, iFixit.com, or Amazon. Confirm the screen resolution, backlight type (LED), connector type, and size match exactly.
- Follow a model-specific teardown guide to remove the screen bezel. Most bezels are held by plastic clips and adhesive with hidden screws under rubber plugs.
- Disconnect the display cable from the back of the LCD panel.
- Remove the mounting brackets from the old panel and attach them to the new one.
- Connect the display cable to the new panel.
- Test before reassembling the bezel. Power on and confirm the display looks correct.
- Reassemble fully.
Expected Result: Green tint is completely gone with the new panel.
If Failed: The display cable may also be damaged and needs replacement alongside the panel, especially if the old cable shows fraying.
Technician Tip: Always test the new panel before snapping the bezel back in place. Finding out the panel has a dead pixel or backlight issue after full reassembly is frustrating and wastes time.
Fix 9: Windows Safe Mode Diagnosis and System Restore
Cost: Free Time: 20-30 minutes Difficulty: Easy
If you confirmed the green screen disappears in Safe Mode, a software conflict is the cause.
System Restore:
- Search for Create a Restore Point and open it.
- Click System Restore.
- Choose a restore point dated before the green screen began.
- Follow the wizard to restore.
Expected Result: Windows reverts to a state before the driver or software conflict occurred.
If Failed: No restore points exist before the issue started. Perform a clean GPU driver install using DDU instead.
Technician Tip: System Restore does not delete personal files. It only reverts Windows settings, drivers, and system software to the chosen date.
Mistakes That Make the Problem Worse
Replacing the LCD panel without testing the external monitor first. If the external monitor also shows green, buying a new panel is a complete waste. The fault is in the driver or GPU, not the screen itself. Always test external output before ordering any parts.
Using Device Manager “Update Driver” and assuming it fixed the driver. Device Manager searches Windows Update, which often has older or generic driver versions. Worse, it can reinstall the same broken version the laptop already has. A proper fix requires downloading the driver directly from NVIDIA, AMD, or Intel and using DDU.
Opening the laptop without disconnecting power. Working on a powered laptop risks short circuits. Always shut down fully, hold the power button for 5 seconds after shutdown to discharge capacitors, and remove the battery if it is removable.
Prying the bezel with metal tools. Metal pry tools scratch and crack plastic bezels. Use a plastic spudger or an old guitar pick. Start from a corner where there is a small gap.
Force-restarting during a Windows Update green screen. If the green screen shows Windows Update text, the system may still be writing files to disk. A force restart at this point can corrupt the installation and cause boot failures. Wait a full 2 hours before concluding it is frozen.
Ignoring temperature. Overheating GPU can produce green artifacts that look like driver issues. Installing DDU and a new driver helps temporarily, but the problem returns because the real cause is thermal damage. Check GPU temperatures with HWiNFO64 before and after fixes.
Assuming the cable is fine because the laptop was never dropped. Cables degrade from normal hinge flex over years of use. A laptop that has never been dropped can still have a fraying eDP cable after two or three years of daily opening and closing.
Brand-Specific Considerations
Dell
Dell laptops use F2 to enter BIOS and F12 for the boot menu. To switch the display output in BIOS, look for the Video option under Advanced Settings. On some XPS and Inspiron models, you can force the display to use Intel integrated graphics only by setting Graphics Mode to “Integrated Graphics.” This is useful for confirming whether a dedicated GPU is the source of the green tint. Dell SupportAssist (search for it in the Start menu) includes a hardware diagnostic that can test the LCD panel and GPU. Run the “Video” test in SupportAssist before concluding you need a panel replacement. Older Dell Inspiron models from 2017-2019 had known LVDS cable failure rates; the cable runs through the hinge and develops micro-cracks after extended use.
HP
HP laptops use Esc to access the boot menu, then F2 for diagnostics or F10 for BIOS. HP System Diagnostics (available at startup with Esc + F2) includes a Display test under the Component Tests section. This built-in test checks the LCD panel for color accuracy and can confirm panel failure without any third-party software. Older HP Pavilion G-series models (G4, G6, G7) running with older AMD or NVIDIA dedicated GPUs are prone to GPU failure from heat. If your HP Pavilion shows green in BIOS and runs extremely hot, the GPU is the likely culprit. HP Support Assistant, available from the Start menu, also provides driver updates optimized for your specific HP model.
Lenovo
Lenovo uses F2 or Fn+F2 for BIOS and F12 for the boot device menu. Lenovo Vantage, installed on most Lenovo laptops, has a Hardware Scan section that tests the display. Run it before opening the laptop. ThinkPad models have especially detailed diagnostics through the Lenovo UEFI Diagnostic Tool, accessible at startup. ThinkPads also have a more accessible display cable routing path, making cable reseating easier than on most consumer laptops. For IdeaPad and Legion models, Lenovo BIOS has a Graphics Switchable option under Configuration; set it to Discrete Only or Integrated Only temporarily to isolate which GPU is producing the green output.
ASUS
ASUS uses F2 for BIOS setup and Del on some models. ASUS MyASUS includes a Customer Support section with hardware diagnostics. For ROG and TUF gaming laptops, the ASUS Armoury Crate software includes a display test mode. ASUS laptops with MUX switch support (available on some ROG models) allow you to switch between discrete and integrated GPU in Armoury Crate under “GPU Mode.” Switching to iGPU-only mode confirms whether the dedicated GPU is producing the green output. Some ASUS ZenBook models have known eDP cable routing issues where the cable can contact the hinges and develop wear faster than expected.
Acer
Acer uses F2 for BIOS on most models and Del on some older units. Acer Care Center provides hardware diagnostics including a display test. On Acer Nitro and Predator gaming models, PredatorSense includes a “Monitor Check” function. Acer Aspire models from 2018-2021 had some reported LCD cable routing issues, particularly on 15.6-inch models where the cable path through the left hinge is tight. Check the left hinge area first when performing a cable inspection.
MSI
MSI gaming laptops use Del to enter BIOS. MSI Center provides driver management and a hardware check tool. On MSI laptops with dual GPU (Intel + NVIDIA), you can switch between Optimus (hybrid) mode and Discrete mode within MSI Center under User Scenario. Setting the GPU to Discrete-only forces all display output through the NVIDIA GPU, which helps confirm whether the integrated Intel GPU is contributing to the green tint. MSI Creator and gaming laptops with Mini LED or OLED panels have separate color profile management; check MSI Center’s display settings tab for any custom profiles that may be causing unintended color shifts.
Repair Shop Diagnosis

When a laptop comes in with a green screen complaint, the first thing we check is the external monitor. That single test eliminates half the possible causes in 30 seconds. If the external is fine, the focus shifts to the internal display assembly. We check the BIOS screen next to confirm the problem persists below the OS level.
For cable diagnosis, we slowly flex the display at different angles while watching the screen under a bright light. A cable fault almost always shows up as a flicker or momentary color change during that test. The cable replacement is a short job once the back panel is off, usually 20-30 minutes total.
If neither the cable reseat nor driver fix resolves it, we use a spare tested LCD panel to swap-test. This definitively confirms panel failure before ordering a replacement, so the customer never pays for parts that do not solve the problem.
GPU failure requires a multimeter check of power delivery and a temperature log during load. True GPU failure on a laptop usually means a motherboard-level repair or replacement, which we assess against the laptop’s age and market value before recommending it.
Typical repair costs:
- Display cable reseat: $30-$60 labor
- Display cable replacement: $10-$30 parts + $40-$80 labor
- LCD panel replacement: $60-$180 parts + $50-$100 labor
- GPU driver fix (in shop): $30-$60 labor
- Motherboard/GPU repair: $200-$500+ depending on model
When Hardware Replacement Is Necessary
Display cable replacement: Required when the lid-tilt test confirms the tint changes with lid movement, and reseating the cable does not hold a stable connection. Cables cost $10-$30 from iFixit or eBay. Match your laptop’s model number exactly to get the correct cable type and length.
LCD panel replacement: Required when the BIOS shows the green tint, the external monitor is normal, and the cable has been confirmed as seated correctly. LCD panels cost $60-$180 depending on resolution and model. Refurbished panels with a warranty are a reliable middle ground between new OEM and no-name generic parts.
GPU hardware repair: Required when the external monitor also shows green artifacts in BIOS. This is a motherboard-level fault on most laptops since GPUs are soldered rather than removable. Options are professional GPU reballing (risky and expensive), motherboard replacement, or using an external monitor as a permanent workaround while the laptop is still functional for other tasks.
RAM replacement: If the green screen is accompanied by random crashes, BSODs, or system instability, bad RAM can sometimes produce display artifacts. Run the Windows Memory Diagnostic (search mdsched.exe) to check for RAM errors before assuming GPU failure.
Stop Troubleshooting and Seek Professional Repair If
You notice a burning smell or see smoke anywhere near the laptop vents or hinge area. This indicates electrical damage and continuing to use the laptop risks fire.
The laptop battery is visibly swollen or the back panel is bulging outward. A swollen battery puts pressure on display cables and internal components and can rupture.
The green screen is accompanied by the laptop shutting down suddenly without warning, especially under any display-related load. This pattern suggests GPU-level overheating or a failing power circuit.
You opened the laptop and found liquid corrosion, burn marks, or visible physical damage on the motherboard or display cable connector. These require professional cleaning and component inspection before any further use.
Any time your attempted cable reseat created sparks or caused components to stop working entirely, power off immediately and do not attempt further repairs at home.
Prevention Tips

Update GPU drivers before issues start.
Check your laptop manufacturer’s support page every two or three months for display and GPU driver updates. Manufacturer-optimized drivers are more stable than the generic versions Windows Update installs.
Disable Windows automatic driver updates for the GPU.
Go to Device Manager, right-click your GPU, select Properties, then the Driver tab. Use the Driver settings in Windows Update to prevent automatic driver replacement. This stops Windows from pushing incompatible driver versions after feature updates.
Handle the display lid with care.
Opening and closing the lid roughly accelerates cable wear. Lift from the center of the lid rather than the corner to distribute flex evenly across the hinge mechanism.
Keep the laptop cool.
GPU components under sustained heat stress degrade faster. Clean the intake and exhaust vents with compressed air every six months. Never use the laptop on soft surfaces like beds or pillows that block the vents.
Use a surge protector.
Power spikes can damage GPU circuitry instantly. A basic surge-protected power strip costs $15-$25 and protects against this.
Do not place objects on the closed lid.
Pressure on the lid transfers directly to the LCD panel and can damage internal color layers even without visible cracking.
Create a restore point before installing driver updates.
Go to Control Panel, System, Create a Restore Point. Create one immediately before updating GPU drivers. If the new driver causes a green tint, you can roll back within minutes.
Monitor GPU temperature.
Use HWiNFO64 during gaming or video work. If GPU temperatures consistently exceed 90 degrees Celsius, address the cooling before the heat damages display output components.
Frequently Asked Questions

Why does my laptop screen turn green only when I watch videos?
This is almost always a hardware acceleration conflict between your browser and the GPU driver. Chrome, Firefox, and Edge all use the GPU to decode video by default. When the driver has a conflict with that specific process, you get a green overlay on video while the rest of the desktop looks normal. Disabling hardware acceleration in your browser’s settings fixes this in most cases. Then update your GPU driver from the manufacturer’s website and you can often re-enable hardware acceleration without the problem returning.
My laptop screen is green in BIOS. Does that mean it is completely broken?
A green screen in BIOS confirms the problem is hardware-level rather than a Windows driver issue. However, hardware-level does not always mean expensive repair. A loose display cable is a hardware issue that costs nothing to fix if you reseat it yourself. The green screen in BIOS simply tells you that a driver fix will not work, so you skip straight to the physical inspection of the cable and LCD panel.
I replaced my laptop’s LCD screen and now it has a green tint. What went wrong?
The most likely cause is that the display cable was not seated properly after the screen replacement. This is the most common post-repair error. Carefully reopen the display assembly, disconnect the eDP or LVDS cable from the back of the new panel, and firmly reseat it until it sits flush in the connector. If reseating does not help, the cable itself may have been damaged during the replacement procedure.
Can overheating cause a green screen on a laptop?
Yes, sustained heat can damage GPU hardware and produce color artifacts including green tints. Overheating typically shows additional symptoms alongside the color issue, such as the laptop running very hot to the touch, fans running constantly at full speed, and the green artifacts appearing only under graphics load rather than at idle. Install HWiNFO64 and check GPU temperatures. If they are above 90 degrees Celsius during normal use, address the thermal issue first before replacing any display hardware.
My laptop screen is green but external monitor is fine. What do I need to replace?
When the external monitor is fine, the GPU and drivers are working correctly. The fault is in your laptop’s internal display assembly. Start by reseating the eDP or LVDS cable that connects your motherboard to the LCD panel. If the cable tests fine (no change when you slowly tilt the lid), the LCD panel itself has failed and needs replacement. Panel replacement costs $60-$180 depending on your model.
Will a factory reset fix a laptop green screen?
A factory reset will fix the green screen only if the cause is a corrupted Windows driver or software conflict. If the BIOS shows the green tint, or if the external monitor also displays green, the problem is hardware-related and a factory reset will not help. Before doing a factory reset, try a clean GPU driver install using DDU first, since it fixes driver corruption without wiping your files.
How do I fix a green tint on a laptop screen after a Windows Update?
Go to Device Manager, expand Display Adapters, right-click your GPU, click Properties, then the Driver tab, and click Roll Back Driver. This reverts to the previous stable driver. If Roll Back Driver is greyed out, download the previous driver version directly from your GPU manufacturer’s website and install it over the current one. After resolving the issue, pause Windows Updates for seven days to prevent the same driver from installing again.
Conclusion
A green laptop screen is almost always caused by one of three things: a corrupted GPU driver, a loose internal display cable, or a failing LCD panel. The external monitor test and the BIOS screen test together tell you which category your problem falls into within about two minutes. Software causes resolve with a clean GPU driver install using DDU. Cable issues resolve with a careful reseat inside the laptop. Panel failure requires a replacement part, but with the right screen match and a careful approach to the cable connector, most users can handle it at home. Only when the external monitor also shows green artifacts does the problem point to GPU hardware failure requiring professional diagnosis.