
Quick Answer
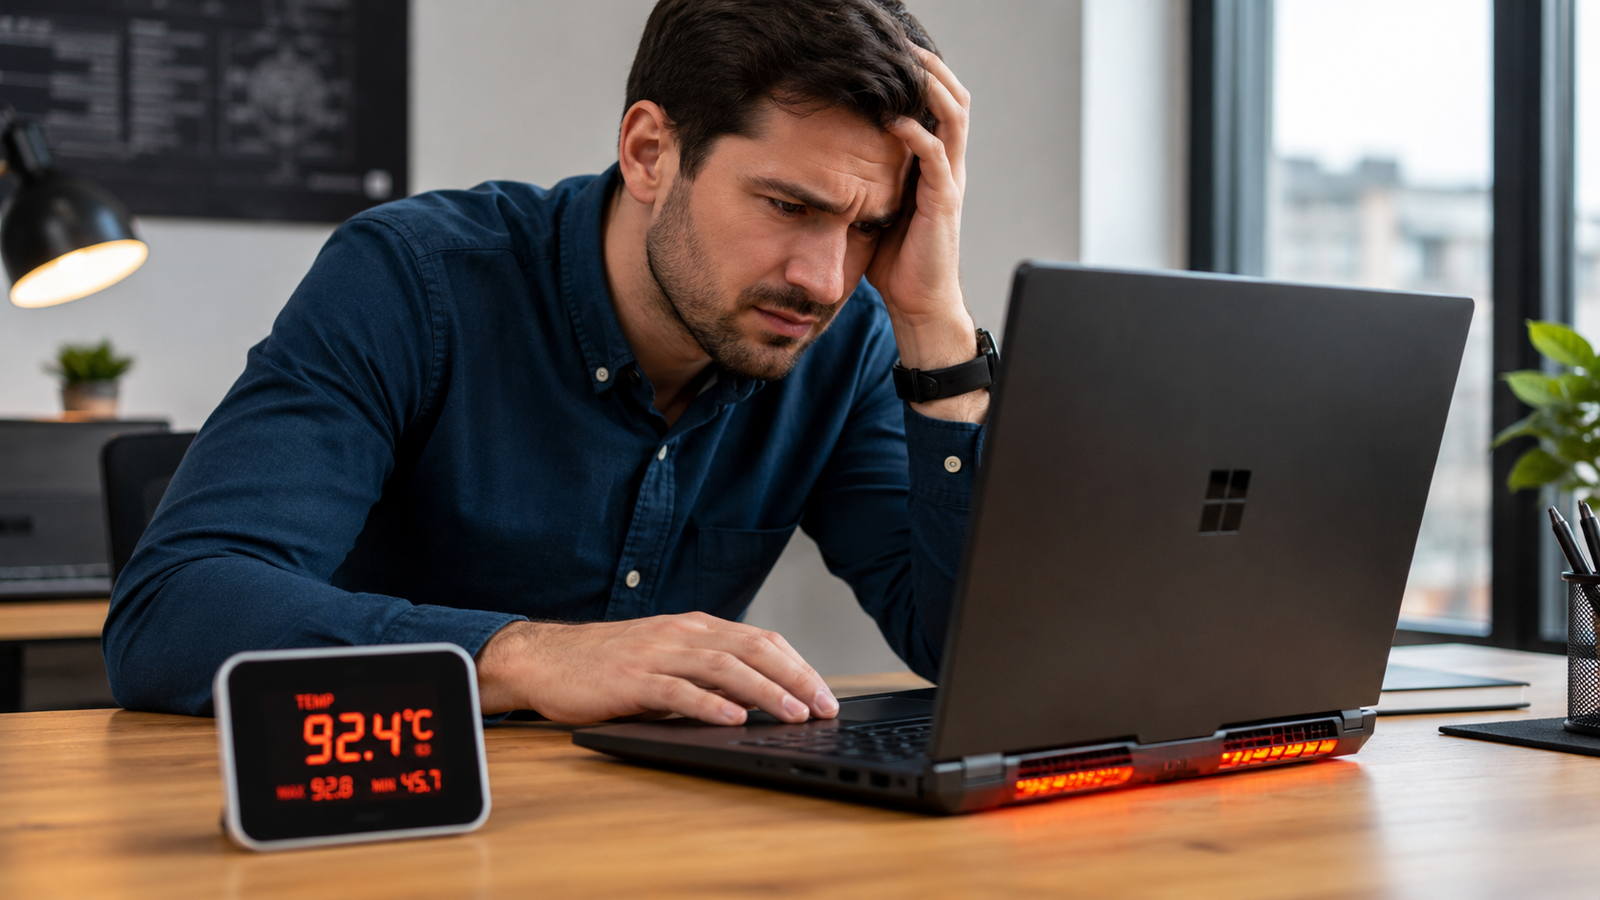
A laptop fan that never stops usually means one of two things: a background process is keeping the CPU busy, or dust and poor airflow are trapping heat. Open Task Manager, sort by CPU usage, and kill any process above 10% at idle. Then clean the vents with compressed air. Most cases resolve in under 10 minutes.
Introduction
The fan kicks on hard the moment you open the lid. You are not gaming, not rendering video, not doing anything demanding. The laptop is just sitting there, and the fan sounds like a small aircraft.
This is one of the most common complaints we see at the repair bench. The good news: in most cases the fix takes less than 15 minutes and costs nothing. The bad news: most guides send you in the wrong direction first.
This guide covers every confirmed cause, from Windows background processes that silently pin your CPU to degraded thermal paste that forces the fan to compensate for a heat transfer problem that has nothing to do with what you are running. Work through the diagnosis section first. That single step eliminates 80% of the guesswork.
Symptoms of the Problem

- Fan runs at high speed during light tasks like web browsing or document editing
- Fan never fully stops, even when the laptop has been idle for several minutes
- Fan noise gets louder immediately after booting or waking from sleep
- Bottom of the laptop is noticeably warm or hot at idle
- Fan surges randomly without any visible change in what you are doing
- System feels sluggish despite low visible activity
- Fan noise started suddenly after a Windows update or driver install
- Laptop shuts down unexpectedly from overheating (more serious)
Start Here: Fast Diagnosis
Use this decision tree before touching any settings or hardware.
Step 1: Open Task Manager (Ctrl + Shift + Esc) and check CPU usage
CPU usage above 20% at idle with no programs open? Go to Fix 1 (Background Process) first.
CPU usage below 10% but fan is still loud? Go to Step 2.
Step 2: Check actual temperatures
Download HWMonitor or Core Temp. Look at CPU temperature at idle.
CPU temperature above 60°C at idle with nothing running? Cooling system is struggling. Go to Fix 4 (Vent Cleaning) or Fix 7 (Thermal Paste).
CPU temperature below 50°C but fan is still loud? The fan control firmware or sensor may be misreporting. Go to Fix 5 (Power Plan) or Fix 6 (BIOS/Drivers).
Step 3: Did it start after a specific event?
After a Windows Update? Roll back the relevant driver. See Fix 6.
After adding new RAM or SSD? Temporary thermal recalibration is normal for 24 to 48 hours. If it continues, the hardware may be improperly seated.
After sitting on a soft surface? The vents are blocked. Move to a hard surface immediately.
Tools Needed
Built-in tools:
- Task Manager (Ctrl + Shift + Esc)
- Windows Security (virus scan)
- Device Manager
- Power Options (Control Panel)
- Windows Update
Free software tools:
- HWMonitor or Core Temp (temperature monitoring)
- HWiNFO64 (fan RPM and sensor data)
- Process Explorer (advanced background process inspection)
- Malwarebytes Free (malware scan)
Hardware tools (for physical cleaning only):
- Compressed air canister
- Soft anti-static brush
- Microfiber cloth
- Phillips screwdriver (if opening the bottom panel)
- Isopropyl alcohol 90%+ and thermal paste (if repasting)
Troubleshooting Matrix
| Symptom | Likely Cause | Fast Fix |
| Fan loud, CPU above 20% at idle | Background process or malware | Task Manager + virus scan |
| Fan loud, CPU low, temp high (60°C+) | Blocked vents or dirty heatsink | Compressed air clean |
| Fan loud, CPU low, temp normal | Power plan or BIOS fan curve | Power plan change |
| Fan loud after Windows Update | Bad driver or update | Roll back driver |
| Fan grinding or rattling noise | Bearing failure | Fan replacement |
| Fan loud only when plugged in | HP/Dell battery firmware or power mode | Manufacturer app settings |
| Fan loud after RAM/SSD upgrade | Temporary recalibration or loose seating | Wait 48hrs or reseat hardware |
| Fan loud on old laptop (3+ years) | Dried thermal paste | Repaste CPU and GPU |
What Causes a Laptop Fan to Run Constantly

Runaway Background Processes
Why it happens: Windows runs dozens of background services at all times. Windows Update, Windows Search indexing, Defender antimalware scan, and telemetry processes can spike CPU usage for extended periods, especially right after a fresh install or major update. From the outside the laptop looks idle. In reality the processor is working hard.
How to identify it: Open Task Manager, click the CPU column to sort by highest usage. Any process above 10% at idle is worth investigating.
What users misunderstand: Many people check Task Manager once and see low numbers, then close it. The problem is these processes run in bursts. Leave Task Manager open for two full minutes and watch for spikes.
Confirmation sign: Fan calms down when you click “End Task” on the offending process.
Blocked Vents and Dust Accumulation
Why it happens: Laptop cooling systems pull cool air in through bottom intake vents and push hot air out through side or rear exhaust vents. Dust builds up on the heatsink fins over time, reducing the surface area available for heat transfer. The fan has to spin faster and longer to move the same amount of heat.
How to identify it: Shine a flashlight into the exhaust vent. If you can see a gray layer of dust on the heatsink fins, the cooling system is partially blocked. Another test: hold your hand near the exhaust vent. Weak airflow from a loud fan confirms blockage.
What users misunderstand: Blowing compressed air into the intake vents often just pushes dust deeper into the heatsink. Aim at the exhaust vent from outside to blow dust out the way it came in.
Confirmation sign: After cleaning, exhaust airflow noticeably increases and temperatures drop within five minutes of normal use.
Degraded Thermal Paste
Why it happens: Thermal paste fills microscopic gaps between the CPU or GPU chip and the heatsink. Over time, usually after two to four years of regular use, the paste dries out and shrinks. When the contact degrades, heat transfer drops and the CPU runs hotter than it should even at low load, which keeps the fan spinning.
How to identify it: Idle CPU temperatures above 60°C on a clean laptop with no background load point strongly to dried paste. A three-year-old or older laptop that has never been repasted is a prime candidate.
What users misunderstand: Cleaning the vents fixes dust. It does not fix dried paste. Both problems can exist at the same time.
Confirmation sign: CPU temperatures drop 10 to 20°C after a fresh paste application with the fan running at a noticeably lower speed.
Aggressive Power Plan Settings
Why it happens: Windows power plans include a setting called Maximum Processor State. When set to 100%, the processor runs at full speed even under light loads. Combined with an Active system cooling policy (which spins the fan before slowing the CPU), this keeps the fan engaged constantly.
How to identify it: Go to Control Panel, Power Options, Change Plan Settings, Change Advanced Power Settings, then expand Processor Power Management. If Maximum Processor State shows 100% on battery or plugged in, this is likely a contributor.
What users misunderstand: Changing to Balanced power plan alone does not always fix this. The Maximum Processor State setting inside the advanced options is separate and often overlooked.
Confirmation sign: Fan noise reduces within 30 seconds of switching the power plan to Balanced or changing Maximum Processor State to 99%.
Outdated or Buggy Drivers and BIOS
Why it happens: Firmware and driver updates often include thermal management improvements. An outdated BIOS may have an overly aggressive fan curve that spins the fan at full speed well before temperatures justify it. GPU drivers can also cause the graphics card to run at unnecessarily high power states even when idle.
How to identify it: Fan running loud immediately after a Windows Update, or on a laptop that has never had a BIOS update, are clear signals. Check your BIOS version in System Information and compare to the latest version on the manufacturer’s support page.
What users misunderstand: Generic drivers from Windows Update are not the same as vendor-specific drivers. Manufacturer drivers include power and thermal management that generic drivers skip entirely.
Confirmation sign: Fan behavior changes noticeably within minutes of installing a BIOS update or rolling back a problematic driver.
Malware and Crypto-Miners
Why it happens: Malware, and especially cryptocurrency mining software, hijacks the CPU to run calculations in the background. The CPU stays at 80 to 100% load continuously, which drives temperatures up and keeps the fan at maximum speed. This is also one of the few causes where the system feels hot even though the user is not doing anything at all.
How to identify it: Open Task Manager. If a process you do not recognize is consuming 30% or more CPU and you cannot identify it, run a full malware scan immediately. Common offenders are processes with random character names or ones disguised with similar spellings to legitimate Windows processes.
What users misunderstand: Windows Defender alone sometimes misses advanced threats. Run Malwarebytes Free alongside Defender for a second opinion.
Confirmation sign: CPU usage and fan speed drop to normal levels immediately after the malware is removed.
Blocked Airflow from Surface Placement
Why it happens: Most laptops draw cool air through vents on the bottom panel. Using the laptop on a bed, couch, pillow, or carpet covers these vents completely. Temperatures rise fast and the fan maxes out trying to compensate.
How to identify it: Check whether fan noise is worse on soft surfaces. Move the laptop to a hard desk and wait two minutes. If the fan quiets down, surface placement was the cause.
What users misunderstand: Thin rubber feet do not provide enough clearance on soft surfaces. The entire bottom vent grid needs clear space.
Confirmation sign: Immediate reduction in fan speed after placing the laptop on a hard, flat surface.
Faulty Fan Speed Sensor
Why it happens: The fan controller reads RPM data from a sensor. If the sensor malfunctions or the fan bearing is starting to fail, the system may misread the fan speed as lower than it actually is and compensate by ramping up even further. In some cases the fan runs at full speed regardless of temperature because the controller receives bad data.
How to identify it: Use HWiNFO64 to monitor fan RPM. If the fan sounds loud but RPM readings are erratic, inconsistent, or zero while the fan is clearly spinning, the sensor or fan itself is failing.
What users misunderstand: A fan that makes grinding or rattling sounds alongside high RPM readings is approaching mechanical failure. This is not a software problem and no fix will resolve it.
Confirmation sign: Fan speed readings behave erratically in monitoring software, or the fan makes mechanical noise in addition to running loudly.
What We See Most Often
On the repair bench, the split is roughly 60% software or process-related and 40% hardware or thermal-related.
The most common scenario: someone brings in a laptop that sounds like a jet engine. Task Manager shows near-zero CPU. Temperatures are fine. The fix ends up being a BIOS update or switching the power plan from Best Performance to Balanced. Five minutes of work.
The second most common scenario: a laptop that is two or three years old and has never been cleaned. The heatsink fins are completely clogged. CPU temperatures are 70 to 80°C at idle. Compressed air alone drops temperatures by 20°C and the fan immediately settles.
The trickiest cases involve laptops where a user cleaned the vents, updated drivers, and even reinstalled Windows without fixing the fan. In almost every one of those cases, the thermal paste was the root cause and nobody thought to check it.
The rarest scenario is a physically failing fan bearing. The noise in those cases is distinctive: a grinding or chirping sound that gets worse over time rather than staying constant.
How to Diagnose the Problem

Step 1: Check background CPU load Open Task Manager. Sort by CPU. Leave it open for two full minutes. Expected Result: You should see all processes below 5% at idle. If Failed: A high-usage process is the root cause. Move to Fix 1.
Step 2: Check idle temperature Install HWMonitor or Core Temp. Let the laptop sit idle for three minutes. Record the CPU temperature. Expected Result: CPU package temperature below 50°C at idle. If Failed: Temperatures above 60°C at idle indicate a cooling problem. Move to Fix 4.
Step 3: Check fan RPM Use HWiNFO64 to view fan speed in RPM while idle. Expected Result: Fan RPM should be low (under 2000 RPM) when idle and cool. If Failed: Fan running above 3000 RPM with low temperature suggests a firmware or sensor issue. Move to Fix 5.
Step 4: Run a malware scan Open Windows Security. Run a Full Scan. Expected Result: No threats detected. If Failed: Quarantine or remove threats and recheck CPU usage.
Step 5: Check surface placement and vent blockage Move the laptop to a hard flat desk. Look into the exhaust vent with a flashlight. Expected Result: Clear fins with good exhaust airflow. If Failed: Clean vents with compressed air. Move to Fix 4.
Which Fix Usually Works?
| Fix | Typical Success | Cost | Difficulty |
| Kill background process | Very Common | Free | Easy |
| Switch power plan | Common | Free | Easy |
| Clean vents with compressed air | Very Common | Under $10 | Easy |
| Update or roll back drivers | Common | Free | Easy |
| BIOS update | Occasional | Free | Moderate |
| Run malware scan | Occasional | Free | Easy |
| Reapply thermal paste | Common (older laptops) | $5-$15 | Hard |
| Replace fan | Rare | $15-$40 | Hard |
Step-by-Step Fixes

Fix 1: Kill Runaway Background Processes
Cost: Free Time: 5 minutes Difficulty: Easy
- Press Ctrl + Shift + Esc to open Task Manager.
- Click the CPU column header to sort by highest usage.
- Identify any process using more than 10% CPU at idle.
- Common offenders: Windows Update (wuauclt.exe, TiWorker.exe), Windows Search (SearchIndexer.exe), Antivirus scans, or browser extensions.
- For Windows Update tasks, right-click and choose End Task. Windows will reschedule the update at next boot.
- For SearchIndexer.exe, right-click on the Windows Start button, search for “Indexing Options”, click Modify, and reduce the indexed locations.
Expected Result: CPU drops below 5% and fan speed decreases within 60 seconds. If Failed: The process may restart automatically. Move to BIOS/driver investigation or check for malware.
Technician Tip: WmiPrvSE.exe running high is usually a secondary symptom. Find what is querying WMI by downloading WMIDiag or using Process Explorer to trace the parent process.
Fix 2: Switch Power Plan to Balanced
Cost: Free Time: 3 minutes Difficulty: Easy
- Press Windows + R, type powercfg.cpl, and press Enter.
- Select Balanced as the active power plan.
- Click Change Plan Settings next to Balanced, then click Change Advanced Power Settings.
- Expand Processor Power Management.
- Change Maximum Processor State to 99% for both On Battery and Plugged In.
- Change System Cooling Policy to Passive (this lets the CPU slow down before ramping the fan).
- Click OK and Apply.
Expected Result: Fan quiets noticeably within 30 to 60 seconds. If Failed: The power plan is not the primary cause. Proceed to temperature and cleaning checks.
Technician Tip: On laptops set to Best Performance by default, this single step is sometimes enough to cut fan noise in half. The 99% trick works because it disables Intel Turbo Boost from running at idle, which removes a significant heat source.
Fix 3: Run a Full Malware Scan
Cost: Free Time: 20 to 60 minutes Difficulty: Easy
- Press Windows key, type Windows Security, and open it.
- Click Virus & Threat Protection.
- Click Scan Options and select Full Scan.
- Also download and run Malwarebytes Free as a second-layer scan.
- After scans complete, quarantine or remove all detected threats.
- Reboot and check CPU usage again in Task Manager.
Expected Result: CPU drops to normal idle levels and fan returns to normal speed. If Failed: The problem is hardware or firmware related. Continue to Fix 4.
Expert Warning: Do not rely on Task Manager process names alone to confirm malware. Sophisticated miners rename themselves to look like legitimate Windows processes. A full antivirus scan is required to detect these.
Fix 4: Clean Vents and Heatsink
Cost: Under $10 (compressed air) Time: 10 to 20 minutes Difficulty: Easy to Moderate
- Shut down the laptop completely. Do not just sleep it.
- Unplug the power adapter.
- Point a compressed air canister at the exhaust vents (usually on the side or rear, not the bottom).
- Fire short bursts of air to blow dust outward through the exhaust path.
- Hold the fan still through the vent if possible to prevent overspin during cleaning.
- Check the intake vents on the bottom and clear any visible debris.
- Power on and recheck temperatures.
Expected Result: Exhaust airflow increases and CPU idle temperature drops by 5 to 20°C. If Failed: Dust may be compacted deep in the heatsink. The bottom panel needs to come off for a more thorough clean.
Technician Tip: Never use a vacuum cleaner near laptop vents. Static discharge from vacuum motors can damage the motherboard. Compressed air only.
Expert Warning: Do not hold the compressed air canister upside down. Liquid propellant can discharge into the laptop and cause corrosion.
Fix 5: Update or Roll Back Drivers
Cost: Free Time: 15 to 30 minutes Difficulty: Easy
- Press Windows + X and click Device Manager.
- Expand Display Adapters. Right-click the GPU and select Update Driver.
- Choose Search Automatically for Drivers.
- Also visit your laptop manufacturer’s support site and download the latest chipset, thermal, and GPU drivers specifically for your model.
- If the fan problem started after a specific update, right-click the device in Device Manager, click Properties, click Driver tab, and click Roll Back Driver.
- Run Windows Update via Settings, Windows Update. Install all available updates including optional updates.
Expected Result: GPU drops to a lower power state at idle, reducing heat output and fan speed. If Failed: Drivers are not the root cause. Check BIOS version next.
Technician Tip: Always download drivers from the manufacturer’s official support page for your exact model. Generic drivers from Windows Update often skip critical power management firmware that is specific to your hardware.
Fix 6: Update BIOS Firmware
Cost: Free Time: 20 to 30 minutes Difficulty: Moderate
- Press Windows + R, type msinfo32, and press Enter. Note the BIOS Version/Date shown.
- Visit your laptop manufacturer’s official support page.
- Enter your model number and navigate to Drivers and Downloads or BIOS/Firmware.
- Download the latest BIOS update if it is newer than your installed version.
- Follow the manufacturer’s instructions exactly. Do not interrupt the update and keep the laptop plugged in.
- After the update, reset BIOS settings to optimized defaults if prompted.
Expected Result: Fan curve may improve. Some BIOS updates specifically address thermal management regression from previous firmware. If Failed: A physical cooling issue is present. Move to Fix 7.
Expert Warning: Never flash BIOS on battery power. A power failure during a BIOS flash can brick the laptop.
Fix 7: Reapply Thermal Paste
Cost: $5 to $15 (thermal paste) Time: 30 to 60 minutes Difficulty: Hard
- Power off and unplug the laptop.
- Remove the bottom panel (consult the service manual for your specific model).
- Disconnect the fan cable and remove the heatsink screws in the sequence shown in the service manual.
- Lift the heatsink off the CPU and GPU.
- Clean the old paste off both the chip surface and heatsink contact plate using isopropyl alcohol 90%+ and a lint-free cloth.
- Apply a small amount of new thermal paste to the CPU and GPU dies. A pea-sized dot in the center of each chip is the right amount.
- Reassemble in reverse order, tighten heatsink screws in a star pattern to ensure even pressure.
- Boot and monitor temperatures.
Expected Result: CPU idle temperature drops by 10 to 25°C. Fan speed decreases significantly. If Failed: The heatsink itself may have a flatness or contact problem, or the fan is physically failing. Seek professional service.
Technician Tip: Use a mid-range thermal compound like Thermal Grizzly Kryonaut or Cooler Master MasterGel. Avoid cheap budget paste and avoid liquid metal compounds unless you are experienced, as liquid metal is electrically conductive and can cause shorts if it spreads.
Fix 8: Use Manufacturer Fan Control Software
Cost: Free Time: 5 minutes Difficulty: Easy
Every major brand offers a control utility with fan profiles built in.
- Dell: Dell Power Manager or Dell Command Center. Choose Quiet or Cool under Thermal Management.
- HP: HP Command Center (HP Omen laptops) or HP CoolSense technology on consumer models. Select Comfort or Quiet profile.
- Lenovo: Lenovo Vantage. Navigate to My Device Settings, Power, and choose Quiet or Balanced mode.
- ASUS: MyASUS or Armoury Crate. Select a Silent or Performance mode appropriate for your usage.
- Acer: Acer Care Center. Check Thermal settings.
Expected Result: Fan operates at lower RPM during light tasks immediately after profile change. If Failed: The problem is physical and software profiles cannot override a genuine heat issue.
Technician Tip: These tools also surface BIOS updates and driver updates specific to your model. Run a check inside the utility before going to the manufacturer website manually.
Mistakes That Make the Problem Worse
Using a vacuum cleaner to clean vents Static electricity from the motor can destroy motherboard components. Compressed air is the only safe method for cleaning laptop vents.
Blowing air into intake vents instead of exhaust This pushes dust deeper into the heatsink and makes the blockage worse. Always aim at the exhaust vent to blow dust outward.
Setting Maximum Processor State to below 80% Dropping this setting too low causes visible performance problems like laggy video and slow browser loading. Stay at 99% for the balance between performance and thermals.
Ending core Windows processes to reduce CPU load Killing processes like lsass.exe or csrss.exe will crash Windows immediately. Only end tasks that are clearly user-level or background services.
Assuming a clean Task Manager means no CPU issue Task Manager’s default two-second refresh can miss brief spikes. Switch the update speed to High under View, Update Speed, or use Process Explorer for more precise data.
Flashing BIOS without reading the release notes Some BIOS updates intentionally make fan curves more aggressive to protect against thermal throttling complaints. Read the changelog before updating.
Ignoring the fan noise for months Running a laptop in an overheated state for extended periods accelerates RAM degradation, reduces SSD lifespan, and can cause solder joint failure on the motherboard from repeated thermal cycling.
Applying too much thermal paste Excess paste squeezes out around the chip die and can contact capacitors or nearby components. A rice-grain-to-pea-sized amount in the center is sufficient.
Brand-Specific Considerations
Dell
Dell laptops default to Optimized or Cool mode in Dell Power Manager. Switching to Quiet mode in Dell Power Manager is the fastest fan reduction step on most XPS, Inspiron, and Latitude models. Dell also runs background processes through SupportAssist that can spike CPU usage unexpectedly. Open SupportAssist and check whether a background scan is scheduled or running. BIOS updates on Dell frequently include thermal curve changes and are worth applying through SupportAssist or the Dell support site.
HP
HP Consumer laptops use HP CoolSense, which adjusts fan speed based on movement sensors and workload. If CoolSense is disabled or not installed, the laptop may default to a more aggressive fan curve. HP Spectre and Envy models frequently have reports of fans running high when plugged in due to HP’s charge optimization firmware. Open HP Command Center and confirm the Power Profile is not set to Performance. HP EliteBook and ProBook models can have BIOS-level fan customization through the HP Client Management Software suite.
Lenovo
ThinkPad models include extensive fan management in Lenovo Vantage under Intelligent Cooling. The Power mode slider affects fan behavior directly. IdeaPad models do not have the same granular control but Lenovo Vantage still surfaces relevant BIOS and driver updates. Lenovo Legion gaming laptops have a known habit of running fans at high speed in Hybrid Mode due to the discrete GPU staying partially active. Switching to Integrated GPU only in Lenovo Vantage dramatically reduces fan noise during light use.
ASUS
ASUS ROG and TUF gaming laptops have Armoury Crate for fan control. The default Turbo or Performance mode keeps fans aggressive even during light tasks. Switching to Silent or Manual mode in Armoury Crate is the first step. ASUS also ships MyASUS for mainstream laptops with similar profile options. ASUS ZenBook and VivoBook models tend to run warm due to thin chassis design. These benefit most from thermal paste maintenance at the two-year mark.
Acer
Acer Predator and Nitro gaming laptops can be set to Quiet mode in Acer Care Center or via Fn+F key shortcuts. Acer consumer models like the Aspire range rarely have brand software for fan control and rely entirely on power plan settings. Acer laptops with Intel Core H-series processors are known for running warm at idle in the High Performance power plan.
MSI
MSI laptops use Dragon Center or MSI Center for fan control. The Auto mode in these utilities still runs fans relatively high during light loads. Switching to Silent mode or using the User Define fan curve reduces noise significantly. MSI Center also shows real-time temperatures, which makes it useful for confirming whether a thermal or software issue is causing the fan behavior.
Repair Shop Diagnosis

When a laptop comes in with a fan complaint, the diagnostic process takes about 10 minutes before any hardware is touched.
The first step is always a real-time temperature and CPU load reading using HWMonitor or HWiNFO64. This immediately splits the problem into two buckets: software load or thermal issue.
If the CPU is pegged high at idle, Task Manager and Process Explorer identify the offender within minutes. In a repair shop context, this is almost always a Windows Update task or a bloatware background agent from the manufacturer.
If temperatures are running high with low CPU load, the laptop gets cleaned first. The bottom panel comes off, the heatsink assembly gets a full cleaning with compressed air and a brush, and the thermal paste gets inspected visually. Dry, cracked, or discolored paste means it gets replaced immediately.
Typical repair costs at an independent shop run $40 to $80 for a cleaning and repaste combined. Fan replacement alone typically runs $60 to $120 depending on the model, with some premium ultrabook fans costing more due to parts scarcity. BIOS updates and software fixes are usually done at no charge if the laptop is in for another service.
Professional repair makes sense when the bottom panel is difficult to remove safely, when the heatsink screws are stripped, when grinding or rattling noise indicates bearing failure, or when the laptop is under warranty and cleaning would void it.
When Hardware Replacement Is Necessary
Fan bearing failure: The fan makes grinding, chirping, or rattling sounds that get worse over time. The fan may surge erratically or stop spinning intermittently. No cleaning or software change resolves a mechanically failed fan. Replacement is required.
Heatsink damage: Bent fins, cracked heatsink pipes, or damaged thermal contact plates prevent proper heat transfer. These are usually caused by drops or improper past service attempts. The heatsink assembly must be replaced.
Thermal sensor failure: HWiNFO64 shows wildly inaccurate temperatures (0°C or 200°C readings) despite normal hardware function. The laptop BIOS reads incorrect temperature data and drives the fan to maximum speed regardless of actual conditions. This is typically a motherboard-level repair.
Stop Troubleshooting and Seek Professional Repair If
- The fan makes grinding, clicking, or rattling sounds (bearing is failing)
- Temperatures are above 90°C at idle after cleaning and repasting
- The laptop shuts down without warning during light tasks
- You smell burning plastic or a chemical smell from the vents
- The laptop has had liquid exposure in the past
- The battery appears swollen or the bottom panel is bulging
- The bottom of the laptop is too hot to rest on bare skin during light use
- You opened the bottom panel and found corroded components or burnt marks on the motherboard
Any of these situations requires a qualified repair technician with proper diagnostic tools.
Prevention Tips

Place the laptop exclusively on hard, flat surfaces. Beds, couches, and fabric surfaces block intake vents and cause immediate temperature spikes.
Clean the exhaust vents with compressed air every three to four months. Set a recurring reminder in your calendar. Dusty environments or homes with pets require monthly cleaning.
Keep drivers and BIOS updated. Subscribe to your laptop manufacturer’s support newsletter or check the support page for your specific model quarterly.
Set your power plan to Balanced rather than Best Performance for everyday tasks. Reserve High Performance for actual demanding work.
Reapply thermal paste every two to three years on a heavily used laptop. This single maintenance step has more impact on long-term thermal performance than any software setting.
Monitor idle temperatures periodically using HWMonitor. Getting a baseline reading when the laptop is new lets you catch thermal degradation early.
Avoid leaving the laptop in direct sunlight or in hot cars. Ambient temperature directly affects how hard the cooling system needs to work.
Consider a quality laptop stand that elevates the rear of the chassis by 10 to 15 degrees. Even passive airflow improvement from elevation reduces average CPU temperatures.
Frequently Asked Questions

Is it normal for my laptop fan to run all the time? No. A fan that runs constantly at idle is a symptom, not normal behavior. Fans should spin up under load and slow down or stop during light tasks. Continuous fan operation means the CPU is either being loaded by a background process or the cooling system is struggling to keep up with heat that should not be there.
Why is my laptop fan loud even after I cleaned it? Cleaning fixes dust blockage, not all causes. If the fan is still loud after cleaning, the next most likely causes are degraded thermal paste, a background process keeping CPU usage high, an aggressive power plan, or outdated BIOS firmware. Work through the fixes in order starting with Task Manager and power plan before assuming more hardware work is needed.
Can a Windows Update cause the laptop fan to run constantly? Yes. Windows Update processes run in the background during and after an update install. The download, installation, and cleanup phases can keep CPU usage elevated for 30 to 90 minutes. If the fan quiets down an hour after the update completes, no action is needed. If it stays loud after several hours, a driver installed by the update may be causing the issue. Roll back the most recently installed driver in Device Manager.
Does Best Performance mode cause the fan to run more? Yes, and more than most people expect. Best Performance mode maximizes the processor state to 100% and uses Active cooling policy, which spins the fan aggressively before the CPU slows down. Switching to Balanced and setting Maximum Processor State to 99% reduces fan activity during light use without noticeably affecting real-world performance.
Can a laptop fan run too fast even when the temperature is fine? Yes. A faulty fan speed sensor or corrupted BIOS fan curve can cause the fan to run at maximum regardless of actual temperature. Use HWiNFO64 to check both temperature and fan RPM simultaneously. If temperatures are in a normal range (under 50°C) but fan RPM is above 4000, the cause is firmware or a sensor issue rather than an actual thermal problem.
How long does a laptop fan last before it needs replacing? Most laptop fans last five to eight years under normal use. Heavier use, dusty environments, and high operating temperatures shorten that lifespan. Signs of a fan nearing end of life include increased noise over time, intermittent RPM surges, and eventually grinding or rattling sounds from the bearing.
Is it bad to use a laptop while the fan is running constantly? If the fan is working correctly and keeping temperatures below 80 to 85°C, it is not damaging to use the laptop. The concern is when the fan cannot keep pace and temperatures push above 90°C, causing thermal throttling that reduces performance and accelerates long-term degradation of CPU, RAM, and storage components.
Will a cooling pad fix a laptop fan that runs constantly? A cooling pad can help reduce ambient temperatures by 5 to 15°C, which may reduce how often or how loudly the internal fan runs. It does not fix a blocked heatsink, dried thermal paste, or software-related CPU load. Think of it as a supplement to proper maintenance, not a replacement for it.
Conclusion
A laptop fan that never stops is almost always caused by a background process keeping CPU load elevated, blocked vents forcing the fan to work overtime, or dried thermal paste that reduces heat transfer efficiency. Start with Task Manager and power plan changes before touching any hardware. If temperatures confirm a thermal issue, clean the vents first and repaste if the laptop is more than two years old. Replacement is only necessary when the fan bearing fails mechanically.