
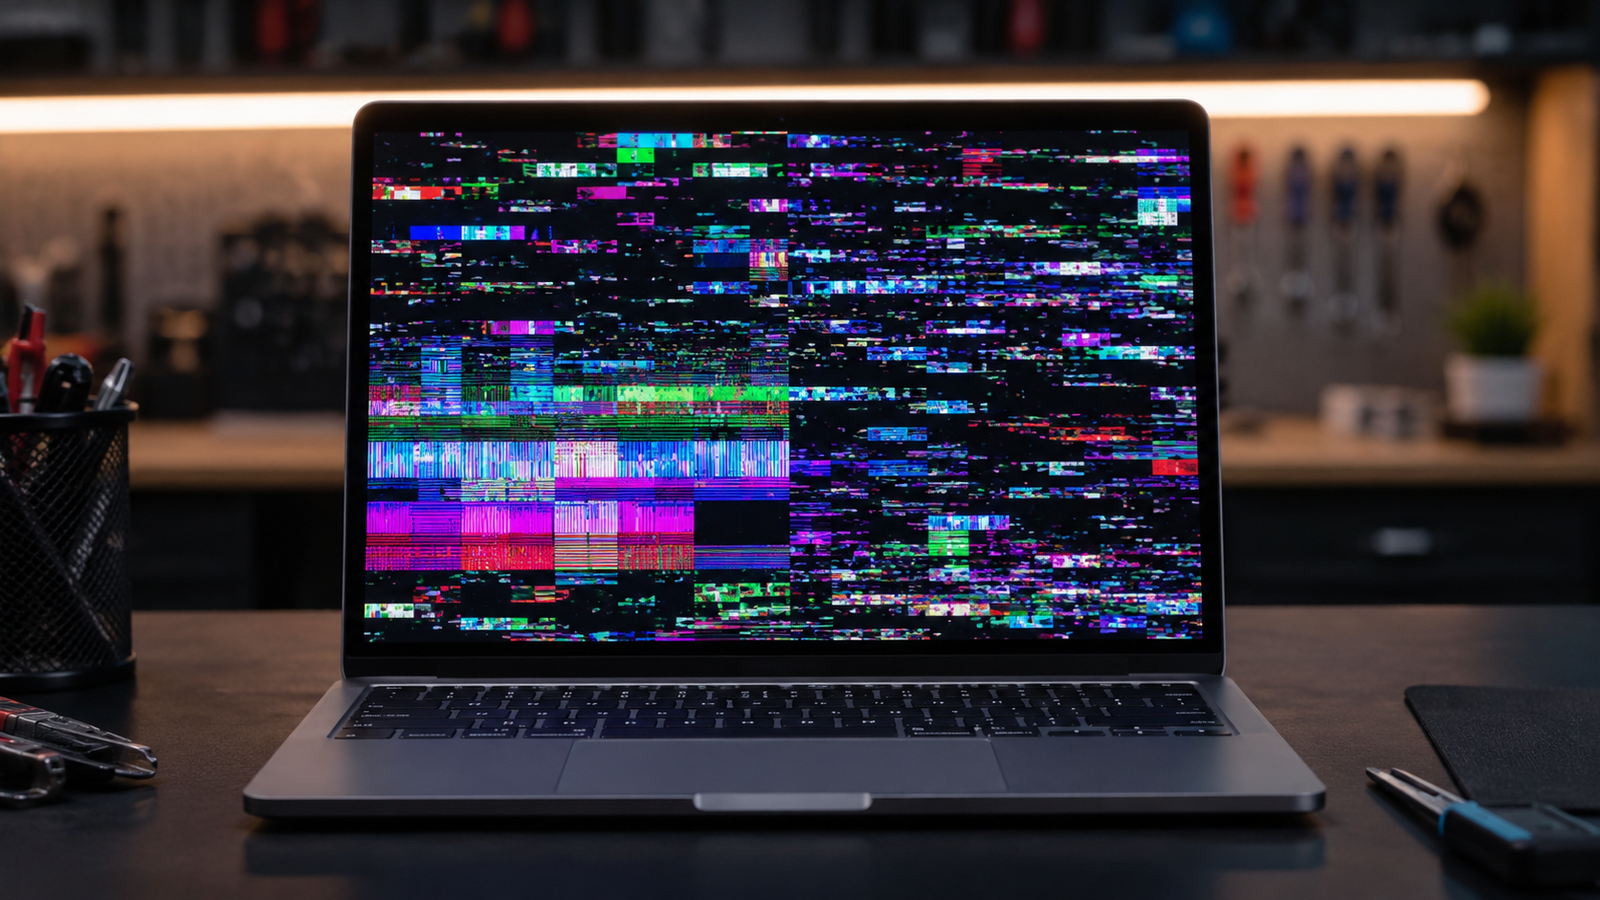
Quick Answer
Display artifacts on a laptop are visual glitches caused by corrupted data from the GPU, a failing display cable, overheating, bad drivers, or failing VRAM. The fastest diagnostic step is to check whether artifacts appear in the BIOS. If they do, the problem is hardware. If they only appear in Windows, start with a clean driver reinstall.
Introduction
Your laptop screen starts showing things it should not: random colored dots, checkerboard patterns, flickering blocks, or lines of static that appear and disappear. The machine runs, the display is on, but something is clearly broken in how the image is being produced or transmitted.
Display artifacts are one of the more frightening laptop problems because they can look like the GPU is dying. Sometimes they do mean the GPU is failing. But a large portion of the time, the fix is a driver reinstall, a cleaned heat sink, or a reseated display cable. Knowing which situation you are in determines whether you spend $0 or $400 on a repair.
This guide walks through every confirmed cause of laptop display artifacts, the fastest way to identify which one is affecting your machine, and the specific fix for each one. By the end, you will know exactly where the fault sits and what to do about it.
Symptoms of Display Artifacts

Artifacts do not all look the same. The pattern itself often points to the cause:
- Checkerboard or blocky pixelation — blocks of scrambled pixels spread across the screen, classic sign of VRAM stress or failure
- Random colored dots (green, pink, red, yellow) — scatter of individual pixels displaying wrong colors; common with overheating or unstable GPU clock
- Horizontal or diagonal lines of noise — usually display cable or LCD panel related when isolated to the internal screen
- Flickering corruption — areas of the image that flash or distort intermittently, often driver-related when it started after an update
- Screen corruption that freezes the image — display locks up showing a garbled frame before requiring a hard restart
- Artifacts only during gaming or GPU-heavy tasks — points toward GPU overheating or VRAM instability under load
- Artifacts at all times including the desktop — broader issue; could be driver, GPU, RAM, or display cable
- Artifacts visible during BIOS boot screen — strongest indicator of hardware fault, as no drivers are loaded at that stage
- Static noise or snow — often display cable or LCD panel issue, especially if it changes when the lid is moved
- Color banding or washed-out sections — incorrect refresh rate, driver conflict, or failing panel backlight controller
Start Here: Fast Diagnosis
Before touching any settings or drivers, run through this decision tree. It will tell you in under five minutes whether you have a hardware or software problem.
Step 1: Check the BIOS screen
Restart the laptop. Press the BIOS key during boot (F2, Del, F10, or Escape depending on brand). Look at the BIOS interface carefully.
- If artifacts appear on the BIOS screen: the problem is 100% hardware. Drivers are not loaded at this stage. The fault is in the GPU, VRAM, display cable, or LCD panel.
- If the BIOS is perfectly clean: the problem is in Windows. Start with drivers before assuming any hardware failure.
Step 2: Connect an external monitor
Plug in a known-good external monitor via HDMI or DisplayPort.
- If artifacts appear on the external monitor too: the GPU or VRAM is producing corrupted data. The display panel and internal cable are not the issue.
- If the external monitor is clean but the laptop screen has artifacts: the fault is in the internal display cable, LCD panel connection, or the panel itself.
- If the external monitor is also affected but only during load: GPU overheating under stress.
Step 3: Check whether artifacts are consistent or random
- Artifacts appear in the same spots every time: likely a dead section of the LCD panel or a physical display cable fault.
- Artifacts are random, move around, or change between sessions: more likely GPU, VRAM, RAM, or thermal issue.
Step 4: Check when artifacts started
- Started after a driver update: driver rollback is the first fix.
- Started after physical impact or drop: display cable damage or GPU solder joint damage.
- Started gradually over months: thermal degradation, aging VRAM, or aging display panel.
- Started after overclocking: revert overclock settings immediately.
Tools Needed
Built-in Windows tools:
- Device Manager (devmgmt.msc)
- Windows Memory Diagnostic (mdsched.exe)
- Task Manager for GPU utilization monitoring
- Event Viewer for crash logs
Free software tools:
- GPU-Z (GPU temperature, VRAM clock, memory type monitoring)
- HWMonitor (real-time thermal monitoring for CPU and GPU)
- FurMark or 3DMark (GPU stress testing)
- Display Driver Uninstaller / DDU (clean driver removal)
- MemTest86 (bootable RAM tester, more thorough than Windows built-in)
- MSI Afterburner (GPU clock monitoring and temperature graphs)
Hardware tools:
- Known-good HDMI or DisplayPort cable
- External monitor or TV for comparison testing
- Compressed air can (for thermal cleaning)
- Screwdrivers (for internal cable inspection if needed)
- Anti-static wrist strap (for internal work)
Troubleshooting Matrix
| Symptom | Likely Cause | Fast First Fix |
| Checkerboard blocks on screen | VRAM failure or overheating | Check GPU temp, run stress test |
| Random colored dots across screen | GPU overheating or driver corruption | Clean drivers with DDU |
| Artifacts only during gaming | GPU throttling or overheating under load | Clean fans, check thermals |
| Clean BIOS but artifacts in Windows | Driver corruption | Clean driver reinstall |
| Artifacts on BIOS screen | Hardware fault (GPU, cable, or panel) | External monitor test |
| Artifacts change when lid is moved | Loose or failing display cable | Reseat or replace cable |
| Artifacts on both screens | GPU or VRAM failure | Professional inspection |
| Artifacts started after driver update | Driver conflict | Roll back or DDU + reinstall |
| Artifacts only on AC power | Power delivery issue or driver conflict | Check power settings |
| Lines of static in fixed position | LCD panel damage | External monitor test |
| RAM artifacts (desktop corruption) | Faulty RAM stick | Remove one stick, test each |
What Causes Display Artifacts on a Laptop

Corrupted or Incompatible Graphics Drivers
Why it happens: The GPU driver is the software layer between Windows and your graphics hardware. A corrupted driver, a bad Windows Update that conflicts with an existing driver, or an OEM driver that clashes with a generic update can all produce display corruption. This is the most fixable cause and it costs nothing.
How to identify it: Artifacts began right after a driver update or Windows Update. The BIOS boot screen is completely clean. Running Windows in Safe Mode (which uses a basic Microsoft display driver) shows a clean screen.
What users misunderstand: Many people update their drivers through Windows Update or Device Manager and think they have the latest correct version. For laptops, the OEM-specific driver from the manufacturer’s website is often different from what Windows installs automatically. Intel’s site, for example, may push a driver version that conflicts with the laptop’s specific panel calibration.
Confirmation sign: Artifacts disappear or change character when you boot into Safe Mode.
GPU Overheating
Why it happens: Laptop GPUs share a thermal system with the CPU and run in a tight chassis with limited airflow. Dust buildup in the fan and heatsink fins restricts airflow, temperatures climb during load, and the GPU starts producing corrupted output before Windows officially reports a thermal shutdown. Modern laptops throttle aggressively, but some artifact before they throttle.
How to identify it: Artifacts appear during or after sustained GPU load (gaming, video rendering, 3D tasks). GPU-Z or HWMonitor shows GPU temperatures above 90C under load. The problem gets worse as the session continues and improves after a cool-down period.
What users misunderstand: A laptop can have serious thermal issues without triggering a shutdown. The GPU starts misbehaving long before Windows detects a critical temperature. Cleaning the fans feels like a long-shot fix, but it resolves this problem in many cases.
Confirmation sign: Artifacts appear during FurMark stress test and GPU temperature climbs above 90-95C during the test.
Failing VRAM (Video RAM)
Why it happens: VRAM is the dedicated memory on the GPU die that stores texture and frame data. On laptops, VRAM is soldered to the GPU package and cannot be replaced independently. When VRAM cells start failing with age, heat damage, or manufacturing defects, the corrupted data they store renders as checkerboard patterns or scrambled textures on screen.
How to identify it: Checkerboard-style pixelation that appears across large areas of the screen. Artifacts show up even during light desktop use, not just under load. The problem often correlates with GPU temperature but can appear even when thermals are fine. VRAM failure tends to worsen over time.
What users misunderstand: VRAM failure does not always show up during a quick FurMark test. It can pass stress tests and still fail intermittently during real-world use. The GPU-Z VRAM error count readout is not available on all GPUs.
Confirmation sign: Checkerboard artifacts also appear on an external monitor, confirming the source is GPU-side, not the display panel.
Loose or Damaged Internal Display Cable
Why it happens: The eDP (embedded DisplayPort) ribbon cable connects the LCD panel to the motherboard. It runs through the hinge area and flexes thousands of times over the laptop’s life. This cable can develop micro-fractures in the copper traces, partially disconnect at either end, or get pinched by hinge stress. When it fails, the signal becomes intermittent or corrupt.
How to identify it: Artifacts change when you open and close the lid, or when you physically flex the display housing. The problem may disappear when the lid is at certain angles. An external monitor shows a clean image while the laptop screen has artifacts.
What users misunderstand: A loose cable often produces horizontal lines or static noise rather than the blocky GPU-style artifacts. The two are easy to confuse. If opening the lid to different angles changes the artifact pattern, it is almost always the cable.
Confirmation sign: Gently pressing around the hinge area while the screen shows artifacts changes or clears them momentarily.
Faulty RAM
Why it happens: System RAM is used as a buffer for display output alongside VRAM in many GPU configurations. A failing RAM stick causes memory corruption that can surface as display artifacts, especially random patterns across the desktop. This is frequently misdiagnosed as a GPU problem.
How to identify it: Artifacts appear across the desktop or browser randomly, not specifically during GPU-heavy tasks. You may also see application crashes, BSODs, or random system hangs alongside the display issues. The Tom’s Hardware forum case referenced in repair communities where random artifacts turned out to be a RAM stick with a warped label and intermittent contact is a textbook example.
What users misunderstand: MemTest86 can miss intermittent RAM faults, especially if the failure requires temperature stress or specific memory addresses to trigger. A stick that passes MemTest can still be the culprit. The most reliable test is removing one stick and running the system for several days.
Confirmation sign: Removing one RAM stick and running on the remaining stick for 48+ hours eliminates the artifacts.
Failing LCD Panel
Why it happens: The LCD panel itself contains millions of pixel transistors and a backlight controller. Individual rows or columns of pixels can fail, the panel’s T-CON board (timing controller) can develop faults, or the LCD layers can delaminate over time. Physical pressure on the screen, temperature extremes, or simply age can produce these failures.
How to identify it: Artifacts are in a fixed position that never moves or changes. Lines or blotches appear in the same location every time. An external monitor is completely clean even when the GPU is under load.
What users misunderstand: A failing panel looks similar to a failing display cable. The external monitor test is the only reliable way to separate them without opening the laptop. If the external monitor is clean and artifacts are fixed in position, the panel is the more likely culprit than the cable.
Confirmation sign: The same areas of corruption appear at the BIOS screen, confirming it is not driver-related.
Overclocking or Unstable Clock Settings
Why it happens: An overclocked GPU or VRAM running at a frequency beyond what it can handle stably produces corrupted output. This is less common on laptops than desktops but happens with gaming laptops that have been tuned via MSI Afterburner or similar tools.
How to identify it: Artifacts correlate with GPU-heavy tasks and disappear when the overclock is removed. The system was previously stable, and the overclock was applied at some point.
Confirmation sign: Resetting GPU clocks to stock in MSI Afterburner and rebooting eliminates the artifacts.
G-Sync or FreeSync Display Sync Conflict
Why it happens: Variable refresh rate technologies occasionally produce flickering or artifacting on certain driver versions or when running outside the monitor’s supported VRR range. This is more common after driver updates or when running at very low frame rates that fall below the display’s minimum VRR threshold.
How to identify it: Artifacts appear specifically during gaming and correlate with frame rate drops. Disabling G-Sync or FreeSync from the NVIDIA or AMD control panel eliminates the issue.
Confirmation sign: Turning off adaptive sync in the display settings removes the problem immediately.
What We See Most Often
At the repair bench, the most common cause of display artifacts on laptops brought in for diagnosis is overheating combined with driver issues. The customer has noticed the fan running louder than usual for months, ignored it, and the GPU is now thermal-throttling to the point of producing corrupted frames before the temperature sensor even triggers a shutdown.
The second most common scenario is a driver conflict after a Windows Update. The customer updated everything automatically, the new Intel or NVIDIA driver clashes with the OEM laptop driver configuration, and now they see flickering artifacts on certain colors or gradients.
VRAM failure is real but less common than its reputation suggests. We see it in gaming laptops that were run at maximum settings with poor cooling for years. The checkerboard pattern is unmistakable.
The case that fools almost everyone: faulty RAM. Three out of five times a customer comes in certain the GPU is dead, the external monitor test shows corruption on both screens, and MemTest has been run, it turns out to be a RAM stick with intermittent contact. Pulling one stick and running on a single module for 48 hours fixes it more often than any driver reinstall.
How to Diagnose the Problem

Step 1: Boot into BIOS and inspect the screen
Turn off the laptop. Power on and press the BIOS key (F2, Del, F10, or Esc). Watch the BIOS screen carefully for 60 seconds.
Expected Result: BIOS screen is completely clean. If Failed: Hardware is confirmed faulty. Proceed to Step 3 (external monitor test). Next Action: If BIOS is clean, proceed to Step 2.
Step 2: Boot into Windows Safe Mode and check for artifacts
Hold Shift and click Restart. Navigate to Troubleshoot, Advanced Options, Startup Settings, and select Safe Mode. Observe the screen for several minutes.
Expected Result: Artifacts disappear in Safe Mode. If Failed: Artifacts persist in Safe Mode, suggesting hardware rather than driver issue. Next Action: If clean in Safe Mode, proceed to the driver fix. If still present, proceed to Step 3.
Step 3: External monitor test
Connect a known-good external monitor via HDMI or DisplayPort. Set Windows to duplicate or extend.
Expected Result: External monitor shows a clean image while laptop screen has artifacts. If Failed: External monitor also shows artifacts, pointing toward GPU/VRAM or RAM. Next Action: If external is clean, focus on cable and panel. If external is affected, run GPU temperature test.
Step 4: GPU temperature under load
Download GPU-Z and HWMonitor. Run FurMark for 10-15 minutes and watch the GPU temperature readout in HWMonitor.
Expected Result: GPU stays below 85C under sustained load. If Failed: GPU exceeds 90-95C. Thermal cleaning is required. Next Action: If thermals are fine, proceed to RAM testing.
Step 5: RAM testing
If you have two RAM sticks, remove one and run the system for 48 hours. If artifacts disappear, test the other stick in isolation to confirm which one is faulty.
Expected Result: Artifacts disappear with one stick removed. If Failed: Artifacts persist regardless of which stick is installed. Next Action: If RAM rules out, GPU or VRAM hardware failure is likely. Professional diagnosis required.
Which Fix Usually Works?
| Fix | Typical Success Likelihood | Cost | Difficulty |
| Clean driver reinstall (DDU) | Very Common | Free | Easy |
| Thermal cleaning (fans and heatsink) | Very Common | Free to $40 | Moderate |
| Driver rollback | Common | Free | Easy |
| RAM swap / removal | Common | Free to $60 | Easy |
| Display cable reseat | Common | Free | Moderate |
| G-Sync/FreeSync disable | Occasional | Free | Easy |
| Overclock removal | Occasional | Free | Easy |
| Display cable replacement | Occasional | $10-40 | Moderate |
| LCD panel replacement | Occasional | $60-180 | Hard |
| GPU reball / motherboard replacement | Rare | $200-600+ | Professional only |
Step-by-Step Fixes
Fix 1: Clean Driver Reinstall Using DDU
Cost: Free Time: 20-30 minutes Difficulty: Easy
- Download Display Driver Uninstaller (DDU) from guru3d.com and save to your desktop.
- Download the latest OEM driver for your GPU from your laptop manufacturer’s support page (not from NVIDIA or AMD directly — use the OEM version when available).
- Boot into Safe Mode: hold Shift, click Restart, go to Troubleshoot, Advanced Options, Startup Settings, and press F4 for Safe Mode.
- Open DDU. Select GPU as the device type and your GPU manufacturer.
- Click “Clean and restart.” DDU will remove all driver files and reboot the system.
- After restart (back in normal Windows), install the driver you downloaded in step 2.
- Restart and monitor for artifacts.
Expected Result: Artifacts disappear entirely after the clean driver install. If Failed: Driver corruption was not the cause. Proceed to thermal cleaning. Technician Tip: Always use DDU in Safe Mode for a truly clean removal. Using the standard “uninstall” in Device Manager leaves registry entries and partial files behind that can cause the new driver to reinstall on top of the corruption. Expert Warning: Download the driver file before entering Safe Mode since Wi-Fi may not work in Safe Mode on some laptops.
Fix 2: Driver Rollback
Cost: Free Time: 10 minutes Difficulty: Easy
- Open Device Manager (right-click Start, select Device Manager).
- Expand Display Adapters.
- Right-click your GPU and select Properties.
- Click the Driver tab.
- Click Roll Back Driver if the button is active.
- Restart and test.
Expected Result: The previous driver version resolves the conflict and artifacts stop. If Failed: The rollback option may be greyed out if no previous driver was recorded, or the old version had the same issue. Use DDU for a clean reinstall instead. Technician Tip: If rollback is not available, check the driver date shown in Device Manager. If it changed recently, DDU removal and manual installation of an older driver version from the OEM site is the alternative.
Fix 3: Thermal Cleaning (Fan and Heatsink)
Cost: Free (or $5-15 for compressed air) Time: 30-60 minutes Difficulty: Moderate
- Power off the laptop completely and remove the power cable.
- If possible, remove the back panel using the appropriate screwdriver.
- Locate the fan vents and heatsink fins.
- Use compressed air in short bursts to clear dust from the fan blades and heatsink fins. Do not let the fan spin freely under sustained air pressure — hold the fan blade still.
- If you have access to the heatsink, inspect the thermal paste on the GPU die. If it has dried out or spread unevenly, clean it with isopropyl alcohol and apply fresh thermal paste.
- Reassemble and power on.
- Monitor GPU temperature under load using HWMonitor.
Expected Result: GPU temperatures drop 10-20C under load and artifacts disappear. If Failed: Dust was not the primary cause or the thermal paste is severely degraded and needs full replacement. Technician Tip: Thermal paste on laptop GPUs typically needs replacing every 3-5 years. If the laptop is older and has never had paste replaced, this is often a bigger factor than dust. Expert Warning: Never vacuum the inside of a laptop. Static discharge from a vacuum can damage components. Compressed air only.
Fix 4: Test and Swap RAM
Cost: Free to $60 for replacement Time: 48 hours of testing Difficulty: Easy
- Check whether your laptop has two accessible RAM slots (some laptops have one stick soldered and one accessible).
- If you have two accessible sticks, remove one and run the laptop on a single stick for 48 hours during normal use.
- If artifacts disappear, the removed stick is faulty.
- Reinstall the removed stick and pull the other one. Run for 48 hours.
- Whichever configuration produces artifacts identifies the faulty module.
Expected Result: Artifacts disappear when a specific faulty stick is removed. If Failed: Both sticks produce clean results individually, meaning the fault is elsewhere. Also check that the sticks are fully and evenly seated in their slots. Technician Tip: Before removing sticks, try reseating them. Push each stick firmly into the slot until the side clips click. Partial contact from a poorly seated stick is more common than actual stick failure and causes identical symptoms.
Fix 5: Reseat or Replace the Internal Display Cable
Cost: Free for reseat / $10-40 for replacement cable Time: 30-60 minutes Difficulty: Moderate
- Power off the laptop and remove the power cable.
- Remove the back panel.
- Locate the display cable connector on the motherboard. It is typically a ribbon cable with a locking connector.
- Gently lift the locking tab, remove the cable, inspect for visible damage (bent conductors, fraying, kinks near the hinge routing area).
- Reinsert the cable and lock the connector.
- If visible damage is present, order a replacement cable specific to your laptop model.
- Replace the cable and test.
Expected Result: Reseating resolves intermittent artifacts. Replacement resolves them permanently if damage was present. If Failed: The cable is not the fault, or the LCD panel itself is damaged. Technician Tip: When inspecting the cable, pay close attention to the section that wraps through the hinge. This area flexes with every lid opening and is where micro-fractures develop first.
Fix 6: Disable G-Sync or FreeSync
Cost: Free Time: 5 minutes Difficulty: Easy
For NVIDIA (G-Sync):
- Open NVIDIA Control Panel (right-click desktop).
- Navigate to “Set up G-SYNC.”
- Deselect “Enable G-SYNC.”
- Click Apply and test.
For AMD (FreeSync):
- Open AMD Radeon Software.
- Go to Display settings.
- Toggle AMD FreeSync off.
- Test.
Expected Result: Flickering artifacts during gaming disappear. If Failed: The sync technology was not the cause. Re-enable it and continue troubleshooting. Technician Tip: If disabling sync fixes the issue, check whether a driver update is available that addresses the specific VRR conflict. The fix is often a newer driver rather than permanently disabling the feature.
Fix 7: Revert or Remove GPU Overclock
Cost: Free Time: 5 minutes Difficulty: Easy
- Open MSI Afterburner or equivalent OC software.
- Click the Reset button to restore default clocks.
- Apply and restart.
- Test for artifacts.
Expected Result: Artifacts caused by instability at overclocked speeds disappear immediately. If Failed: The overclock was not the cause. Technician Tip: If the GPU was never manually overclocked, check whether the laptop manufacturer has a performance mode that applies automatic overclocking (common on ASUS ROG and MSI gaming laptops). Switching from “Turbo” or “Performance” mode to “Balanced” in the laptop’s OEM control panel effectively lowers the GPU frequency.
Fix 8: LCD Panel Replacement
Cost: $60-180 for the panel Time: 45-90 minutes Difficulty: Hard
- Identify the exact LCD panel model number from the back of your current panel (requires partial disassembly and is specific to each laptop model).
- Order a replacement panel that matches the resolution, connector type, refresh rate, and physical dimensions of your original.
- Remove the display bezel carefully using a plastic pry tool.
- Disconnect the video cable and any backlight connections.
- Swap the panel, reconnect the cables, and test before reassembling the bezel.
Expected Result: Artifacts caused by panel failure are completely eliminated. If Failed: The panel was not the source of the artifacts. The issue is upstream in the GPU or cable. Technician Tip: Take a photo of the cable routing and connections before disconnecting anything. The antenna cables for Wi-Fi also route through the display housing and need to be handled carefully. Expert Warning: Verify the issue is the panel before ordering parts. The BIOS test and external monitor test should both point to the panel before spending money on it.
Mistakes That Make the Problem Worse
1. Reinstalling drivers without DDU first
The standard “Update driver” in Device Manager does not remove all driver components. Partial driver corruption survives the update and the artifacts continue. DDU in Safe Mode is the only proper way to do a clean reinstall.
2. Dismissing the RAM as a cause because MemTest86 passed
MemTest86 misses intermittent faults that require specific conditions or thermal stress to trigger. A passing MemTest result does not clear RAM as a suspect. The only reliable test is running single-stick for 48 hours under real-world use.
3. Assuming BIOS-level artifacts automatically mean GPU failure
A loose or damaged display cable also produces artifacts at the BIOS stage because the corruption happens in the signal path, not in the GPU itself. Always run the external monitor test before concluding the GPU needs replacement.
4. Applying fresh thermal paste without cleaning the old paste first
Layering new thermal paste on top of dried old paste creates an insulating sandwich that makes thermals worse. Use isopropyl alcohol (90%+) on a microfiber cloth to fully remove the old paste from both the GPU die and the heatsink contact surface before applying fresh paste.
5. Running the laptop elevated on a surface that blocks the intake vents
Many laptops draw cooling air through the bottom panel. Using the laptop on a bed, pillow, or carpeted surface blocks the intake completely. This alone can push GPU temperatures high enough to trigger artifacting during gaming sessions.
6. Downloading GPU drivers from a third-party site
Third-party driver download sites frequently host outdated or bundled versions of drivers. Always download from NVIDIA.com, AMD.com, Intel.com, or your laptop manufacturer’s support page.
7. Immediately replacing the GPU or motherboard based on display artifacts alone
GPU replacement on a laptop usually means motherboard replacement, which costs $200-600 or more. Multiple causes of artifacts are fixable for free. Never authorize this repair without exhausting software, thermal, RAM, and cable testing first.
8. Continuing to run the laptop under load while artifacts are present
If artifacts suggest thermal failure (appearing under load, GPU temperatures above 90C), continuing to use the laptop for gaming or heavy tasks accelerates the damage. Limit use to light tasks and clean the thermal system as quickly as possible.
Brand-Specific Considerations
Dell
Dell laptops with Alienware or XPS models using dual-GPU setups (NVIDIA + Intel Optimus) sometimes produce artifacts after driver updates because the switchable graphics handoff becomes unstable. Dell SupportAssist is the most reliable source for OEM driver packages on these models. On Alienware machines, Alienware Command Center also controls performance modes that affect GPU frequency; check these settings before assuming hardware failure.
HP
HP OMEN and Victus gaming models have been reported to show display artifacts specifically when transitioning between AC and battery power due to how the power management software interacts with the GPU driver. Updating the HP System Event Utility and the OMEN Gaming Hub alongside the GPU driver often resolves this. For HP display cable issues, the routing through the hinge on OMEN 15 models is particularly prone to wear — moving the lid while the laptop is on and watching whether artifacts change is a quick check.
Lenovo
ThinkPad and IdeaPad models with NVIDIA Optimus or AMD-only graphics need GPU drivers sourced from Lenovo’s support site rather than directly from NVIDIA or AMD. Lenovo modifies drivers for compatibility with their specific panel configurations. Using generic NVIDIA drivers on a ThinkPad frequently produces color artifacts or panel sync issues that disappear when switching to the Lenovo-packaged driver. Lenovo Vantage also handles firmware updates that can affect display stability — keep it updated.
ASUS
ASUS ROG and TUF gaming laptops with AMD graphics are particularly prone to driver conflict artifacts because AMD releases driver updates frequently and OEM validation lags behind. The ASUS support site driver is often several versions behind the latest AMD release but is verified for the specific panel and BIOS combination. ASUS Armoury Crate manages performance profiles that adjust GPU power limits; switching from “Turbo” to “Balanced” mode sometimes resolves thermal-related artifacts without any hardware change.
Acer
Acer Nitro and Predator models with high-refresh-rate panels (144Hz, 165Hz, 360Hz) sometimes exhibit artifacts when the refresh rate is set incorrectly after a driver update. Windows occasionally resets the refresh rate to 60Hz after a driver change, and the panel produces visual glitches as it operates outside its expected parameters. Confirm the refresh rate in Display Settings (Advanced display settings) matches the panel’s rated rate.
MSI
MSI gaming laptops with Dragon Center or MSI Center control performance modes that directly affect GPU power and clock behavior. The “Extreme Performance” mode on some MSI models pushes GPU voltages and clocks to levels that produce artifacting on aging units. Switching to “Balanced” mode is the first troubleshooting step on any MSI laptop showing load-related artifacts.
Repair Shop Diagnosis

When a laptop with display artifacts comes into the shop, the diagnostic workflow follows a specific order that minimizes wasted time and avoids replacing parts unnecessarily.
First check: BIOS screen inspection. Clean BIOS narrows the field to software or system RAM. Artifacts in BIOS opens the hardware path.
Second check: External monitor test. This is done before any driver changes because it immediately separates panel/cable faults from GPU faults.
Third check: Temperature under load using HWMonitor. If the GPU hits 90C+ within five minutes of a FurMark run, thermal cleaning happens before any further diagnosis. Roughly half of artifact cases in older gaming laptops resolve after a full thermal cleaning and paste replacement.
Fourth check: RAM test using single-stick rotation. On laptops where the BIOS screen showed corruption and the external monitor also shows artifacts, RAM is tested before assuming GPU failure. Faulty RAM is a cheaper, faster fix than a motherboard replacement.
Fifth check: If all of the above are clean, the GPU itself is suspect. For integrated GPU situations (no discrete GPU), the diagnosis typically ends at the motherboard. For laptops with discrete GPUs on daughter boards (some Alienware models), the GPU module can sometimes be replaced independently.
Typical repair costs at a shop:
- Thermal cleaning and paste replacement: $40-80
- Driver support and reinstall: $40-60
- Display cable replacement (parts + labor): $60-120
- LCD panel replacement (parts + labor): $120-250
- Motherboard replacement: $250-600+ depending on model
When Hardware Replacement Is Necessary
Display Cable
The cable needs replacement when it shows visible conductor damage, produces artifacts that change with lid position, and a reseat does not permanently resolve the issue. Cables typically cost $10-40 and are model-specific.
LCD Panel
Panel replacement is necessary when the external monitor is clean, the BIOS shows corruption in fixed positions, and no cable damage is found. A failing T-CON board on the panel cannot be repaired separately.
RAM
RAM needs replacing when single-stick testing confirms a specific stick is faulty. DDR4 SODIMM replacement costs $20-60 depending on capacity and speed.
GPU / Motherboard
On laptops where the GPU is soldered to the motherboard (which is almost all modern laptops), GPU failure means motherboard replacement. This is the last resort after all other causes have been eliminated. A minority of gaming laptops (some older Alienware and Clevo-based machines) have MXM GPU modules that can be replaced without a full board swap.
Stop Troubleshooting and Seek Professional Repair If
- Artifacts appeared immediately after liquid contact. Liquid damage requires professional inspection before any power is applied. Do not power on a laptop that has been exposed to liquid.
- You detect a burning smell. A component is overheating beyond normal limits. Power off immediately and do not restart.
- The battery is swollen. A swollen battery physically pushes against the motherboard and display components. This is a fire hazard and needs immediate professional attention.
- Artifacts are accompanied by the laptop repeatedly shutting down without warning. This suggests thermal failure or power delivery failure that can cause permanent damage with continued use.
- Visible scorch marks or discoloration are visible on the motherboard. This indicates a short circuit or component burn. Do not restart.
- The laptop was dropped and now has both display artifacts and structural damage. The GPU solder joints may be cracked. Further use can complete the fracture and cause total failure.
Prevention Tips

- Keep the laptop on a hard, flat surface during use.
Soft surfaces block bottom intake vents and raise GPU and CPU temperatures significantly. A laptop stand or even a book under the rear edge improves airflow. - Clean the thermal system every 12-18 months.
For gaming laptops or those used in dusty environments, clean fan vents every 6-12 months. A $5 can of compressed air extends hardware life. - Get GPU drivers from your laptop manufacturer’s support page, not directly from NVIDIA or AMD.
OEM drivers are validated for your specific panel, BIOS, and power management setup. Generic drivers cause conflicts that produce artifacts. - Do not run GPU-heavy tasks on battery power alone.
Laptops reduce GPU performance on battery to conserve power. Running demanding games on battery causes the GPU to oscillate between power states, which stresses the VRAM and can produce instability. - Do not close the lid with objects on the keyboard.
Even a thin USB cable resting on the keyboard gets pressed into the screen surface when the lid closes. Over time this causes LCD layer pressure damage. - Avoid extreme temperature environments.
Leaving a laptop in a hot car or cold outdoor conditions causes LCD layer expansion and contraction that degrades the panel faster. - If you run an overclock on a gaming laptop, stress-test it before daily use.
An overclock that passes a 10-minute test may fail after 30 minutes of real-world gaming load. Use FurMark for at least 30 minutes to verify stability before trusting any frequency increase.
Frequently Asked Questions

Are display artifacts always a sign the GPU is dying?
No. Most laptop artifacts are caused by driver corruption, overheating, a loose display cable, or faulty RAM — all of which are fixable without replacing the GPU. The BIOS screen test and external monitor test separate software from hardware causes quickly. Only after ruling out all of these should GPU hardware failure be considered.
My laptop passes FurMark with no issues but still shows artifacts during normal use. Why?
FurMark stresses the GPU differently than real-world usage. Some VRAM faults only trigger under specific access patterns that normal gaming or desktop use produces. Faulty RAM is also frequently the cause in this scenario since MemTest and stress tests may not trigger the fault that daily browser or system activity does.
The artifacts are only on my laptop screen but not on my external monitor. What does that mean?
The GPU is producing a clean signal. The problem is between the GPU output and the laptop’s panel: either the internal display cable has a damaged section or the LCD panel itself is failing. Reseating the cable is the free first step.
Do display artifacts go away on their own?
Driver-related artifacts sometimes resolve after a Windows update that replaces the conflicting driver. Thermal artifacts temporarily disappear when the laptop cools down but return as soon as load increases again. Hardware-related artifacts (failing VRAM, damaged cable, failing panel) do not resolve on their own and worsen over time.
My laptop only shows artifacts when connected to AC power, not on battery. What causes that?
This is usually a power management driver conflict or a specific GPU performance profile that activates on AC power. Some HP and Dell laptops have performance modes that kick in automatically on AC and push GPU clocks higher. Check the laptop’s power plan settings and OEM performance control software. Updating the system BIOS and chipset drivers alongside the GPU driver often resolves this.
Can a Windows Update cause display artifacts?
Yes. Windows Update occasionally installs generic NVIDIA, AMD, or Intel driver versions that conflict with the OEM-specific driver your laptop was shipped with. If artifacts started immediately after a Windows Update, use DDU to remove all GPU drivers and reinstall the OEM version from your manufacturer’s support page.
What is the typical repair cost for display artifact problems?
Driver fixes and thermal cleaning cost nothing to $80. Display cable replacement runs $60-120 at a shop. LCD panel replacement is $120-250. Motherboard replacement for GPU failure is $250-600 or more and is only warranted after all other causes are confirmed ruled out.
Conclusion
Most laptop display artifacts are not a death sentence for the GPU. Start with the BIOS screen test to determine whether the fault is hardware or software, then run the external monitor test to isolate which hardware component is involved. In the majority of cases, a clean driver reinstall, thermal cleaning, or a RAM stick swap resolves the problem without any hardware purchase. Reserve motherboard replacement for situations where every other cause has been systematically eliminated and confirmed.