
Quick Answer
Your laptop shows the charging symbol but the percentage will not move because of one of four things: a battery driver glitch, a manufacturer charge threshold silently capping the battery at 60 or 80 percent, a charger that lacks enough wattage to outpace your system’s power draw, or a degraded battery that can no longer accept a charge. Reinstall the battery driver in Device Manager first — it fixes the issue in about half of all cases.
Introduction
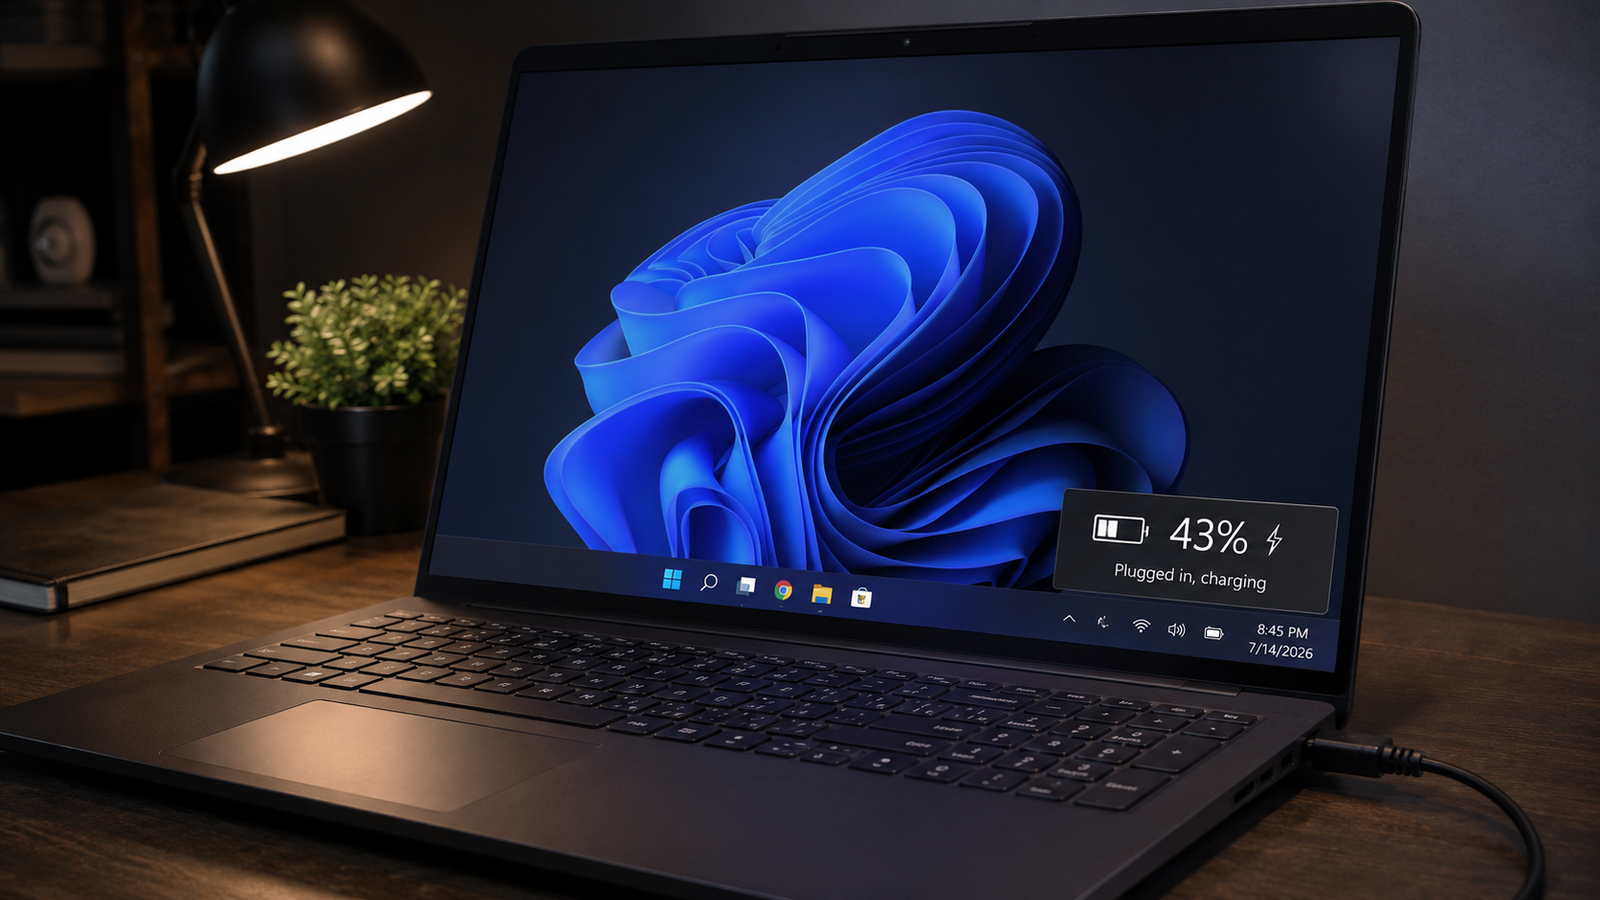
You plug in your charger, the lightning bolt or plug icon appears on the taskbar, and everything looks normal. Except the number never moves. You come back an hour later and it is still at 43 percent. You leave it overnight and wake up to the same number. The laptop is running fine off AC power but the battery is getting nowhere.
This is one of the most misdiagnosed laptop problems because the charging icon tricks people into thinking the charger works fine and the battery must be dead. The reality is more complicated. The charging circuit, the battery driver, the BIOS settings, and the charger’s wattage all play a role in whether the battery actually fills up — and most of the time, the fix has nothing to do with buying a new battery.
This guide walks through every real cause in order from fastest to fix to most serious, including a cause most users never suspect: a manufacturer battery protection setting that silently caps charging without telling you.
Symptoms of the Problem

- Battery percentage stays frozen at the same number for 30 minutes or longer while plugged in
- Charging icon (bolt or plug) appears on the taskbar as normal
- “Estimated time until full” is missing from the battery tooltip
- Battery drains normally when the charger is unplugged
- Laptop runs fine on AC power but the number never climbs
- Percentage increases by 1 or 2 percent after a restart, then stops again
- Battery percentage stuck below a specific cutoff point like 60, 75, or 80 percent
- Windows shows “Plugged in, charging” but nothing changes
Start Here: Fast Diagnosis
Work through this decision tree before diving into fixes. It will point you to the right section faster than guessing.
Battery percentage completely frozen (does not move even 1 percent over 30 minutes): Go to Fix 1 (Power Drain Reset) then Fix 3 (Battery Driver Reinstall).
Battery stops at exactly 60, 75, or 80 percent every time: This is almost certainly a charge threshold or conservation mode. Go straight to Fix 5 (Charge Threshold Check). This single setting trips up hundreds of users every week and gets missed because it looks like a fault.
Battery percentage moves slowly (1 percent every 20 to 30 minutes): Your charger probably lacks enough wattage to charge the battery while the system is under load. Go to Fix 2 (Charger Wattage Check). Also check if you have background tasks or a game running while charging.
Battery percentage stuck below 20 percent and laptop shuts down when unplugged: The battery is likely too deeply discharged or has failed cells. Jump to the Battery Replacement section after trying Fix 1.
Problem started right after a Windows update: Read the Windows Update note under Fix 3 first. A Windows update commonly corrupts the ACPI battery driver.
Problem started after a new third-party charger: Go directly to Fix 2 (Charger Wattage Check). Incompatible chargers are one of the top causes.
Tools Needed
Built-in Windows tools:
- Device Manager (Win + X, then Device Manager)
- Windows PowerShell or Command Prompt (run as administrator)
- Windows Battery Report (powercfg /batteryreport in Command Prompt)
- Windows Power Troubleshooter (Settings, System, Troubleshoot)
Manufacturer diagnostic tools:
- HP Support Assistant / HP PC Hardware Diagnostics
- Lenovo Vantage
- Dell SupportAssist
- MyASUS
- MSI Center
Hardware tools (if physical access is needed):
- Phillips screwdriver (for battery cable reseating)
- Antistatic wrist strap (recommended when opening chassis)
- Replacement charger with correct wattage (for testing)
Free software:
- BatteryInfoView (NirSoft) — shows full charge capacity, design capacity, and battery health
- HWMonitor — monitors battery voltage and charge rate in real time
Troubleshooting Matrix
| Symptom | Likely Cause | Fast Fix |
| Percentage frozen, charging icon showing | Battery driver glitch | Reinstall ACPI battery driver |
| Stops at exactly 60, 75, or 80 percent | Conservation mode or charge threshold | Disable in manufacturer software or BIOS |
| Charges 1 percent per 30 minutes | Charger wattage too low | Use correct OEM charger |
| Percentage moves after restart, freezes again | Battery calibration error | Run battery calibration cycle |
| No movement at all, new battery installed | Charging circuit fault | Professional bench test |
| Problem started after Windows update | Driver overwritten by update | Reinstall battery driver, update chipset |
| Percentage frozen at very low number | Deep discharge or failed cells | Battery replacement |
What Causes Battery Charging But Percentage Not Increasing

1. Battery Driver (ACPI) Glitch
The Microsoft ACPI-Compliant Control Method Battery driver is the software layer that sits between Windows and your physical battery. When this driver corrupts, stalls, or gets replaced by an incompatible version during a Windows update, Windows loses the ability to accurately read or manage the battery state. The charging circuit may actually be working correctly but the operating system cannot register it. The confirmation sign is that the issue often resolves temporarily after a full restart, then returns.
2. Charge Threshold or Conservation Mode
This is the most overlooked cause and the one that causes the most confusion. Lenovo, ASUS, Dell, HP, MSI, and Acer all ship software that can cap battery charging at a specific percentage to preserve long-term battery health. Lenovo Conservation Mode stops charging at around 75 to 80 percent on newer models and around 55 to 60 percent on older IdeaPad models. ASUS Battery Health Charging stops at 60 or 80 percent depending on the mode selected. Dell Power Manager has a “Primarily AC Use” setting that functions the same way. If this setting is active and the battery is already at or above the threshold, the system will never charge higher regardless of what you do to the driver.
3. Charger Wattage Mismatch
A charger that is too low in wattage will power the laptop from the adapter but leave nothing left to push into the battery, especially under load. The system draws what it needs from the adapter to run, and if that number equals or exceeds the adapter’s output, the battery never receives power. The charging icon still appears because the adapter is connected. This happens most often when users replace an original 90W or 130W charger with a cheaper 45W or 65W third-party option, or when charging via a USB-C PD adapter that cannot negotiate the required wattage.
4. Residual Power in the Charging Circuit
The embedded controller (EC) inside the laptop manages the entire charging process independently of Windows. If the EC gets stuck in an error state from a power surge, brownout, or firmware hiccup, it can report the battery as charging when no current is actually flowing to the cells. This typically happens after power fluctuations or long periods on battery with a very low charge. The EC needs a full power drain to reset, which is different from simply restarting Windows.
5. Battery Calibration Error
Laptop batteries use a combination of voltage readings and charge cycle tracking to calculate the percentage shown on screen. Over time, especially after partial charges and discharges, this estimate drifts away from the actual state of the cells. The battery might be receiving charge but the percentage counter does not reflect it accurately until a full calibration cycle resets the tracking.
6. Degraded or Failed Battery Cells
Old or physically damaged batteries lose the ability to hold or accept a charge. The charging circuit pushes current in but the cells cannot store it. This is the hardware failure scenario — genuine cell degradation, physical swelling, or a failed charge management chip inside the battery pack. The battery report will show a full charge capacity far below the design capacity, and in severe cases, Windows will flag the battery with a warning.
7. Faulty Charging Port or Cable Damage
A loose or damaged charging port creates an intermittent connection that allows the adapter to power the laptop from AC but fails to deliver a stable current for battery charging. USB-C ports with bent pins or barrel connectors with debris in the socket are common culprits. The adapter supplies enough power for the system to run but not enough for the battery to register sustained charge.
What We See Most Often
In the shop, the battery driver and the charge threshold account for the vast majority of these cases. The driver issue usually follows a Windows update, and the conservation mode issue is almost always something the user enabled months ago and completely forgot about. A surprising number of people call the laptop “broken” when their Lenovo has been in Conservation Mode for over a year.
Wattage mismatches are common on gaming laptops. Users buy a second charger for travel and grab something inexpensive online. A 45W brick on a machine that needs 130W under load will appear to charge all day and never move the needle. Shutting the laptop down and charging while powered off usually confirms it — if the percentage climbs while off but not while on, the charger cannot keep up with the system’s runtime demand.
Physical battery failure is the third most common case we see, and it almost always comes with other signs: the battery health report shows full charge capacity below 30 percent of design capacity, the battery heats up faster than normal, or Windows has already flagged it with a yellow warning triangle.
How to Diagnose the Problem

Step 1: Generate a Battery Report
Open Command Prompt as administrator and run: powercfg /batteryreport /output C:\battery-report.html
Open the report and check the Design Capacity vs. Full Charge Capacity numbers. If the full charge capacity is below 50 percent of design capacity, the battery is degraded.
Expected Result: The report opens and shows both values clearly. If Failed: Run the command in a new Command Prompt window opened as administrator, not a standard one.
Step 2: Check for Conservation Mode or Charge Threshold
Open your manufacturer’s laptop management software (Lenovo Vantage, MyASUS, Dell Power Manager, HP Command Center, MSI Center, Acer Care Center). Look for battery settings, battery health, or conservation mode. Check whether a charge limit is active.
Expected Result: You find a charge limit at 60, 75, or 80 percent that is currently active. If Failed: Check the BIOS as well. Some manufacturers set charge thresholds in BIOS rather than through software.
Step 3: Verify Charger Wattage
Check the wattage label on your charger brick. Compare it to your laptop’s required input wattage found in the manual or on the bottom label. Then shut down the laptop completely, plug in the charger, and let it charge powered off for 20 minutes. Check the percentage after.
Expected Result: Percentage increases while powered off but not while running. This confirms a wattage mismatch under load. If Failed: If the percentage does not move even while powered off, the charger, port, or battery is the problem.
Step 4: Check the Battery Driver in Device Manager
Press Win + X and open Device Manager. Expand the Batteries section. You should see two entries: Microsoft ACPI-Compliant Control Method Battery and Microsoft AC Adapter. If either is missing or shows a yellow warning icon, the driver is corrupted.
Expected Result: Both entries are present with no warning icons. If Failed: Proceed to Fix 3 (Battery Driver Reinstall).
Step 5: Test a Different Charger
Borrow or test with a known-good OEM charger of the correct wattage. Plug it in and monitor for 30 minutes.
Expected Result: Percentage begins to climb with the correct charger. If Failed: The problem is not the charger — it is the battery driver, EC state, or physical battery.
Which Fix Usually Works?
| Fix | Typical Success Likelihood | Cost | Difficulty |
| Power Drain Reset (EC Reset) | Very Common | Free | Easy |
| Charger Wattage Check | Common | Replacement charger cost if needed | Easy |
| Battery Driver Reinstall | Very Common | Free | Easy |
| Windows Power Troubleshooter | Occasional | Free | Easy |
| Charge Threshold / Conservation Mode Check | Very Common | Free | Easy |
| Battery Calibration | Common | Free | Easy |
| BIOS Update | Occasional | Free | Moderate |
| Battery Replacement | Common (on older laptops) | $40 to $150 depending on model | Moderate to Hard |
Step-by-Step Fixes

Fix 1: Power Drain Reset (EC Reset)
Cost: Free Time: 5 minutes Difficulty: Easy
- Shut down your laptop completely. Do not just restart — fully power off.
- Unplug the charger from the laptop.
- If your laptop has a removable battery, remove it.
- Hold the power button for 30 seconds. This drains residual power from the capacitors and resets the embedded controller.
- Reconnect the battery (if removed) and plug in the charger.
- Power on and check whether the percentage begins increasing.
Expected Result: The embedded controller resets and Windows correctly registers charging. If Failed: Move to Fix 3 (Battery Driver Reinstall). Technician Tip: This is the fastest fix and works on surprisingly often on laptops that got stuck after a power fluctuation or were left at 0 percent for too long.
Fix 2: Charger Wattage Verification
Cost: Free to verify; cost of replacement charger if needed Time: 10 minutes Difficulty: Easy
- Check the wattage printed on your charger brick (it will show something like 65W, 90W, or 130W).
- Check your laptop’s required wattage from the manual, the label on the bottom of the laptop, or the manufacturer’s product page.
- Shut the laptop down completely and plug in the charger.
- Wait 20 minutes and check the battery percentage.
- If the percentage increases while powered off but not while running, the charger cannot supply enough wattage for both the system and the battery simultaneously.
Expected Result: You identify the wattage gap and replace the charger with one that matches the required spec. If Failed: A correct-wattage charger that still does not charge points to a port fault or battery issue. Technician Tip: If you are using a USB-C charger, the cable also matters. Some USB-C cables are not rated for laptop wattage even if the adapter is. Use the original cable or an e-marked USB-C cable rated for 100W or more. Expert Warning: Never use a charger with lower voltage than specified. Wattage differences are usually manageable (a higher-wattage OEM charger is fine), but voltage must match exactly.
Fix 3: Battery Driver Reinstall (ACPI)
Cost: Free Time: 5 to 10 minutes Difficulty: Easy
- Press Win + X and click Device Manager.
- Expand the Batteries section.
- Right-click Microsoft ACPI-Compliant Control Method Battery and select Uninstall Device. Confirm.
- Repeat for Microsoft AC Adapter.
- Restart the laptop. Windows will automatically reinstall both drivers on boot.
- Plug in the charger and monitor the battery percentage for 10 minutes.
Expected Result: The reinstalled driver correctly registers the charging state and the percentage begins climbing. If Failed: Run Windows Update after this step to ensure the new driver is not overwritten again by a pending update. Technician Tip: If the issue started right after a Windows update, run this fix first before everything else. Windows updates commonly push incompatible ACPI driver versions that break battery reporting.
Fix 4: Windows Power Troubleshooter
Cost: Free Time: 5 minutes Difficulty: Easy
Windows 10:
- Go to Settings, Update & Security, Troubleshoot.
- Scroll to Power and click Run the Troubleshooter.
- Follow the prompts and restart when asked.
Windows 11:
- Go to Settings, System, Troubleshoot, Other Troubleshooters.
- Find Power and click Run.
- Restart after completion.
Expected Result: Windows detects and corrects a misconfigured power plan or driver conflict. If Failed: The troubleshooter handles minor configuration errors. Proceed to Fix 5 if it finds nothing. Technician Tip: This tool occasionally catches obscure power plan conflicts that do not show up in Device Manager.
Fix 5: Check and Disable Charge Threshold / Conservation Mode
Cost: Free Time: 5 to 10 minutes Difficulty: Easy
This fix targets the silent battery cap that manufacturers build into their software. Check for your brand below.
Lenovo:
- Open Lenovo Vantage.
- Go to Device Settings, Power.
- Look for Conservation Mode or Battery Charge Threshold.
- Toggle Conservation Mode off (or set the stop charge percentage to 100).
- For ThinkPads with Lenovo Commercial Vantage: open the app, go to Power, Battery, and disable the threshold.
ASUS:
- Open MyASUS.
- Go to Device Settings, Power and Performance.
- Find Battery Care Mode or Battery Health Charging.
- Toggle it off, or switch to Full Capacity Mode.
- For a one-time override, use Instant Full-Charge Mode.
Dell:
- Open Dell Power Manager from the Start menu.
- Click Battery Information, then Settings.
- Change the mode from Primarily AC Use or Custom to Standard.
- Click OK and check whether charging resumes past the previous limit.
HP (Business laptops):
- Shut down the laptop.
- Power on and press F10 repeatedly to enter BIOS.
- Navigate to Configuration or Advanced.
- Look for Battery Care Function or Battery Health Manager.
- Set to Full Charge or 100 percent and save.
MSI:
- Open MSI Center.
- Go to General Settings.
- Find Battery Master or Battery Health.
- Switch from Best Battery Health or Balanced to No limit.
Acer:
- Open Acer Care Center.
- Go to Checkup, Battery health.
- Toggle Battery Charge Limit off.
Expected Result: The threshold is removed and the battery charges past the previous cutoff point. If Failed: Check the BIOS separately from the software tool. Some models apply the threshold in BIOS independently. Technician Tip: You can re-enable this setting afterward if you use the laptop plugged in most of the time — it does genuinely extend battery longevity. Just turn it off when you need a full charge for travel.
Fix 6: Battery Calibration
Cost: Free Time: 3 to 6 hours (full cycle) Difficulty: Easy
Battery calibration resets the percentage tracking software inside the battery pack so it accurately reflects the cells’ actual state.
- Charge the battery to 100 percent without interruption.
- Unplug the charger and use the laptop at normal load until the battery dies and the laptop shuts down on its own.
- Leave the powered-off laptop for 30 minutes.
- Plug in the charger and charge straight to 100 percent without unplugging.
- After a full charge, monitor whether the percentage now increases normally during future charges.
Expected Result: The battery’s percentage reporting recalibrates and reflects the actual charge state accurately. If Failed: If the battery cannot reach 100 percent even after calibration or dies faster than expected, the cells are degraded beyond calibration. Technician Tip: Run this cycle only once or twice. Repeatedly calibrating modern lithium batteries stresses the cells unnecessarily. One proper calibration cycle is enough.
Fix 7: Update BIOS and Chipset Drivers
Cost: Free Time: 15 to 30 minutes Difficulty: Moderate
An outdated BIOS can cause the embedded controller to mismanage the charging circuit. Manufacturers release firmware updates specifically targeting battery and charging fixes.
- Visit your laptop manufacturer’s support page and enter your exact model number.
- Download the latest BIOS update and the latest chipset driver.
- For Dell: also update the Intel Management Engine Interface (MEI) driver, which directly manages power delivery on Intel-based systems.
- Install the chipset driver first, then restart.
- Run the BIOS updater following your manufacturer’s exact instructions (do not interrupt a BIOS update).
- Restart and test charging.
Expected Result: Updated firmware resolves an EC or charging controller bug. If Failed: This fix covers firmware-level issues. If the problem persists after a BIOS update, the hardware itself needs inspection. Expert Warning: Never run a BIOS update on battery alone. The laptop must be plugged into AC power for the entire BIOS flashing process. A failed BIOS update can brick the motherboard.
Fix 8: Battery Cable Reseat (Internal Battery Only)
Cost: Free (if you do it yourself) Time: 20 to 45 minutes Difficulty: Moderate (requires opening the chassis)
On laptops with internal batteries, the battery connects to the motherboard via a ribbon cable. A slightly loose connection at either end can prevent charging without triggering a clear error.
- Power off the laptop completely and unplug the charger.
- Remove the bottom panel screws and carefully lift the cover.
- Locate the battery connector on the motherboard.
- Press firmly to reseat the connector, making sure it clicks into place.
- If you see corrosion on the contacts, clean gently with 99 percent isopropyl alcohol on a cotton swab.
- Reassemble and test.
Expected Result: A secure cable connection restores normal charging. If Failed: If the cable is properly seated and charging still fails, the battery or charging circuit needs formal testing. Expert Warning: Some laptop models (especially newer HP and Microsoft Surface units) use very fragile ZIF connectors for the battery cable. If you are not familiar with these, take the laptop to a technician to avoid tearing the cable.
Mistakes That Make the Problem Worse
Buying a replacement battery before diagnosing the real cause. Most users who buy a new battery when the percentage stops increasing end up with the same problem because the cause was the driver, the conservation mode, or the charger — not the battery. Diagnose first.
Using the wrong wattage charger as a permanent solution. Running a gaming or high-performance laptop on an underpowered charger slowly forces the system to pull from the battery even while plugged in, gradually draining it over time while appearing to charge.
Repeatedly reinstalling the battery driver without updating Windows first. If Windows Update is queued and contains an older ACPI driver version, it will overwrite the clean installation every time. Run all Windows updates before reinstalling the driver, or the problem will return.
Interrupting a BIOS update. If the laptop shuts down during a BIOS flash because the battery died or the power was cut, the motherboard can become unbootable. Never update BIOS on battery or through an unreliable power source.
Running a battery calibration cycle too often. Fully discharging lithium-ion batteries puts stress on the cells. Calibration is useful once or twice to fix reporting accuracy, but doing it monthly to “refresh” the battery actually accelerates degradation.
Assuming a charging light means the battery is charging. A charging indicator LED or taskbar icon confirms the adapter is connected, not that current is flowing into the battery cells. The two are different things.
Using third-party USB-C chargers without verifying PD wattage negotiation. Many cheap USB-C adapters advertise 100W but only negotiate lower power profiles with certain laptops. The laptop’s power delivery chip requests a specific wattage and if the adapter cannot confirm it, the battery will not receive adequate charge.
Brand-Specific Considerations
Dell
Dell laptops are known for strict charger authentication. When the laptop cannot identify the charger as a genuine Dell adapter, a startup message will appear: “The AC adapter type cannot be determined.” In this state, the battery may charge very slowly or not at all. Update the BIOS first, as older firmware versions are more aggressive about rejecting unrecognized adapters. Check the AC Adapter field in Dell BIOS to confirm the system recognizes your charger. If it shows “Unknown,” the charger or charging port is the weak point. Dell’s Advanced Battery Charge mode in BIOS can also create unexpected behavior if its schedule does not match your usage pattern — disable it and switch to Standard Charge to rule it out.
HP
HP splits battery charge management between software and BIOS, and the behavior differs between consumer and business lines. Consumer HP laptops generally have fewer battery management software options. Business models like the ProBook and EliteBook have the most BIOS-level control through Battery Care Function and HP Battery Health Manager. If you have an HP consumer laptop with a frozen battery percentage, the fix almost always comes from the ACPI driver or the charger rather than software thresholds. The HP PC Hardware Diagnostics tool (access via F2 at startup) has a Battery Check component that gives a pass/fail result directly from the firmware level.
Lenovo
Conservation Mode is the single most common cause of “battery stuck at 60 or 80 percent” complaints on Lenovo hardware, and it is legitimate by design. ThinkPads are the most aggressive about this — many dock users have Conservation Mode on by default and never see their battery above 60 percent. Open Lenovo Vantage and disable it before doing anything else. IdeaPad models on older firmware may cap even lower. If Vantage is not installed, the threshold can also be set directly in the Lenovo BIOS under the Power tab. Lenovo also uses a proprietary charging chip that can get stuck in a fault state after deep discharge — the power drain reset (Fix 1) is particularly effective on ThinkPads for this reason.
ASUS
ASUS Battery Health Charging has three modes: Maximum Lifespan (60 percent), Balanced (80 percent), and Full Capacity (100 percent). Many ASUS laptops ship with Balanced mode active out of the box. If the battery has never gone above 80 percent, this is almost certainly the cause. Find it in MyASUS under Device Settings, Power and Performance. ROG and TUF gaming laptops have an additional Instant Full-Charge mode that overrides the health limit for a single full charge cycle before reverting to the saved mode — useful for travel.
Acer (including Nitro and Predator)
Acer Care Center’s Battery Charge Limit feature can cause the same confusion as other brands. Nitro and Predator gaming models sometimes have this active by default. The Acer Nitro 5 in particular generates a lot of forum posts about frozen percentages because users do not realize the battery charge limit is on. Acer BIOS versions on older models can also conflict with Windows power management — a BIOS update from Acer’s support page often resolves charging anomalies on pre-2022 Nitro hardware.
MSI
MSI gaming laptops are high-wattage machines. A 130W or 180W requirement is common, and charging while gaming will drain the battery even with the correct adapter if the GPU and CPU are at full load simultaneously. This is normal behavior for high-draw gaming sessions, not a fault. MSI Center’s Battery Health mode (60 percent cap) is also frequently left active on MSI laptops used primarily at desks. Disable it in MSI Center under General Settings, Battery.
Repair Shop Diagnosis
When a laptop comes in with this complaint, the first thing checked is the battery report. Running powercfg /batteryreport takes 10 seconds and immediately shows whether the battery’s full charge capacity has degraded away from its design capacity. If it is below 40 percent of design, the battery is the likely culprit regardless of other fixes.
After the battery report, conservation mode and charge thresholds are checked in the manufacturer software. This takes another minute and catches a large portion of cases immediately.
For hardware-level testing, a bench power supply is used to verify whether the charging circuit is accepting current at all when bypassing the standard charger. A laptop that accepts bench power but not the adapter has a charger or port problem. A laptop that refuses to charge from the bench supply has a motherboard or battery charge controller fault.
Typical repair costs for this issue:
- Battery driver reinstall and threshold check: free if done at home; $40 to $60 labor at a shop
- Battery replacement: $50 to $150 for the part depending on model; $80 to $200 total at a shop
- Charging port repair: $60 to $120 depending on whether the port is solderable or requires a board-level fix
- Motherboard charging circuit repair: $150 to $350 at a specialist shop; may not be cost-effective on older machines
Professional repair is worth it when the charging port is loose or damaged, when the battery requires soldered cable replacement (common on Surface and MacBook-style laptops), or when the fault is at the motherboard charge controller.
When Hardware Replacement Is Necessary
Battery replacement becomes necessary when the full charge capacity shown in the battery report drops below 40 to 50 percent of the design capacity, when the battery swells or feels warm to the touch even when not charging, when charging cycles are visible in the report as over 500 cycles on most consumer batteries, or when the battery percentage refuses to rise above 20 percent even with a confirmed working charger.
Charging port replacement is needed when the cable must be held at a specific angle to show the charging icon, when the port visibly wobbles or has loose contact, or when the laptop charges with one charger but not another of the same wattage.
Motherboard-level repair becomes the conversation when all software fixes, driver reinstalls, charger replacements, and battery replacements have been tried and the charging circuit still does not work. A failed charge controller chip on the board is the scenario requiring professional board repair or motherboard replacement.
Stop Troubleshooting and Seek Professional Repair If
The battery is visibly swollen. A swollen battery is a fire hazard. Stop using the laptop immediately, do not charge it, and take it to a professional for battery removal and disposal. Do not puncture, compress, or attempt to remove a swollen lithium battery yourself.
You smell burning from the laptop or charger. This indicates an electrical fault in the charging circuit or a battery cell failure. Continued use risks fire. Unplug immediately and do not attempt to repair it without professional help.
The charging port sparks when you plug in the charger. A sparking port has a short circuit. This requires immediate professional repair and should not be used again until the fault is identified.
The laptop shuts down randomly while plugged in at low battery percentages. This pattern suggests the battery can no longer hold enough charge to sustain the system even on AC, which means it is failing at the cell level.
The laptop was exposed to liquid. Water or liquid damage to the charging circuit causes corrosion that spreads over time. Even if the laptop appears to work, charging faults caused by liquid damage require a professional cleaning and inspection before continued use.
The bottom of the laptop near the battery is noticeably hot to the touch during charging. Excessive heat in the battery area indicates a charging fault or a failing battery that is generating heat instead of storing charge.
Prevention Tips

Match your charger wattage exactly.
Buy a replacement charger that meets your laptop’s wattage requirement — not below it. Save the original charger spec from the bottom label before you lose the sticker.
Keep manufacturer software updated.
Lenovo Vantage, MyASUS, Dell SupportAssist, and similar tools push firmware and driver updates that fix charging bugs. Run updates monthly.
Know your conservation mode setting.
If you enable a charge threshold for long-term battery health, note what percentage you set and where the setting is. You will otherwise forget it exists and spend hours troubleshooting a “broken” battery.
Generate a battery report twice a year.
Run powercfg /batteryreport every six months and compare the full charge capacity to the previous report. You can watch degradation develop gradually rather than being surprised by sudden failure.
Keep the charging port clean.
Use a dry toothpick or a can of compressed air to clear lint and debris from barrel connectors and USB-C ports. Debris causes intermittent connections that look exactly like charging failures.
Avoid frequent full discharge cycles.
Modern lithium batteries last longest when kept between 20 and 80 percent. Letting the laptop die completely every day accelerates cell degradation faster than partial charges.
Update BIOS annually.
Laptop manufacturers push charging and battery management fixes through BIOS updates. Staying current prevents firmware-level charging bugs from appearing.
Frequently Asked Questions

Why does my laptop show the charging icon but the battery percentage never goes up?
The charging icon only confirms the adapter is connected to the laptop — it does not confirm that current is flowing into the battery. The most common causes are a glitched ACPI battery driver, a charge threshold set by manufacturer software, or a charger that lacks enough wattage to charge the battery while the system is running.
Why does my battery stop charging at 60, 75, or 80 percent every time?
A charge threshold is almost certainly active in your manufacturer’s software. Lenovo Conservation Mode, ASUS Battery Health Charging, Dell’s Primarily AC Use setting, and MSI’s Battery Health mode all cap charging at specific percentages to reduce long-term battery wear. Open Lenovo Vantage, MyASUS, Dell Power Manager, or MSI Center and look for battery or power settings to disable or change the limit.
Can a bad charger cause the percentage to appear frozen even though it shows charging?
Yes. A charger with insufficient wattage will power the laptop from AC but consume all available power for the running system, leaving nothing to push into the battery. The laptop shows the charging icon because the adapter is recognized, but the cells never receive current. Shutting down the laptop and charging while powered off confirms this — if the percentage increases when off but not when on, the charger cannot keep up with runtime power demand.
Is it safe to keep trying fixes if my battery is swollen?
No. A swollen battery is a physical hazard regardless of whether the laptop otherwise works. Stop using and charging the laptop immediately and have the battery removed by a professional. Lithium batteries that have swollen have experienced internal chemical changes and can rupture or catch fire if continued use or charging puts pressure on the cells.
My battery report shows “Design Capacity: 50000 mWh” and “Full Charge Capacity: 18000 mWh.” Does that mean I need a new battery?
Yes. A full charge capacity at 36 percent of design capacity means the battery has lost more than 60 percent of its original capacity. It is failing and will need replacement. No amount of software fixes or calibration will restore degraded cells.
Does reinstalling the battery driver delete any data?
No. Uninstalling and reinstalling the Microsoft ACPI-Compliant Control Method Battery driver only affects how Windows communicates with the battery hardware. It has no effect on your files, applications, or Windows installation. The driver reinstalls automatically on the next restart.
My laptop charges fine when powered off but not when running. Is that a sign of a failing battery?
Not necessarily. It most likely means the charger does not supply enough wattage to cover both the running system and battery charging simultaneously. Test with a higher-wattage OEM charger to confirm before assuming the battery is the problem.
Conclusion
Most laptops with a frozen battery percentage are not broken — they have a driver glitch, an active charge threshold, or an underpowered charger. Start with the EC reset and battery driver reinstall, then check for conservation mode in your manufacturer’s software before spending money on parts. If the battery report shows full charge capacity below 40 percent of design capacity, replacement is the right move. Physical warning signs like swelling, heat, or sparking at the port require professional attention before any other troubleshooting.