
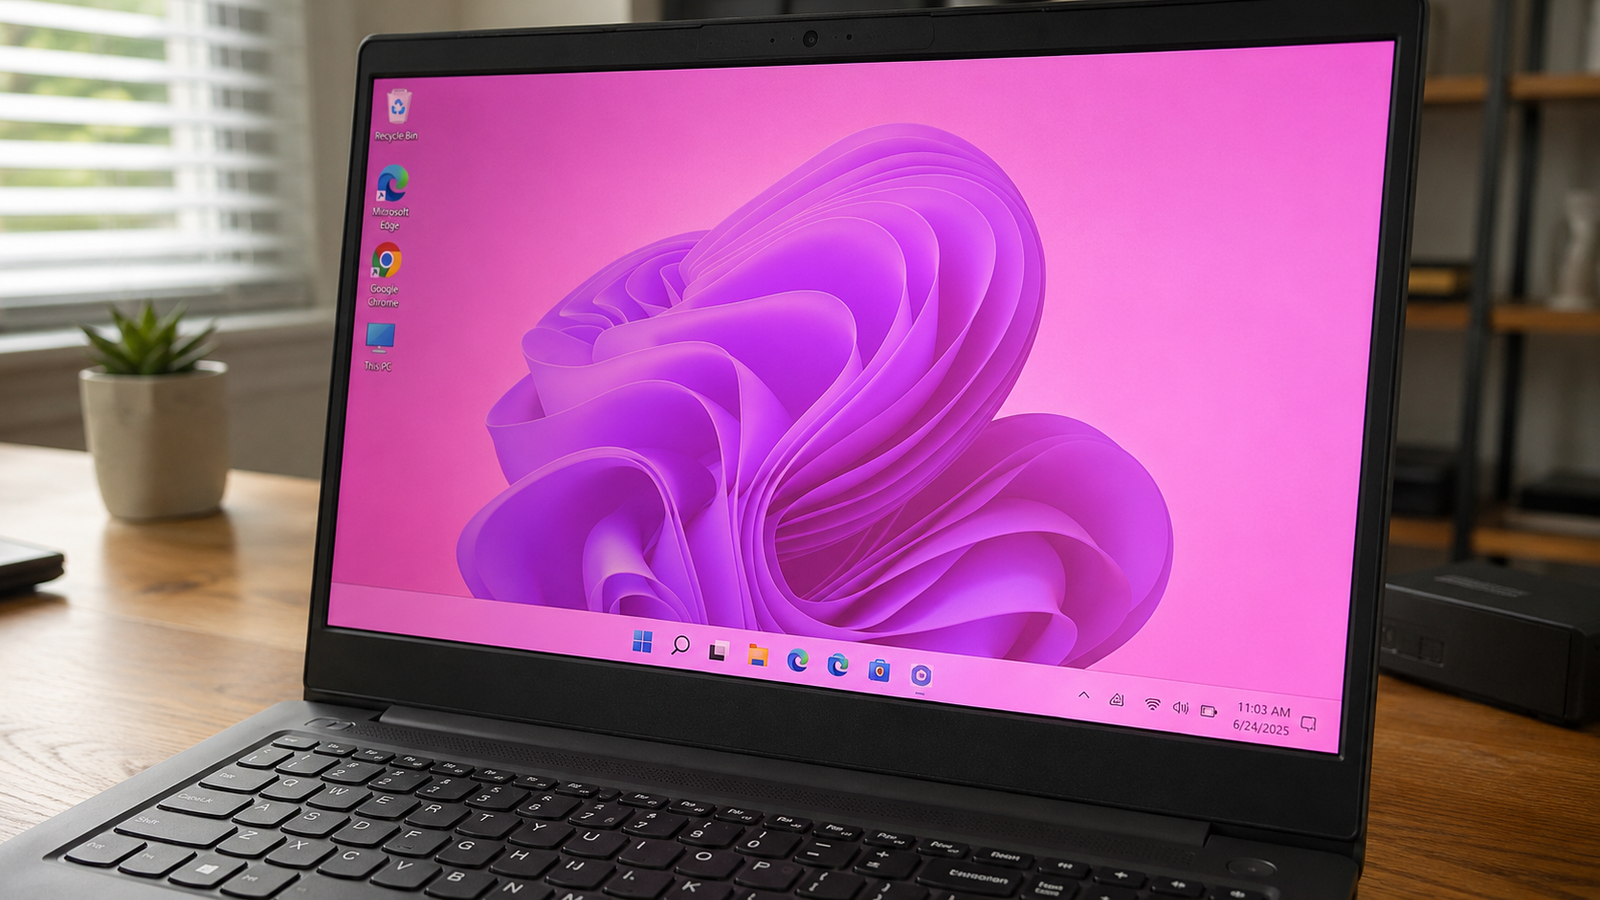
Quick Answer
A pink laptop screen is almost always caused by Night Light being accidentally enabled, a corrupted GPU driver after a Windows Update, or a loose display cable inside the hinge. Turn off Night Light first, then test an external monitor. If the external screen looks normal, it is a software or driver issue you can fix yourself in under ten minutes.
Introduction
You open your laptop and the entire screen has a pink or magenta tint. It looks like someone put a pink filter over everything. Text is still readable, the laptop still works, but something is clearly wrong with how the display is rendering color.
This happens because your screen blends red, green, and blue light to produce every color. When the blue channel weakens or the color balance shifts, the remaining red and green combine to produce that visible pink or magenta cast. The tint can cover the whole screen uniformly, show up as pink lines running across the display, or affect only certain areas depending on the cause.
The frustrating part is that a pink screen can mean something as simple as a setting that got toggled by a Windows Update, or it can mean your display cable is wearing out inside the hinge. This guide gives you a two-minute test to tell the difference, then walks you through every fix from easiest to most involved.
Symptoms of This Problem

- The entire display has a pink, magenta, or rose-colored tint
- Whites appear pinkish or off-color instead of neutral
- The pink tint appears suddenly after a Windows Update or driver update
- The color shift is worse on battery or only appears when plugged in
- The tint changes or disappears when you move the lid to a different angle
- Pink or purple vertical or horizontal lines appear across the screen
- The screen looks normal on an external monitor connected by HDMI
- The pink tint was present from the moment the laptop powered on, before Windows even loaded
- The display has localized pink patches or blotchy discoloration in specific areas
- Mouse cursor leaves pink trails on screen (indicates a GPU or driver fault)
Start Here: Fast Diagnosis
This two-step test takes under two minutes and tells you exactly which direction to go before you change a single setting.
Step 1: Connect an external monitor
Plug any TV or monitor into your laptop via HDMI. If the external screen shows the same pink tint, the problem is on the software or GPU side. If the external screen looks completely normal, the fault is in your laptop’s display panel or the cable running to it.
Step 2: Watch the boot logo
Restart your laptop and look carefully at the manufacturer logo that appears before Windows loads. That logo renders before any Windows settings or drivers take effect.
If the boot logo is already pink, the problem is hardware. No software fix will help here. The cable, panel, or GPU is the issue.
If the boot logo looks normal and the pink only appears after Windows loads, you are almost certainly dealing with a software or driver issue. Work through the software fixes first and you will likely solve it without touching the hardware.
Using those two tests:
Boot logo pink and external monitor also pink: GPU or motherboard level issue, very rare.
Boot logo pink and external monitor normal: Display cable or LCD panel failure. Hardware repair needed.
Boot logo normal and external monitor pink too: Software, driver, or color profile issue. Fix it yourself.
Boot logo normal and external monitor looks fine: Windows setting, manufacturer color utility, or driver conflict. Nearly always fixable at zero cost.
Tools Needed
Built-in tools:
- Windows Settings (Night Light, Color Filters, HDR settings)
- Device Manager (driver rollback and reinstall)
- Windows Color Management (ICC profile reset)
- Safe Mode (clean driver testing environment)
Software tools:
- Display Driver Uninstaller (DDU) for clean GPU driver removal
- GPU-Z or HWiNFO64 for temperature and GPU health monitoring
- HWMonitor for thermal readings under load
Hardware tools (if hardware repair is required):
- Plastic spudger and pry tool for lid disassembly
- Phillips head screwdriver set
- Anti-static wrist strap
- Replacement eDP or LVDS display cable (model-specific)
Troubleshooting Matrix
| Symptom | Likely Cause | Fast Fix |
| Pink tint appeared after Windows Update | Night Light toggled on or driver conflict | Turn off Night Light, roll back GPU driver |
| Pink only shows after Windows loads | Software or color profile issue | Disable color filters, reinstall GPU driver |
| Boot logo is already pink | Hardware fault: cable or panel | External monitor test, professional diagnosis |
| Pink changes when you move the lid | Loose or worn eDP/LVDS display cable | Cable reseat or replacement |
| Pink only when plugged in, not on battery | Manufacturer color software conflict | Disable Dell True Color, HP Color Tool, or similar |
| Pink tint plus mouse trails | GPU driver corruption or failing GPU | DDU clean reinstall, check GPU temps |
| Pink on the external monitor too | GPU driver or corrupted color profile | Clean driver reinstall, delete ICC profiles |
| Blotchy pink patches, not uniform | LCD panel failure | Panel replacement |
| Pink screen at startup with crash | Pink Screen of Death (PSOD) | Remove peripherals, boot into Safe Mode, check drivers |
What Causes a Pink Laptop Screen

Night Light or Color Filter Accidentally Enabled
This is the single most common cause. Windows Night Light warms the display temperature to reduce blue light, and on many laptops that warm shift reads as a clear pink tint. It can be toggled on automatically by a Windows Update without the user doing anything.
Windows 11 also has a separate Color Filters feature under Ease of Access that can apply color overlays. A misclick or an accessibility shortcut can activate these filters without the user realizing it.
How to identify it: The tint appeared right after a Windows Update and the boot logo looks completely normal.
What users misunderstand: Most people assume a sudden pink screen is always hardware damage. In practice, a Windows Update quietly turning on Night Light is responsible for a large portion of pink screen calls at repair shops.
Confirmation sign: The screen returns to normal the moment you turn Night Light off.
Corrupted or Conflicting GPU Driver
A bad GPU driver installation corrupts the color channel output. This happens most often after a Windows Update installs a generic display driver that conflicts with the laptop’s specific GPU, or after a manual driver update that did not complete cleanly.
The result is that the driver sends an unbalanced color signal to the display, with the blue channel suppressed and red pushed higher, producing the pink or magenta cast.
How to identify it: Pink appeared right after a driver or Windows Update. The boot logo looks normal. An external monitor may also show the pink tint.
What users misunderstand: Simply updating the driver again from Windows Update does not always fix this. The old driver remnants stay in the system and conflict with the new install. A clean removal using DDU in Safe Mode is required.
Confirmation sign: Booting into Safe Mode with the generic Microsoft display adapter loaded makes the pink disappear.
Windows Automatic Color Management or Corrupted ICC Profile
Windows 11 introduced an “Automatically manage color for Apps” feature that can, when enabled on certain display hardware, cause a persistent pink tint on the laptop screen while leaving an external monitor completely unaffected. This was widely reported on Dell Inspiron and XPS models.
ICC color profiles can also become corrupted after system updates, causing the display to render all colors through a broken calibration baseline.
How to identify it: The tint only affects the internal screen, not an external monitor. It appeared after a Windows 11 update or a display driver change.
What users misunderstand: This one is almost never mentioned in standard pink screen guides. Many users go through full driver reinstalls and hardware checks before discovering that one toggle inside Color Management is responsible.
Confirmation sign: Turning off “Automatically manage color for Apps” in Display Settings makes the pink tint immediately disappear.
Loose or Worn eDP or LVDS Display Cable
A thin ribbon cable runs from the motherboard, through the hinge mechanism, and up into the display panel. The hinge area is the point of highest mechanical stress. Every time the lid is opened and closed, that cable flexes slightly. Over time, especially on laptops where the hinge is stiff or where a hinge has broken, the cable wears and individual color channels begin to fail.
When the blue channel signal weakens in the cable, the display receives incomplete color data and the red-green combination produces a pink or magenta tint.
How to identify it: The pink tint changes, flickers, or temporarily disappears when you move the lid to a different angle. The boot logo may already be pink. An external monitor looks completely normal.
What users misunderstand: Users who see the tint flicker at a certain lid angle often assume it is a software glitch. Any symptom that responds to lid movement is a mechanical cable fault, not a software issue. No driver update will fix this.
Confirmation sign: Gently flex the hinge area while watching the screen. If the color shifts or corrects briefly, the cable is the problem.
Failing LCD Panel
When the display panel itself starts to fail, the pink tint is persistent, present from the boot logo, and does not respond to lid movement. The panel may also show blotchy discoloration, off-white areas, or pink patches localized to specific zones of the screen.
Older CCFL-backlit panels can develop a pink tint when the cold cathode fluorescent lamp ages, often showing as pink when the laptop is cold and fading toward normal as the screen warms up. Modern LED-backlit panels typically fail differently, with the color processing circuitry inside the panel producing a persistent cast.
How to identify it: Pink at the boot logo, no change with lid movement, external monitor is normal. On very old laptops, the tint is worse when cold.
What users misunderstand: Users often assume a failing panel means the whole laptop is broken. A panel swap is a straightforward repair and in most cases fully restores the display.
Confirmation sign: The external monitor looks normal, the boot logo is pink, and the tint does not change with any software adjustment.
Manufacturer Color Utility Conflict
Dell, HP, ASUS, and Lenovo all ship proprietary color management software on many of their laptops. Dell calls it Dell True Color or PremierColor. HP has its own Color Tool in OMEN Gaming Hub and MyHP. ASUS includes Color-Intelligent technology in some models. Lenovo has display calibration options inside Lenovo Vantage.
These utilities can malfunction after a driver update or OS upgrade and produce a persistent pink or magenta tint that survives even a clean GPU driver reinstall because the color utility sits on top of the driver and overrides the output.
How to identify it: The pink tint disappears only after disabling or uninstalling the manufacturer color application. The tint may appear only while plugged in and not on battery, which is a known behavior of some Dell True Color power mode settings.
What users misunderstand: Reinstalling GPU drivers does not touch these manufacturer utilities. The utilities must be disabled or removed separately.
Confirmation sign: The pink disappears immediately after disabling the manufacturer color app from the system tray.
HDR or Auto-HDR Conflict in Windows 11
Windows 11 versions 24H2 and later have introduced HDR and Dolby Vision pipeline bugs that cause pink, green, or purple washes on laptop screens, particularly when toggling between HDR-enabled content and standard desktop use. Auto-HDR can also produce this effect on displays that do not fully support the HDR signal being sent.
How to identify it: Pink appeared after a Windows 11 24H2 or later update. The tint flickers when switching between apps or returning from full-screen video.
What users misunderstand: Many users blame the GPU driver when the real cause is the HDR pipeline. Disabling HDR completely resolves the issue.
Confirmation sign: The pink disappears after turning off Windows HD Color in Display Settings.
Early GPU Failure or Overheating
When a GPU begins to fail, whether from VRAM degradation, excessive heat, or power delivery problems, color artifacting is one of the early symptoms. Unlike cable or panel failures, GPU failure produces a pink or magenta wash on both the laptop screen and the external monitor simultaneously.
Mouse cursor trails are a strong indicator of GPU-level artifacting rather than a simple setting or cable issue.
How to identify it: Both the laptop screen and the external monitor show the pink tint. The pink is accompanied by other artifacts like trails, flickering, or random discoloration. GPU temperatures may be elevated.
What users misunderstand: GPU failure on a laptop is often confused with a driver problem. If a full DDU clean reinstall does not resolve the issue and the external monitor still shows the tint, the GPU is the most likely cause.
Confirmation sign: HWiNFO64 shows the GPU running hot under normal loads, or artifacts appear at random times and not only after specific triggers.
What We See Most Often
The majority of pink screen cases that come through repair shops resolve with one of two fixes. A Windows Update quietly enabling Night Light or toggling the automatic color management setting is responsible for most sudden-onset cases where the laptop was working perfectly the day before. The customer has no idea anything changed and assumes hardware failure.
The second most common cause is a worn display cable, specifically on laptops that are two or more years old and are opened and closed frequently, or on machines where the hinges are stiff and put extra stress on the cable with every lid movement.
Actual LCD panel failure is less common than either of those. GPU failure is the rarest cause and comes with other accompanying symptoms that make it easier to identify.
The most common misdiagnosis we see is customers replacing the LCD panel when the real problem is the cable. Testing an external monitor and watching the boot logo first would have saved them the cost of an unnecessary screen replacement.
How to Diagnose the Problem

Step 1: Turn off Night Light
Go to Settings, then System, then Display. Look for the Night Light option and make sure it is set to Off.
Expected Result: If Night Light was the cause, the pink disappears immediately.
If Failed: Night Light was off or disabling it had no effect. Proceed to Step 2.
Step 2: Check Windows Color Filters
Press Windows key plus U to open Accessibility settings, then go to Color Filters. Make sure color filters are turned off.
Expected Result: If a color filter was active, the display returns to normal immediately.
If Failed: No color filter was active. Proceed to Step 3.
Step 3: Disable automatic color management
Go to Settings, then System, then Display, then Advanced Display. Look for “Automatically manage color for Apps” and turn it off.
Expected Result: On systems where this setting is the cause, the pink tint disappears immediately without a restart.
If Failed: Proceed to Step 4.
Step 4: Turn off HDR
Go to Settings, then System, then Display. Under Windows HD Color, turn off Use HDR for the internal display.
Expected Result: If an HDR pipeline conflict was causing the tint, the display returns to normal immediately.
If Failed: Proceed to Step 5.
Step 5: Disable manufacturer color utility
Look in the system tray at the bottom right of the screen. Find any Dell True Color, HP MyDisplay, ASUS Color-Intelligent, or Lenovo Vantage display icon. Right-click it and disable or close the utility.
Expected Result: If the manufacturer software was overriding color output, the pink clears immediately.
If Failed: Proceed to Step 6.
Step 6: Boot into Safe Mode
Hold Shift and click Restart. Select Troubleshoot, then Advanced Options, then Startup Settings. Restart and press F4 to enter Safe Mode.
Expected Result: In Safe Mode, Windows uses a basic Microsoft display adapter. If the screen looks normal in Safe Mode, the problem is a driver or software conflict solvable with a clean driver reinstall.
If Failed (still pink in Safe Mode): If the screen is pink even in Safe Mode, the cause is hardware: either the display cable, the panel, or the GPU. The boot logo test will confirm which one.
Step 7: Run the boot logo test
Restart the laptop and watch the manufacturer logo carefully before Windows loads.
Expected Result: If the logo is normal and the pink only appears after Windows starts, software is still the cause. If the logo itself is pink, the hardware is the source.
Step 8: External monitor test
Connect an HDMI display. If the external monitor looks normal and only the laptop screen is pink, the fault is in the laptop’s display assembly, specifically the cable or panel. If the external monitor also shows the tint, the GPU or a deep software issue is responsible.
Which Fix Usually Works?
| Fix | Typical Success | Cost | Difficulty |
| Turn off Night Light | Very Common | Free | Very Easy |
| Disable color filters | Common | Free | Very Easy |
| Disable automatic color management | Common | Free | Very Easy |
| Turn off HDR / Auto-HDR | Common | Free | Easy |
| Disable manufacturer color utility | Common | Free | Easy |
| Roll back GPU driver | Common | Free | Easy |
| Clean GPU driver reinstall (DDU) | Common | Free | Moderate |
| Delete corrupted ICC color profiles | Occasional | Free | Moderate |
| Display cable reseat or replacement | Common (hardware cases) | $15-50 for cable | Moderate to Hard |
| LCD panel replacement | Occasional | $80-200 | Hard |
| Motherboard or GPU repair | Rare | $200+ | Professional only |
Step-by-Step Fixes

Fix 1: Turn Off Night Light
Cost: Free Time: 30 seconds Difficulty: Very Easy
- Press Windows key and I to open Settings.
- Go to System, then Display.
- Find the Night Light option and click the toggle to Off.
- If Night Light is set to turn on automatically on a schedule, click Night Light Settings and disable the schedule.
Expected Result: The pink tint disappears immediately. No restart needed.
If Failed: Night Light was not the cause. Move to Fix 2.
Technician Tip: Windows Updates have a documented habit of enabling Night Light silently during major version upgrades, especially on the 24H2 build. This is the first place to check any time a pink screen appears right after an update.
Fix 2: Disable Windows Color Filters
Cost: Free Time: 1 minute Difficulty: Very Easy
- Press Windows key plus U to open Accessibility settings.
- Click Color Filters.
- Make sure the toggle for Color Filters is set to Off.
- Also make sure the keyboard shortcut (Windows key plus Ctrl plus C) is not accidentally toggling filters on.
Expected Result: Display returns to full color immediately.
If Failed: No active color filter present. Move to Fix 3.
Technician Tip: The Color Filters toggle can be activated accidentally with the Windows key plus Ctrl plus C keyboard shortcut. This catches people out more often than they realize, especially on laptops where the Ctrl key is used frequently.
Fix 3: Disable Automatic Color Management
Cost: Free Time: 1 minute Difficulty: Easy
- Go to Settings, System, Display.
- Click Advanced Display at the bottom of the Display settings page.
- Find the option labeled “Automatically manage color for Apps.”
- Toggle it to Off.
Expected Result: The pink tint clears on the laptop screen immediately, while any connected external monitor is unaffected.
If Failed: This setting was either not active or not the cause. Move to Fix 4.
Technician Tip: This setting was the direct cause of widespread pink screen reports on Dell Inspiron 16 Plus models running Windows 11. It is almost never mentioned in mainstream pink screen guides. If a customer has already tried drivers and still has a pink internal screen with a normal external monitor, this is the first setting to check.
Fix 4: Turn Off HDR and Auto-HDR
Cost: Free Time: 1 minute Difficulty: Easy
- Go to Settings, System, Display.
- Under Brightness and Color, click Windows HD Color Settings.
- Turn off Use HDR and Auto HDR for the internal display.
- Restart the laptop.
Expected Result: The pink or magenta tint caused by HDR pipeline conflicts resolves completely after restart.
If Failed: HDR was not the cause. Move to Fix 5.
Technician Tip: This fix specifically targets pink screen issues that appeared after a Windows 11 24H2 or later update. Dolby Vision handshake bugs introduced in recent Windows builds affect a range of laptop display panels that technically support HDR but do not handle the full Windows HDR pipeline cleanly.
Fix 5: Disable Manufacturer Color Utility
Cost: Free Time: 2 minutes Difficulty: Easy
- Look in the system tray at the bottom right of the taskbar. Click the up arrow to show hidden icons.
- Look for Dell True Color, Dell PremierColor, HP MyDisplay, HP Color Tool, ASUS Color-Intelligent, ASUS Splendid, or Lenovo Display Color Calibration icons.
- Right-click the icon and select Disable, Close, or Exit.
- Watch the screen immediately after closing the utility.
Expected Result: The pink tint clears the moment the utility is closed or disabled.
If Failed: Either no manufacturer color utility is installed, or the utility was not the cause. Move to Fix 6.
Technician Tip: On Dell laptops, Dell True Color with Power Efficiency mode enabled can cause a pink tint specifically when the laptop is plugged into AC power. If the screen is pink while charging but normal on battery, Dell True Color is almost certainly the cause.
Fix 6: Roll Back the GPU Driver
Cost: Free Time: 5 minutes Difficulty: Easy
- Press Windows key plus X and select Device Manager.
- Expand Display Adapters.
- Right-click your graphics adapter (NVIDIA, AMD, or Intel) and select Properties.
- Click the Driver tab.
- Click Roll Back Driver if the option is available.
- Restart the laptop after the rollback completes.
Expected Result: If a recent driver update caused the color imbalance, rolling back to the previous driver restores normal color output.
If Failed: Roll Back Driver is greyed out (no previous driver stored) or the pink remains after rollback. Move to Fix 7.
Technician Tip: Driver rollback is only available if Windows stored the previous driver version. If the option is greyed out, a clean reinstall with DDU is the next step.
Fix 7: Clean GPU Driver Reinstall Using DDU
Cost: Free Time: 20-30 minutes Difficulty: Moderate
- Download Display Driver Uninstaller (DDU) from guru3d.com before starting.
- Download the correct GPU driver from NVIDIA, AMD, or Intel’s official website. Do not use Windows Update for this.
- Boot into Safe Mode: hold Shift and click Restart, go to Troubleshoot, Advanced Options, Startup Settings, then press F4.
- In Safe Mode, run DDU. Select your GPU type (NVIDIA, AMD, or Intel) and click “Clean and Restart.”
- After the restart into normal Windows, install the driver you downloaded. Use the Custom installation option and check “Perform a clean installation.”
- Restart once more after installation completes.
Expected Result: All corrupted driver remnants are removed and clean reinstallation restores proper color channel output.
If Failed: The pink remains after a clean driver reinstall. At this point the software and driver causes are exhausted. Move to hardware diagnosis.
Expert Warning: Do not download GPU drivers from third-party sites. Use only the official NVIDIA, AMD, or Intel driver portals, or your laptop manufacturer’s support page for the correct driver for your specific model.
Fix 8: Delete Corrupted ICC Color Profiles
Cost: Free Time: 5 minutes Difficulty: Moderate
- Search for “Color Management” in the Windows search bar and open it.
- Click the Devices tab and select your laptop display from the dropdown.
- Check the box labeled “Use my settings for this device.”
- Select any color profiles listed under this display.
- Click Remove and confirm. Remove all non-default profiles.
- Restart the laptop.
Expected Result: The display reverts to Windows default color rendering and the corrupted profile no longer interferes with color output.
If Failed: Profiles were not the cause or the pink persists after removal. The cause is hardware.
Technician Tip: Corrupted ICC profiles often survive driver reinstalls because they are stored separately in the Windows color profile database, not in the driver package.
Fix 9: Reseat the Internal Display Cable
Cost: Free to $50 for a replacement cable Time: 30-60 minutes Difficulty: Moderate to Hard
This fix applies when the external monitor looks normal but the laptop screen stays pink, and when the tint changes with lid movement.
- Power off the laptop completely and unplug all cables and peripherals.
- Remove the battery if it is accessible.
- Using a plastic spudger, carefully remove the screen bezel starting from a corner. Work around the entire perimeter. Do not use metal tools near the screen.
- The display cable connector is typically located at the bottom of the screen, below the panel.
- Gently disconnect the cable from the back of the panel by pulling the connector straight back.
- Inspect the cable for visible damage, kinks, or wear marks near the hinge area.
- Reconnect the cable firmly and reassemble.
- Power on and test the display.
Expected Result: If the cable was merely loose or unseated, the display returns to normal color. If the cable is visibly damaged, a replacement cable (typically $15-50 depending on model) is required.
If Failed: The cable is not the problem, or the cable is damaged and needs replacement. If a new cable does not resolve the issue, the LCD panel itself is the next component to test.
Expert Warning: Do not attempt lid disassembly without a proper plastic pry tool. Metal tools will crack the bezel or damage the panel. On some newer ultrathin laptops, the bezel is glued and requires a heat gun to separate cleanly.
Fix 10: LCD Panel Replacement
Cost: $80-200 for the panel, $150-350 if done professionally Time: 1-2 hours Difficulty: Hard
When the boot logo is pink, the external monitor is normal, reseating the cable did not help, and the tint does not respond to any lid movement, the LCD panel itself is failing and needs to be replaced.
- Identify your exact laptop model and look up the display panel part number. The panel specs (resolution, size, finish, and connector type) must match exactly.
- Disassemble the lid as described in Fix 9.
- Disconnect the display cable and any webcam or antenna cables routed along the panel.
- Remove the panel mounting screws (typically four, at the corners).
- Slide the old panel out and carefully install the new one.
- Reconnect all cables, reassemble, and test.
Expected Result: Full normal color output restored.
If Failed: If the new panel also shows pink, the display cable was damaged during the swap or the GPU is the source of the problem.
Technician Tip: Buy the replacement panel from a reputable LCD parts supplier with a return policy. Always test the new panel before fully reassembling the lid in case there is a compatibility issue.
Mistakes That Make the Problem Worse
Buying a new LCD panel before testing the display cable This is the most expensive mistake. A cable reseat or a $20 cable replacement resolves the issue in many hardware cases. Replacing the panel without ruling out the cable first means spending $100-200 unnecessarily.
Updating the GPU driver through Windows Update during troubleshooting Windows Update does not always install the driver version optimized for your specific laptop hardware. Updating through Windows Update during an active pink screen issue can layer additional driver conflicts on top of existing ones. Use the GPU manufacturer’s official site or your laptop maker’s support page.
Assuming a pink screen always means hardware failure Most pink screens are software or settings issues. Jumping straight to hardware diagnosis, or worse, taking the laptop to a repair shop before trying the five-minute software checks, costs time and money that was not necessary.
Trying DDU without downloading the replacement driver first DDU removes the GPU driver completely. If you are not in Safe Mode with the correct driver already downloaded, you can be left without any display output. Download the driver before running DDU.
Pressing down on the screen to test if it flexes Some users physically press on the display panel to test for cable issues. Applying pressure to an LCD panel risks cracking it or creating dead pixel zones. Flex testing is done by gently moving the lid angle, not by pressing the screen surface.
Ignoring the boot logo test and going straight to Windows fixes The boot logo test tells you in seconds whether any Windows-level fix will work. Skipping it and spending an hour on software troubleshooting when the boot logo is already pink is wasted time.
Using a metal pry tool to remove the screen bezel Metal tools crack bezels and scratch display panels. Plastic spudgers or old credit cards are the correct tools. On laptops with glued bezels, skipping the heat gun step snaps the plastic clips and permanently damages the bezel.
Brand-Specific Considerations
Dell
Dell laptops have two known causes specific to the brand. Dell True Color is the most commonly reported one: it applies real-time color adjustments based on content type and power source, and in AC-powered mode it can produce a visible pink tint. The fix is to disable True Color from the system tray icon or uninstall it through Settings, Apps. Dell PremierColor on XPS and Precision models has the same behavior.
The second Dell-specific issue is the automatic color management setting in Windows 11. This was widely reported on the Inspiron 16 Plus 7620 and similar models. The fix is described in Fix 3 above.
Dell BIOS diagnostics can be run by pressing F12 at startup and selecting Diagnostics. A built-in LCD test cycles through solid colors and can confirm whether the panel has a true hardware fault before opening the case.
HP
HP laptops with the OMEN Gaming Hub include a Color Tool that can misconfigure color output after a software update. Disable or reset it from inside the OMEN Gaming Hub application. HP also includes HP Display Control in MyHP on some consumer models.
HP UEFI Hardware Diagnostics can be accessed by pressing Esc at startup and selecting F2 for HP Diagnostics. The display test will show whether the panel renders the full color spectrum correctly.
Older HP laptops with CCFL backlights (pre-2015 models) are more susceptible to the pink-when-cold backlight issue described in the LCD panel failure section.
Lenovo
Lenovo Vantage includes display calibration options that can be misconfigured after a system update. Open Lenovo Vantage, go to Device, then Display, and check that the color profile is set to default or sRGB rather than a warm preset.
Lenovo ThinkPad models are known for hinge wear that stresses the eDP cable over time, particularly on units that are opened and closed hundreds of times in a business environment. A pink screen that flickers at certain angles on a ThinkPad is almost always the display cable.
ASUS
ASUS laptops include Splendid and Color-Intelligent display technology controlled through the MyASUS application. These utilities can conflict with GPU driver updates and produce a warm pink tint. Open MyASUS, go to Display Color Settings, and reset the profile to Normal.
On ASUS gaming laptops, the ROG Armoury Crate software also includes color control options. Check and reset display settings there if the issue appeared after an Armoury Crate update.
MSI
MSI True Color Technology is a factory calibration that should not produce ongoing issues, but MSI Creator Center and MSI Center applications include display enhancement options that can conflict with driver updates. Reset display settings to default inside MSI Center if a pink tint appeared after a software update.
MSI Dragon Center (older branding) had known issues with color mode switching on Windows 11. If the laptop is running an older Dragon Center version, update it to MSI Center first.
Acer
Acer laptops use Acer Color Intelligence, managed through the Acer Care Center. On Predator and Nitro gaming models, Acer NitroSense includes display options. Reset color settings to default inside NitroSense or Care Center before pursuing driver-level fixes.
Repair Shop Diagnosis

When a laptop with a pink screen comes into the shop, the first thing to check is the boot logo. That single test immediately separates the hardware cases from the software cases and tells us how to price the job.
For software cases, the diagnosis workflow is: Night Light off, color filters off, automatic color management off, HDR off, manufacturer utility disabled. If none of those resolve it, DDU clean reinstall in Safe Mode. Most software pink screens resolve in under fifteen minutes with those steps.
For hardware cases, the next check is the external monitor. If the external monitor is normal, we know the GPU is fine and the issue is in the display assembly. We open the lid, inspect the cable for wear at the hinge, and if the cable looks intact we reseat it. If reseating does not work, we pull the panel number and order a replacement.
If the external monitor also shows the tint, the conversation shifts to the GPU. We run HWiNFO64 to check temperatures and look for artifacting patterns. GPU failure on a laptop is a motherboard-level conversation, which means the repair cost can exceed the value of the machine.
Diagnostic fee at most laptop repair shops runs $50-90 and is typically credited toward the repair if work is authorized.
Typical repair costs by cause:
- Software fix: Free to $75 labor if done in-shop
- Display cable replacement: $80-150 parts and labor
- LCD panel replacement: $150-350 depending on panel spec
- Motherboard/GPU repair: $300-600 or more, depending on model
When Hardware Replacement Is Necessary
Display cable: Replace when the cable has visible wear, fraying near the hinge, or when reseating does not resolve the tint and the external monitor is normal. Cables are model-specific and typically cost $15-50. This is one of the more cost-effective hardware fixes available.
LCD panel: Replace when the boot logo is pink, the external monitor is normal, the cable has been reseated or replaced without improvement, and the panel shows blotchy discoloration or fails a solid color diagnostic test. Panel costs range from $80-200 depending on resolution and manufacturer.
RAM: Pink screens are not typically caused by RAM failure. If a pink screen is accompanied by frequent crashes or blue screens pointing to memory errors, run Windows Memory Diagnostic before assuming the display is the issue.
Motherboard or GPU: Replace or repair when both the laptop screen and an external monitor show the tint simultaneously, the issue persists after a full DDU clean driver reinstall, and GPU temperatures confirm thermal damage or the GPU fails under a stress test. This is the most expensive outcome and is often only viable on higher-end or business laptops where the repair cost makes economic sense.
Stop Troubleshooting and Seek Professional Repair If
The laptop was dropped or received physical impact before the pink screen appeared. Physical damage can affect the display cable, panel, GPU solder joints, or the hinge itself. Self-repair without proper training risks compounding the damage.
There is a burning smell coming from the laptop during operation. Stop using it immediately. A burning smell indicates an electrical fault that can cause fire or permanent damage.
The battery is swollen and the bottom of the laptop is visibly bulging. A swollen battery can puncture and cause a fire. Do not try to open the case yourself.
The pink screen is accompanied by repeated unexpected shutdowns. Combined with a pink tint, unexpected shutdowns usually mean GPU overheating or a power delivery problem at the motherboard level.
Liquid entered the laptop. Pink discoloration after liquid exposure can indicate corrosion across multiple components. A technician needs to assess the damage and clean the board before any display troubleshooting is meaningful.
The pink screen appeared with electrical burning or crackling sounds. This is an electrical short and requires immediate professional inspection.
Prevention Tips

Keep GPU drivers updated from the official manufacturer portal, not through Windows Update, and check the release notes before updating. Driver versions that include known display or color fixes are noted there.
Disable automatic GPU driver updates in Windows Update settings. Go to Settings, Windows Update, Advanced Options, and turn off the option to receive updates for other Microsoft products, then manage GPU drivers manually.
Handle the lid carefully. Do not pick up the laptop by the screen. Mechanical stress on the display lid assembly accelerates hinge wear and cable fatigue.
Set Night Light to a manual schedule rather than automatic, or disable the automatic toggle option. This prevents Windows Updates from silently enabling it.
If your laptop ships with a manufacturer color utility like Dell True Color, learn what it does and where to find it. Knowing where to disable it saves significant troubleshooting time later.
Check display settings after every major Windows Update. Updates sometimes reset color management options or enable HDR on displays where it was previously disabled.
Clean the laptop cooling system every 12-18 months to prevent GPU overheating. GPU thermal damage is irreversible and produces color artifacting that looks identical to software issues in early stages.
Frequently Asked Questions

Why did my laptop screen suddenly turn pink?
A sudden pink screen most commonly means a Windows Update silently enabled Night Light or changed an automatic color management setting, or a GPU driver updated in the background and introduced a color channel conflict. The boot logo test tells you within seconds whether the cause is software or hardware.
My laptop screen is pink but the external monitor looks normal. What does that mean?
A normal external monitor with a pink internal screen means the GPU is working correctly. The fault is in the laptop display assembly: either the internal cable that runs through the hinge, or the LCD panel itself. Start by watching whether the tint changes when you adjust the lid angle, because a flicker or shift at a certain angle points directly to the cable.
Can a pink screen be caused by a virus?
Almost never. A uniform pink tint is a color rendering issue caused by settings, drivers, or display hardware. Viruses do not typically affect color output. If you are concerned about malware for other reasons, run a scan separately, but the pink screen itself is not an infection symptom.
My screen is pink at the boot logo before Windows loads. Is it hardware?
Yes. If the manufacturer logo is pink before Windows starts, no software or driver fix will help. The cause is hardware: the display cable, the LCD panel, or in rare cases the GPU. An external monitor test will confirm which one.
Why does my pink screen go away when I tilt the lid?
A pink tint that changes or disappears at certain lid angles is a classic display cable symptom. The ribbon cable that carries the video signal runs through the hinge and is under mechanical stress. When the cable is partially damaged or loose, certain positions create or relieve the color channel failure. This needs a cable reseat or replacement.
Will updating my graphics driver fix a pink screen?
It depends on the cause. If a recent driver update introduced the problem, rolling back the driver or doing a clean reinstall with DDU often resolves it. If the pink appeared for any other reason, a driver update alone is unlikely to help and in some cases makes the issue worse by adding another layer of driver conflict.
How much does it cost to fix a pink screen professionally?
It depends entirely on the cause. If it is a software or settings issue, a repair shop can resolve it in under an hour for minimal labor cost. A display cable replacement typically runs $80-150 parts and labor. An LCD panel replacement is usually $150-350 depending on the panel specification. GPU-level issues are the most expensive and can run $300 or more.
Conclusion
A pink laptop screen sounds alarming but in most cases resolves quickly. The two-minute test covering the external monitor and the boot logo tells you whether you are dealing with a software issue or a hardware fault before you change a single setting. Software causes, which are the majority of cases, respond to turning off Night Light, disabling HDR, removing manufacturer color utilities, or doing a clean GPU driver reinstall with DDU. Hardware causes require either a cable reseat or a panel replacement, with the cable being the more affordable and more common repair. GPU failure is rare and comes with additional symptoms that distinguish it from a simple display assembly problem.