
Quick Answer
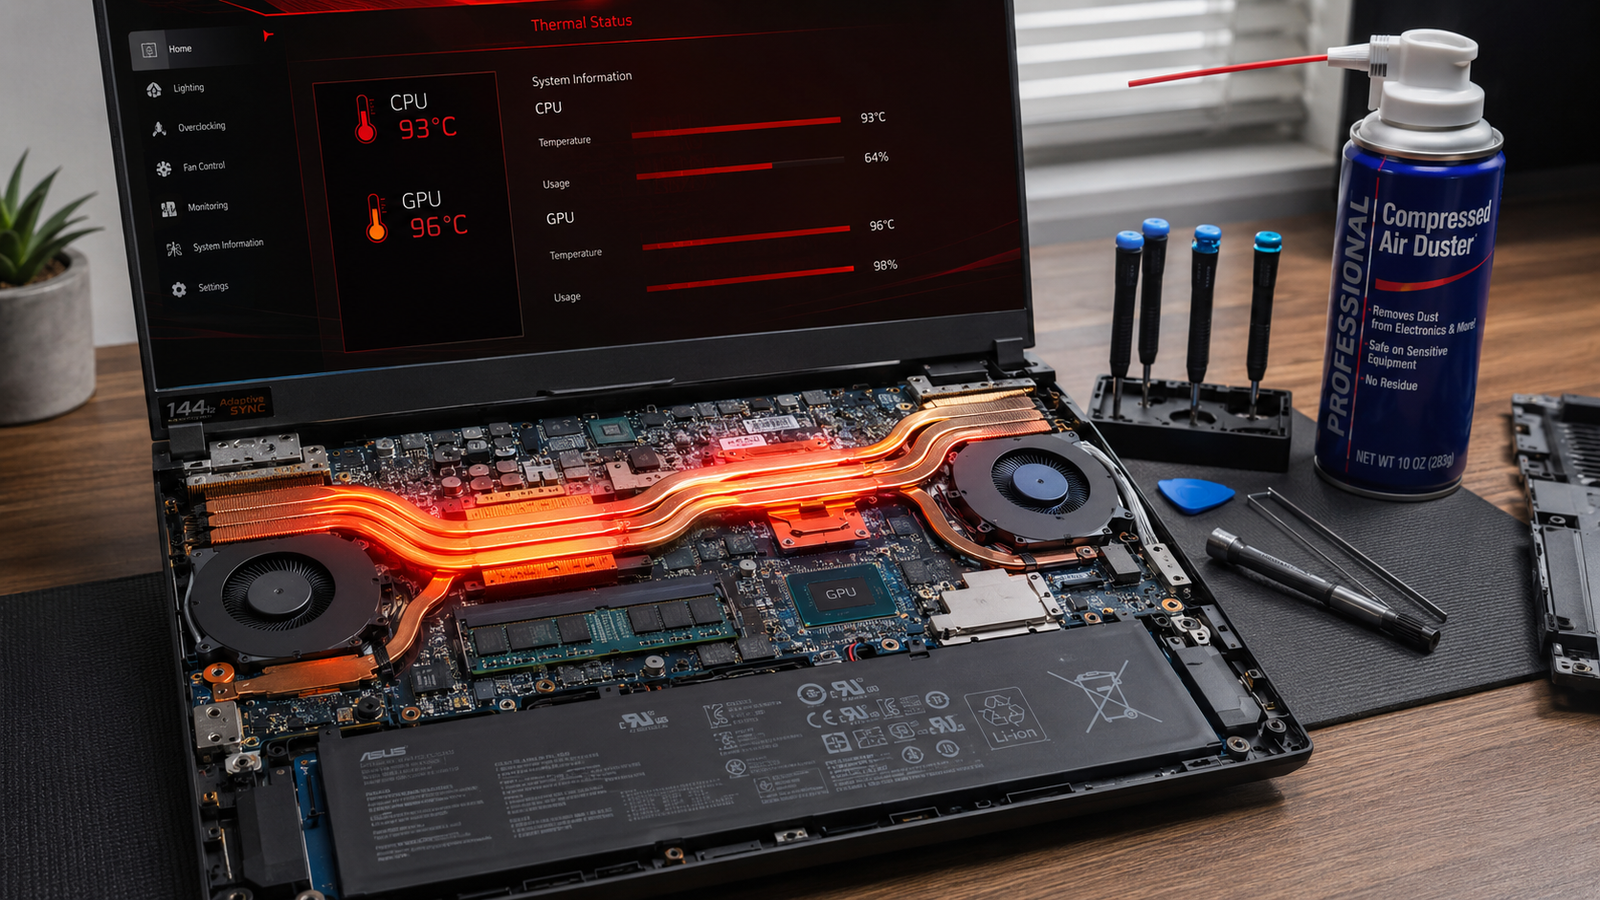
A laptop GPU overheats most often because of dust-clogged vents, dried thermal paste, or a fan that is no longer spinning at the right speed. Open your manufacturer’s thermal management software, switch to a high-performance fan mode, and clean the exhaust vents with compressed air. Most laptops recover immediately. If temperatures stay above 90C after those steps, thermal paste replacement is the next fix.
Introduction
Your laptop was running games fine six months ago. Now it crashes fifteen minutes in, or the frame rate drops so badly the game becomes unplayable, or the screen flickers and goes black right when the GPU should be working hardest. You have probably already cleaned the vents and maybe even replaced the thermal paste. The problem came back anyway.
GPU overheating on a laptop is not always one single cause. Dust is the most obvious trigger, but dried thermal paste, a failing fan, aggressive power limits set too high for the chassis, outdated BIOS firmware, and even background software all push GPU temperatures past the point where the chip starts protecting itself. That protection is called thermal throttling, and it is the direct cause of almost every symptom users associate with a failing GPU.
This guide walks through how to confirm the GPU is the actual problem, what is causing it, and which fix to try first based on what you observe.
Symptoms of GPU Overheating on a Laptop

Performance symptoms
- FPS drops during the same moments every session, usually 10 to 20 minutes after launch
- Stutter that gets worse as the session goes longer, not when the scene is more demanding
- Frame rate that starts high and gradually degrades without changing graphics settings
- Game performance that feels fine on battery but drops when plugged in (or the reverse)
Visual symptoms
- Screen artifacts: colored blocks, flickering pixels, horizontal lines during gaming
- Screen going black for 1 to 3 seconds then recovering
- Full black screen crash followed by either a reboot or a frozen screen
System symptoms
- Sudden shutdown with no warning or error message during gaming or video rendering
- Fans spinning to maximum speed and staying there throughout gaming sessions
- Bottom of the laptop extremely hot near the GPU exhaust vent area
- Windows reporting the GPU in Device Manager with a yellow warning flag after a thermal crash
Monitoring symptoms
- GPU core temperature consistently above 85C under gaming load
- GPU hotspot temperature above 100C
- GPU clock speed dropping below its base clock while under full load (visible in HWiNFO64 or MSI Afterburner)
Start Here: Fast Diagnosis
Work through this before trying any fix. Knowing the exact pattern saves hours.
If the laptop shuts down or crashes only during GPU-heavy tasks (games, video rendering, GPU stress tests) The GPU is generating more heat than the cooling system can remove. Go to the Troubleshooting Matrix and start with dust and thermal paste.
If the laptop runs but performance degrades over 10 to 20 minutes, then partly recovers when you pause This is classic thermal throttling. The GPU is overheating, cutting its clock speed to reduce heat, then recovering slightly when load drops. The fix is cooling-focused.
If the GPU reaches 100C within 2 to 3 minutes even after cleaning and repasting Either the fan is not spinning correctly, the heatpipe has lost contact with the die, or the GPU itself has a hardware fault.
If the laptop shuts down at temperatures that look normal (below 80C) The thermal sensor threshold may be miscalibrated in firmware, or a different component (CPU, VRM) is reaching its limit through the shared heatpipe. Check CPU temperatures in the same monitoring session.
If the problem started immediately after a Windows Update or GPU driver update Start with the driver rollback fix before touching hardware.
If screen artifacts appear but temperatures are under 85C Overheating is less likely. The issue may be VRAM failure or a dying GPU die rather than a thermal problem.
Tools Needed
Built-in tools
- Task Manager (GPU usage and temperature on Windows 11, Win+X then Task Manager)
- Device Manager (check GPU detection and driver status)
Software tools
- HWiNFO64: most detailed GPU temperature monitoring available for free, shows core and hotspot separately
- MSI Afterburner: real-time temperature overlay and custom fan curves
- GPU-Z: GPU specification verification and sensor tab for temperature history
- FurMark: GPU stress test to reproduce overheating on demand
- UserBenchmark or 3DMark: controlled GPU load testing with logging
Manufacturer tools (check for your brand)
- ASUS Armoury Crate: fan mode control and temperature monitoring
- MSI Center / Dragon Center: performance profiles and fan tuning
- Lenovo Vantage: thermal mode switching and hardware diagnostics
- Dell SupportAssist / Dell Power Manager: thermal management profiles
- HP Omen Command Center / HP Support Assistant: fan control and cooling diagnostics
- Acer PredatorSense / NitroSense: fan mode and performance profile switching
Hardware tools
- Compressed air can: vent and heatsink cleaning
- Small Phillips head screwdriver set: required for opening most laptops
- Thermal paste (Arctic MX-6, IC Diamond, or Thermal Grizzly Kryonaut): for repasting
- Spudger or plastic pry tool: for safely opening laptop back panels
Troubleshooting Matrix
| Symptom | Likely Cause | Fast Fix |
| FPS drops after 10 to 20 minutes of gaming | Thermal throttling from dust or dried paste | Clean vents, switch to high-performance fan mode |
| Sudden shutdown during gaming with no warning | GPU hit thermal shutdown threshold | Check temperature with HWiNFO64 during a short gaming session |
| Artifacts and screen flickering under GPU load | GPU overheating or VRAM stress | Monitor hotspot temperature; repaste if above 100C |
| Black screen that recovers after a few seconds | GPU driver crash from overheating | Check temperatures, update or roll back GPU driver |
| Fans at max speed but GPU still hits 90C+ | Heatsink blocked with dust or thermal paste degraded | Disassemble and clean heatsink fins; repaste |
| GPU overheats immediately after driver update | Driver-side power management issue | Roll back driver or install manufacturer-specific driver |
| Temperatures look normal but laptop still crashes | Shared heatpipe CPU heat, or failing PSU delivery | Monitor both CPU and GPU simultaneously |
| GPU overheating during light tasks like video playback | Background process forcing GPU load (check Task Manager) | Close unused apps; scan for mining malware |
What Causes GPU Overheating on a Laptop

Dust Buildup in the Heatsink and Vents
Why it happens: Laptop heatsinks use densely packed aluminum fins to move heat away from the GPU die. Over 12 to 18 months of regular use, those fins collect a layer of compacted dust that blocks airflow almost completely. The fan spins at full speed but cannot move heat out of the system because the fins are blocked.
How to identify it: Hold the laptop near the exhaust vent during gaming. If airflow feels weak or barely present despite fan noise, the fins are blocked. You can also shine a flashlight through the vent and see the blockage visually.
What users misunderstand: Blowing compressed air into the intake vent pushes dust deeper into the heatsink. The correct direction is always into the exhaust vent to push dust outward.
Confirmation sign: After cleaning the fins with compressed air, GPU temperatures drop noticeably within the first 5 minutes of testing.
Dried or Degraded Thermal Paste
Why it happens: Thermal paste fills the microscopic gaps between the GPU die and the copper heatpipe base. Over 3 to 5 years, the paste dries out, cracks, or separates. When that happens, the GPU is essentially generating heat with no efficient path to the heatsink.
How to identify it: If you have cleaned the vents and fans but temperatures are still hitting 90C or above, paste degradation is the likely cause. On laptops older than 3 years, this is the single most common root cause we see in the shop.
What users misunderstand: Some users replace the paste, see temperatures drop, then report the problem returned after the next reboot. This usually means the paste was applied too thick and spread unevenly when the laptop was closed and reopened. A pea-sized dot in the center of the die is the correct amount.
Confirmation sign: GPU temperatures that were previously hitting 95C+ drop to 75C to 82C within one gaming session after repasting.
Fan Failure or Incorrect Fan Speed
Why it happens: Laptop fans run continuously for years under high RPM load. The bearings degrade over time, causing the fan to spin slower than it should or produce a grinding noise. A fan running at half speed provides significantly less airflow than the thermal design requires.
How to identify it: Open MSI Afterburner and watch the fan speed reading while running a GPU stress test. If the GPU hits 90C but the fan is only at 40 to 50 percent speed, the fan is not responding correctly. You should also hear the fan noticeably increase speed as temperature rises.
What users misunderstand: A fan that sounds loud is not necessarily running at full speed. Fan noise can come from a bearing issue while the actual RPM is lower than it should be. Always confirm with a monitoring tool.
Confirmation sign: Manually setting a more aggressive fan curve through Afterburner or your manufacturer’s software causes immediate temperature reduction.
Thermal Pads on VRAM and VRMs
Why it happens: Dedicated laptop GPUs include video memory (VRAM) chips and voltage regulation modules (VRMs) arranged around the GPU die on the same circuit board. These are cooled by thermal pads that transfer heat to a secondary section of the same heatpipe or to the back plate. Those pads compress and dry out just like thermal paste does.
How to identify it: After repasting the GPU die, if temperatures are still problematic or if the GPU hotspot reading is 15 to 20C higher than the core reading in HWiNFO64, the VRAM pads are likely failing.
What users misunderstand: Many users (and some guides) only replace the main GPU die paste and ignore the VRAM pads entirely. On gaming laptops with high-end dGPUs like the RTX 4070 or RX 7600M, VRAM temperatures drive the hotspot reading, not the core temperature.
Confirmation sign: After replacing thermal pads, the hotspot temperature drops significantly, often by 10 to 20C.
Power Limit Set Too High for the Chassis
Why it happens: Some gaming laptops ship from the factory with GPU power limits that exceed what the cooling system can handle at full boost. Manufacturers also release BIOS updates that adjust power limits, and third-party overclocking software can push TGP above the thermal design ceiling.
How to identify it: If the GPU is hitting its temperature limit within 2 to 3 minutes of any load, even after cleaning and repasting, the power limit may be the issue. Check the GPU TGP setting in Afterburner or in your manufacturer’s software.
What users misunderstand: More power does not always mean better gaming performance on a laptop. A GPU that constantly thermal throttles at 105W TGP often performs worse than one that sustains 80W stably because sustained clock speed beats peak clock speed that only holds for seconds.
Confirmation sign: Reducing the power limit in Afterburner by 10 to 15 percent causes temperatures to drop immediately without a noticeable FPS reduction in most games.
Outdated BIOS or GPU Drivers
Why it happens: Manufacturer BIOS updates frequently include thermal management improvements, fan curve adjustments, and power limit calibrations specific to your laptop model. An outdated BIOS can mean the fan ramps up too late, the shutdown threshold is miscalibrated, or the GPU is allowed to consume more power than the cooling system was designed for.
How to identify it: GPU overheating that started immediately after a Windows Update (which sometimes silently installs GPU drivers) or that appears on an otherwise clean-running laptop points to a driver or firmware issue.
What users misunderstand: The GPU driver installed by Windows Update is a generic Microsoft-certified version. It does not include your laptop manufacturer’s power management customizations. Always use the driver from your laptop manufacturer’s support page rather than directly from NVIDIA or AMD.
Confirmation sign: After installing the manufacturer-specific GPU driver and updating the BIOS, fan speed response improves and GPU temperatures drop during the same workloads.
Shared Heatpipe Thermal Saturation
Why it happens: Most budget and mid-range laptops route both the CPU and GPU through the same heatpipe and heatsink assembly. When the CPU is also running hot, it saturates the shared heatpipe. The GPU receives less cooling capacity than its temperature readings suggest it needs, and both components throttle simultaneously.
How to identify it: Monitor CPU and GPU temperatures simultaneously in HWiNFO64 during a gaming session. If the CPU is hitting 90C or above at the same time the GPU is hitting 85C+, shared heatpipe saturation is contributing to the GPU problem.
What users misunderstand: Most forum advice tells users to focus only on GPU temperature. We have seen dozens of cases where the GPU looks like the problem but the real source is the CPU pushing heat through the same pipe.
Confirmation sign: Reducing CPU load (capping frame rate to reduce game CPU demand, or setting the CPU power limit to 80 percent) causes GPU temperatures to drop even when the GPU workload stays the same.
Malware Using GPU Resources
Why it happens: Cryptomining malware specifically targets the GPU because GPU hashing power is far more valuable than CPU power. A laptop with a dGPU running mining malware will show high GPU usage in Task Manager even when no GPU-intensive applications are open.
How to identify it: Open Task Manager and check the GPU usage column. If GPU utilization is sitting above 30 to 40 percent with only a browser and desktop open, something is using the GPU without your knowledge. Run Malwarebytes and Windows Defender full scan.
What users misunderstand: Standard antivirus scans sometimes miss GPU-targeted mining scripts running through browser extensions or injected into system processes.
Confirmation sign: After removing the malware or suspicious browser extensions, GPU idle temperatures drop from 60 to 70C back to 30 to 45C.
What We See Most Often
In the shop, dust-blocked heatsinks account for the majority of GPU overheating complaints on laptops between 2 and 4 years old. The vent fins collect dust so gradually that users do not notice the progressive temperature rise until something fails or performance drops noticeably.
For laptops older than 4 years, dried thermal paste is the more common root cause. The paste degrades with heat cycling, and at a certain point, cleaning the vents alone does nothing because the primary thermal path is broken.
The misdiagnosis we see most frequently is users blaming the GPU itself. A laptop GPU that shuts the system down at 95C is working exactly as it is designed to. The failure is almost always in the cooling path to the GPU, not the GPU die itself. Actual GPU hardware failure is far less common than a degraded thermal interface, and the symptoms are different: artifacts at low temperatures, black screens without prior overheating, or GPU not detected in Device Manager.
How to Diagnose GPU Overheating

Step 1: Install HWiNFO64 and establish a baseline temperature
Download HWiNFO64 from hwinfo.com and run it in Sensors-only mode. Note the GPU core and GPU hotspot temperatures at idle (after 5 minutes of desktop use with no GPU-heavy applications open). Idle GPU temperatures should be between 30C and 50C.
Expected result: You have confirmed idle temperatures before any load. If failed: If the GPU is already at 60C or above at idle, check Task Manager for unexpected GPU usage immediately. Next action: Move to Step 2.
Step 2: Run a controlled GPU load test
Open FurMark or launch a game you know causes the issue. Watch GPU core and hotspot temperatures in real time in HWiNFO64. Note the highest temperature reached before any crash, shutdown, or throttle event occurs.
Expected result: You now have a peak temperature reading under load. If failed: If the laptop shuts down within 60 seconds of load, the thermal protection threshold is being hit almost immediately, indicating either very blocked vents or a completely failed thermal paste. Next action: Record the temperature and compare against the thresholds in the section above.
Step 3: Check GPU fan speed response
While running FurMark, watch the GPU fan speed percentage in HWiNFO64. As temperature rises from 50C toward 80C, the fan speed should visibly increase.
Expected result: Fan speed climbs from around 40 percent at idle to 70 to 90 percent at full load. If failed: If fan speed stays flat or low despite high GPU temperature, the fan is failing or the manufacturer’s thermal management profile is set to a quiet mode. Next action: Try switching to the highest performance fan mode in your manufacturer’s software, then rerun the test.
Step 4: Inspect the exhaust vent physically
Hold your hand or a piece of paper near the exhaust vent while running FurMark. You should feel strong warm airflow. If airflow is weak or barely present, the heatsink fins are blocked.
Expected result: Strong, warm airflow from the exhaust vent under GPU load. If failed: Weak airflow despite the fan running means the fins are blocked. Cleaning is required before any other fix. Next action: Proceed to Fix 1 (vent and heatsink cleaning).
Step 5: Monitor CPU temperature simultaneously
In HWiNFO64, check CPU temperature readings during the same gaming or stress test session. Note whether the CPU is also hitting high temperatures (above 85C) at the same time as the GPU.
Expected result: CPU stays below 85C during gaming, GPU is the sole component hitting high temperatures. If failed: Both CPU and GPU hitting 85C or above simultaneously indicates shared heatpipe saturation or a system-wide cooling failure. Next action: Address cooling for both components or reduce CPU load while testing GPU fixes.
Which Fix Usually Works?
| Fix | Typical Success Likelihood | Cost | Difficulty |
| Clean exhaust vents with compressed air | Very Common | $5 to $10 | Easy |
| Switch manufacturer fan profile to performance mode | Very Common | Free | Easy |
| Install correct manufacturer GPU driver | Common | Free | Easy |
| Update BIOS firmware | Common | Free | Moderate |
| Reduce GPU power limit in Afterburner | Common | Free | Easy |
| Open laptop and clean heatsink fins deeply | Common | $5 to $10 | Moderate |
| Replace GPU thermal paste | Common | $10 to $20 | Moderate |
| Replace thermal pads on VRAM and VRMs | Occasional | $15 to $40 | Hard |
| Replace laptop cooling fan | Occasional | $25 to $80 | Moderate |
| Professional reflow or GPU replacement | Rare | $150 to $400 | Professional only |
Step-by-Step Fixes

Fix 1: Clean Exhaust Vents with Compressed Air
Cost: $5 to $10 Time: 5 to 10 minutes Difficulty: Easy
- Power off the laptop completely and unplug the charger.
- Locate all exhaust vents (usually on the left side, right side, or rear of the laptop).
- Hold the can of compressed air upright and at an angle.
- Insert the straw into the exhaust vent opening, not the intake.
- Blast compressed air in 2 to 3 second bursts to push dust outward.
- Repeat until dust stops visibly exiting the vent.
- Power on and monitor GPU temperature during gaming.
Expected result: GPU temperatures drop by 5 to 15C during the first gaming session. If failed: The blockage is deeper in the heatsink fins and requires opening the laptop. Next action: Proceed to Fix 4 (internal heatsink cleaning). Technician Tip: Compressed air alone clears light accumulations. On a laptop that has never been cleaned in 2 or more years, the fins are usually packed solid with compressed dust that requires a brush or opening the laptop to remove fully.
Fix 2: Switch to Performance Fan Mode in Manufacturer Software
Cost: Free Time: 5 minutes Difficulty: Easy
- Open your manufacturer’s thermal management application.
- Locate the fan or performance profile settings.
- Switch from Balanced, Silent, or Auto mode to Performance or Turbo mode.
- Launch a game or run FurMark and compare GPU temperatures.
ASUS: Armoury Crate, switch from Balanced to Performance or Turbo mode. MSI: MSI Center or Dragon Center, switch to Extreme Performance mode. Lenovo: Vantage, switch from Intelligent Cooling to Performance mode using Fn+Q shortcut. Dell: Dell Power Manager, switch from Cool to Ultra Performance. For Alienware, use Command Center Thermal Mode set to Performance. HP Omen: HP Omen Command Center, switch from Balanced to Performance or custom fan control. Acer: PredatorSense or NitroSense, enable Turbo fan mode before launching games.
Expected result: Fan activates more aggressively earlier in the temperature curve, preventing the GPU from reaching throttle temperatures. If failed: Performance mode reduces but does not eliminate the overheating. Next action: Combine with vent cleaning and power limit reduction. Technician Tip: On many Lenovo ThinkPads and IdeaPads, the Fn+Q shortcut cycles between thermal modes even without Vantage installed. Press it once before gaming to confirm you are in Performance mode.
Fix 3: Install the Correct Manufacturer GPU Driver
Cost: Free Time: 15 to 20 minutes Difficulty: Easy
- Go to your laptop manufacturer’s support page and search for your exact model number.
- Download the GPU driver listed under your model, not from NVIDIA.com or AMD.com directly.
- Download DDU (Display Driver Uninstaller) from guru3d.com.
- Boot into Safe Mode: Settings, System, Recovery, Advanced Startup, Restart Now, then Troubleshoot, Advanced Options, Startup Settings, Restart, press 4.
- In Safe Mode, run DDU and select Clean and Restart.
- After restart in normal mode, install the manufacturer GPU driver.
Expected result: Power management profile specific to your laptop model is restored, reducing peak GPU power consumption and heat output. If failed: The driver is not the root cause. Move to hardware fixes. Next action: Proceed to Fix 4. Technician Tip: If no manufacturer-specific GPU driver is available for your model (common on some Acer and ASUS budget models), download the GPU driver from the NVIDIA or AMD GeForce/Radeon support page, choosing your specific GPU model rather than using auto-detect. Expert Warning: Never use the GPU driver version offered by Windows Update as your only option. Microsoft’s generic driver strips out OEM power management layers that regulate GPU heat output on laptops.
Fix 4: Update BIOS Firmware
Cost: Free Time: 15 to 30 minutes Difficulty: Moderate
- Open System Information (search for it in the Start menu) and note your current BIOS version and date.
- Go to your manufacturer’s support page and search by model number.
- Download the latest BIOS update file.
- Read the manufacturer’s installation instructions for your specific model before proceeding.
- Ensure the laptop is plugged in before starting the BIOS update.
- Run the BIOS update utility and follow on-screen instructions. Do not power off during the update.
- After restart, retest GPU temperatures during gaming.
Expected result: Thermal management improvements from the BIOS update reduce fan curve delays and improve temperature headroom. If failed: The BIOS was already current, or the update did not change thermal behavior. Next action: Proceed to Fix 5. Technician Tip: BIOS updates for gaming laptops from ASUS ROG, Lenovo Legion, and MSI frequently include thermal fixes. Check the BIOS changelog on the manufacturer’s support page before updating to confirm thermal improvements are included. Expert Warning: Never update the BIOS on battery power. A failed BIOS update from a power interruption can brick the laptop. Confirm the charger is connected and delivering power before starting.
Fix 5: Reduce GPU Power Limit in MSI Afterburner
Cost: Free Time: 10 minutes Difficulty: Easy
- Download and install MSI Afterburner from msi.com.
- In Afterburner, locate the Power Limit slider (displayed as a percentage).
- Reduce the power limit by 10 percent from its current setting.
- Click the checkmark to apply, then run a gaming session and monitor temperatures.
- If temperatures improve but FPS drops are noticeable, try a 5 percent reduction instead.
Expected result: GPU peak temperature drops by 5 to 10C with minimal FPS impact, eliminating thermal throttling. If failed: The GPU thermal problem is too severe for a power limit adjustment alone. Next action: Proceed to hardware fixes. Technician Tip: On most gaming laptops, reducing the GPU power limit by 10 to 15 percent costs 3 to 8 percent FPS in demanding games but eliminates thermal throttle events that were causing larger performance drops. The net result is often faster sustained performance, not slower.
Fix 6: Undervolt the GPU
Cost: Free Time: 30 to 60 minutes Difficulty: Moderate
- Open MSI Afterburner and navigate to the voltage/frequency curve editor (Ctrl+F).
- Locate the highest stable voltage your GPU runs at and reduce it by 50 to 100mV.
- Apply the curve and run a 30-minute FurMark session to test for stability.
- If stable, increase the undervolt by another 25mV and test again.
- If crashes occur, pull back 25mV and lock that as your stable undervolt.
Expected result: GPU runs 5 to 15C cooler at the same clock speeds, with improved sustained performance. If failed: NVIDIA RTX 30 series and some AMD laptop GPUs have locked voltage curves that prevent undervolting in Afterburner. Use Throttlestop or Intel XTU for CPU undervolting instead. Next action: Proceed to Fix 7 if hardware-level thermal improvements are needed. Technician Tip: Undervolting is particularly effective on RTX 2060 through RTX 4070 laptop GPUs, which often ship with conservative voltage curves that generate unnecessary heat.
Fix 7: Deep Internal Heatsink Cleaning (Requires Opening the Laptop)
Cost: $5 to $10 Time: 30 to 60 minutes Difficulty: Moderate
- Power off completely and remove the charger.
- Remove the back panel screws and gently pry off the back cover.
- Locate the GPU heatsink and fan assembly.
- Disconnect the fan cable from the motherboard before removing the assembly.
- Remove the screws securing the heatsink in the order marked on the board (usually numbered).
- Lift the heatsink and use a brush or compressed air to clean the fins thoroughly.
- Reassemble, reconnect the fan cable, and reinstall the back panel.
- Power on and monitor temperatures.
Expected result: GPU temperatures drop significantly compared to compressed-air-only cleaning, particularly on laptops with 2 or more years of use. If failed: The heatsink is clean but temperatures remain high, indicating thermal paste failure. Next action: Proceed to Fix 8 (thermal paste replacement). Technician Tip: When removing the heatsink assembly, hold it level. Tilting it too far can cause dried paste flakes to fall onto the motherboard. Blow compressed air over the motherboard surface carefully after heatsink removal. Expert Warning: On Dell XPS and HP Spectre models, the heatsink screws are torqued very lightly. Do not overtighten on reassembly. Overtightening bends the copper heatpipe contact surface and makes thermal contact worse, not better.
Fix 8: Replace GPU Thermal Paste
Cost: $10 to $20 Time: 45 to 90 minutes Difficulty: Moderate
- Open the laptop and remove the heatsink as described in Fix 7.
- Clean the old thermal paste from both the GPU die and the heatsink contact surface using 90 percent or higher isopropyl alcohol and a lint-free cloth or coffee filter.
- Clean until both surfaces are completely bare metal. Remove every trace of the old paste.
- Place a pea-sized dot of new thermal paste in the center of the GPU die.
- Reinstall the heatsink and tighten screws in diagonal order (not sequential) to ensure even contact pressure.
- Reassemble the laptop and run a 30-minute gaming session while monitoring temperatures.
Expected result: GPU temperatures drop by 10 to 20C compared to pre-repaste readings. If failed: The paste contact is good but temperatures are still high, suggesting VRAM pad failure or heatsink damage. Next action: Proceed to Fix 9 (thermal pad replacement). Technician Tip: Use Thermal Grizzly Kryonaut for gaming laptops that run moderately hot (under 90C after cleaning). Use Thermal Grizzly Conductonaut or IC Diamond for laptops that were running consistently at 95C or above, as those require a paste with higher thermal conductivity. Expert Warning: Liquid metal thermal paste (Conductonaut) conducts electricity. It must never contact the capacitors, resistors, or any component surrounding the GPU die. Use only if you are fully comfortable with the application process and prepared to mask surrounding components carefully.
Fix 9: Replace VRAM and VRM Thermal Pads
Cost: $15 to $40 Time: 60 to 90 minutes Difficulty: Hard
- After removing the heatsink, identify the thermal pads on the VRAM chips and VRM components around the GPU die.
- Note the thickness of each pad before removal (measure with a caliper if available, or look up the spec for your model on ifixit.com or your manufacturer’s service manual).
- Remove the old pads and clean the surfaces with isopropyl alcohol.
- Apply new pads of the correct thickness. Common thicknesses are 0.5mm, 1mm, and 1.5mm.
- Reassemble and test.
Expected result: GPU hotspot temperature drops by 10 to 20C. Sustained performance improves because VRAM is no longer the temperature ceiling. If failed: Pad thickness was incorrect or pad material conductivity is too low. Next action: Verify pad thickness matches the original spec and retry with a higher-conductivity pad (above 8 W/mK recommended). Technician Tip: Pads that are too thin will not make contact. Pads that are too thick can apply excessive pressure on VRAM chips. Look up your exact model’s service manual on the manufacturer’s website or ifixit.com to confirm the correct pad thickness before purchasing.
Fix 10: Replace the Laptop Cooling Fan
Cost: $25 to $80 Time: 45 to 90 minutes Difficulty: Moderate
- Open the laptop and locate the GPU cooling fan (some laptops have two separate fans for CPU and GPU).
- Disconnect the fan cable from the motherboard.
- Remove the screws securing the fan and lift it out.
- Install the replacement fan (source from your manufacturer’s spare parts page or a reputable third-party supplier matching the exact part number).
- Reconnect the fan cable and reassemble.
- Monitor fan speed response in HWiNFO64 during a load test.
Expected result: Fan speed responds correctly to temperature changes and reaches full rated RPM under load. If failed: The fan cable connection was not fully seated, or the replacement fan is incorrect for the model. Next action: Confirm the replacement fan part number against the original. If correct and still not functioning, the fan header on the motherboard may be damaged. Technician Tip: Before replacing a fan that is making noise, open the laptop and check whether the blade is physically hitting a displaced wire or a piece of compressed dust. A small obstruction causes the same grinding noise as bearing failure and takes 30 seconds to fix.
Mistakes That Make the Problem Worse
Blowing compressed air into the intake vent Most laptop users aim the compressed air can at the visible bottom intake grille because it is accessible. This pushes compacted dust further into the heatsink fins, making the blockage worse and harder to remove. Always aim at the exhaust vent to blow dust out the correct direction.
Using a vacuum cleaner on laptop vents Vacuum motors generate static electricity. That static discharge can destroy GPU memory, capacitors, and the motherboard. Every technician has seen boards killed this way. Compressed air only.
Applying too much thermal paste A large blob of paste does not improve heat transfer. It increases the distance between the GPU die and the heatpipe contact surface. It also spreads under pressure and can reach surrounding components. One pea-sized dot in the center is the maximum correct amount.
Running maximum fan speed permanently through software Tools like MSI Afterburner allow you to force the fans to 100 percent at all times. This does not fix the underlying cause and accelerates bearing wear. Fan bearings on most laptop fans are rated for roughly 40,000 to 50,000 hours, but sustained maximum speed reduces that significantly.
Repasting with the wrong paste Generic thermal paste from a hardware store or a paste with low thermal conductivity (under 6 W/mK) makes little improvement over dried OEM paste. Use Arctic MX-6, Thermal Grizzly Kryonaut, or IC Diamond. Budget thermal paste is a wasted repair attempt.
Skipping the BIOS update On ASUS ROG, Lenovo Legion, and MSI gaming laptops specifically, BIOS updates frequently adjust fan curves and GPU power limits. Users who clean and repaste but skip the BIOS update sometimes see only partial improvement because the fan is still ramping up too late.
Running GPU-heavy tasks on battery power alone Laptops reduce GPU power delivery on battery to preserve battery life. This causes the GPU to oscillate between power states repeatedly, which generates heat and stresses the VRAM. Always plug in for gaming or rendering.
Misidentifying CPU heat as GPU heat On laptops with a shared heatpipe, the CPU can thermally saturate the pipe and cause GPU temperatures to rise even when the GPU workload is modest. Treating this as a GPU-only problem and repasting only the GPU gives partial results. Both processors share the same cooling path and both must be addressed.
Brand-Specific Considerations
Dell
Dell XPS and Inspiron models have very tight heatsink tolerances. The heatsink screws are torqued lightly from the factory. Overtightening during reassembly bends the copper heatpipe contact plate and worsens thermal contact. Dell’s BIOS updates are among the most aggressive for thermal management. Check SupportAssist for BIOS and chipset driver updates before opening the laptop. Alienware models use a dedicated software called Command Center for thermal profiles. Set the Thermal Mode to Performance before gaming.
HP
HP Omen and Victus models support thermal profiling in HP Omen Command Center. The Omen Hub application also provides fan control. HP’s BIOS can be updated directly through HP Support Assistant. One common HP quirk: the fan diagnostic in BIOS (access via F10 at startup, then Component Tests) is genuinely useful for confirming whether the fan is reaching rated RPM before deciding whether to replace it.
Lenovo
Lenovo Legion and IdeaPad Gaming models use Vantage for thermal modes. The Fn+Q keyboard shortcut cycles between Quiet, Balanced, and Performance modes without needing to open any software. Lenovo’s thermal pads on Legion models are known to degrade faster than average; if a Legion laptop is 3 or more years old and showing GPU overheating, pad replacement alongside paste replacement often makes a significant difference. Always download GPU drivers from lenovo.com rather than NVIDIA.com for Legion models.
ASUS
ASUS ROG and TUF models use Armoury Crate for thermal and fan management. The Turbo mode in Armoury Crate is the highest fan profile and is appropriate for gaming; it is not harmful to use it regularly. ASUS ROG Zephyrus models have an underside vent design that requires elevating the rear of the laptop for adequate airflow; the laptop’s built-in stand (MUX display hinge design) serves this purpose on some models. ASUS BIOS updates are particularly important to apply before any hardware thermal work.
Acer
Acer Predator and Nitro models use PredatorSense and NitroSense respectively for fan and performance management. Acer’s OEM GPU drivers must be sourced from acer.com rather than NVIDIA.com because they include power management layers not present in the generic NVIDIA package. Enable Turbo fan mode before launching games in PredatorSense, not after the game is already running.
MSI
MSI gaming laptops historically run hotter than other brands at stock settings because MSI ships some models with GPU power limits set to the maximum the chip supports. Reducing the GPU TGP in MSI Center is often the fastest single fix before any hardware work. MSI Center (the current version, formerly Dragon Center) includes a dedicated hardware monitor that shows GPU temperature, fan speed, and power consumption in one panel. The Cooler Boost function in MSI Center forces fans to 100 percent and is useful as a diagnostic to confirm whether the thermal problem is fan-speed-related or a blocked heatsink.
Repair Shop Diagnosis

When a laptop comes in with GPU overheating, the first 10 minutes are always the same. We run HWiNFO64 in the background, open a gaming session, and watch which temperature climbs first and how fast. That pattern tells us more than any symptom description.
GPU hitting 90C within 2 minutes of load means the heatsink is blocked or the paste is gone. GPU climbing gradually to 85C over 15 minutes and stabilizing there with throttling means the cooling system is working but undersized for the current power limit. Both look like overheating but the fix is completely different.
Tools used in the shop: HWiNFO64 for temperature logging, MSI Afterburner for fan curve control during diagnostics, FurMark for controlled GPU stress, Throttlestop for CPU power limit adjustment when testing shared heatpipe theories, compressed air and a parts cleaning brush for physical inspection.
A typical GPU overheating repair takes 30 to 90 minutes depending on how difficult the laptop is to disassemble. Common costs for professional repair range from $60 to $150 for cleaning and repasting, $80 to $200 if thermal pads need replacement, and $120 to $350 for a fan replacement combined with a full thermal service.
Professional repair is worth it when the laptop is a gaming model and has not been serviced in 3 or more years, when the laptop is under warranty and opening it yourself would void that warranty, or when previous self-repair attempts did not resolve the issue after two or three tries.
When Hardware Replacement Is Necessary
Fan replacement When the fan bearings have failed, the fan makes grinding or rattling sounds under load, or the fan speed does not increase despite rising temperatures in monitoring software. Fan replacement is one of the more affordable hardware repairs.
Heatsink replacement When the copper heatpipe has a visible kink, a dent from a drop, or the contact surface is visibly warped. A damaged heatpipe cannot transfer heat regardless of how much fresh paste is applied. Heatsink assemblies for most models are available from OEM suppliers for $30 to $100.
Thermal pad replacement When the GPU hotspot temperature remains 15C or more above core temperature after repasting, or when the VRAM chips are visibly cracked or scorched on inspection after heatsink removal.
Motherboard or GPU replacement When the GPU itself has hardware failure, which shows differently from overheating. The symptoms of a failing GPU die are: artifacts at normal temperatures, GPU not detected in Device Manager, system crashes immediately when any GPU-accelerated application opens even after a clean driver install, or GPU sensor readings that are stuck, missing, or clearly wrong (reading 0C or negative temperatures). At this stage, motherboard replacement or a soldered GPU reball is required.
Stop Troubleshooting and Seek Professional Repair If
Burning smell from the laptop during use Stop immediately and power off. Do not use the laptop until it has been inspected. A burning smell from a GPU indicates a component on the PCB has reached a temperature where it is physically degrading.
Visible discoloration on the heatsink or near GPU components Darkening or burn marks near any component indicate a previous thermal event that may have already caused board damage.
Swollen battery A battery that has expanded from heat exposure is a fire hazard. If the laptop bottom panel is bulging or the trackpad is lifting, the battery has swollen. Do not charge or use the laptop. Take it to a repair shop or contact the manufacturer immediately.
GPU not detected in Device Manager after a thermal crash If the GPU disappears from Device Manager or shows an error code 43 after an overheating event, the die may have partially failed. This occasionally recovers after a full shutdown and cool-down period. If it does not, the GPU is hardware-damaged.
System crashes immediately at any GPU load regardless of temperatures When the system crashes within 10 to 30 seconds of GPU activity even after a clean driver install and at temperatures that appear normal, the GPU die or VRAM has electronic failure independent of thermal problems.
Repeated shutdowns under light load after multiple repair attempts If the laptop shuts down watching video or during light browser use after all thermal fixes have been applied, the issue has escalated beyond thermal management to a hardware fault requiring professional board-level diagnosis.
Prevention Tips
Clean exhaust vents every 3 to 6 months On a gaming laptop used daily, vents start restricting airflow within 3 to 4 months in a dusty environment. A 30-second compressed air blast at the exhaust vent every few months prevents the slow accumulation that causes thermal failure.
Elevate the rear of the laptop during gaming A 2 to 3 centimeter elevation at the rear allows the bottom intake vents to draw in more air. A cooling pad, a rubber stand, or even a stable book accomplishes this. The temperature reduction is usually 3 to 8C, which can be enough to prevent throttling on laptops that run borderline hot.
Always use a hard flat surface Placing a laptop on a bed, couch, or cushion blocks the bottom intake vents completely and causes immediate temperature increases. Beds and fabric surfaces also trap heat around the chassis. Use on hard flat surfaces only.
Replace thermal paste every 3 years Thermal paste does not last forever. On a gaming laptop used heavily, 3 years is a reasonable service interval. Proactive repasting before overheating starts keeps performance consistent and extends hardware life.
Use the correct thermal management profile before gaming Switch to your manufacturer’s Performance or Turbo fan mode before launching a game, not after you notice temperatures climbing. The fan needs to be running at the appropriate speed when the GPU load spike hits at game launch.
Keep GPU drivers from the manufacturer’s page updated New driver versions frequently include power management improvements for specific GPU models and laptop chassis. Staying current prevents the kind of runaway power consumption that generates unnecessary heat.
Set a temperature alert in HWiNFO64 HWiNFO64 can trigger an alert when a temperature sensor crosses a threshold you set. Configure a GPU core temperature alert at 85C so you know when to investigate before performance is impacted.
Avoid running demanding applications while charging in a warm room Charging already generates heat. Combining that with a heavy GPU load in a room above 30C ambient temperature significantly narrows the thermal headroom between normal operating temperature and the throttle point.
Frequently Asked Questions

What temperature is too hot for a laptop GPU? A laptop GPU is in the danger zone when core temperature consistently exceeds 90C under gaming load. NVIDIA laptop GPUs start thermal throttling between 83C and 90C depending on the specific chip. AMD laptop GPUs typically throttle closer to 90C to 95C. Sustained temperatures above 95C reduce hardware lifespan and increase the risk of permanent damage.
Why does my laptop GPU overheat even after cleaning the vents? Vent cleaning removes surface-level dust from the exhaust opening but often does not reach the heatsink fins inside. The fins are where dust actually accumulates into a solid blockage. If external vent cleaning does not help, the laptop needs to be opened for a deep heatsink cleaning and likely a thermal paste replacement.
Can a GPU driver cause overheating? Yes. A GPU driver update can change power management behavior and cause the GPU to consume more power than the cooling system can handle. If overheating began immediately after a Windows Update or a driver update, roll back the GPU driver or install the manufacturer-specific version from your laptop brand’s support page.
Is 85C safe for a laptop GPU while gaming? 85C is borderline. Most NVIDIA laptop GPUs stay under 83C to 85C at peak. If your GPU consistently hits exactly 85C and holds there with consistent frame rates, thermal throttling has likely already started but is mild. Temperatures that stay below 80C during sustained gaming indicate a well-functioning cooling system.
My laptop GPU hits 100C and shuts down. Is the GPU broken? Not necessarily. A GPU shutting down at 100C is responding correctly to a thermal threat. The cooling system is the more likely problem, not the GPU itself. Clean the vents, check fan speed, and replace thermal paste. If the GPU still hits 100C after those fixes, the heatsink is damaged or the fan has failed.
Why does repasting fix the problem for a day but the issue returns? This usually means the paste was applied too thick or too thin. Too thick creates a gap rather than eliminating one. Too thin dries out faster under heat. Use a pea-sized dot in the center of the die and let the heatsink spread it under pressure. If the problem still returns after a careful reapplication, the heatsink contact surface itself may be warped.
Does a cooling pad actually help with GPU overheating? A cooling pad helps when the laptop’s intake vents are on the bottom. Raising the chassis improves airflow to those vents and can reduce temperatures by 3 to 8C. A cooling pad does not substitute for cleaning blocked heatsink fins or replacing degraded thermal paste. Use it as a supplement to proper thermal maintenance, not a replacement for it.
Could malware cause GPU overheating? Yes. Cryptomining malware targets the GPU specifically because GPU computational power is more valuable for mining than CPU power. If your GPU temperature is high during light use and you see unexplained high GPU usage in Task Manager, run Malwarebytes alongside Windows Defender. Remove any suspicious browser extensions.
Conclusion
GPU overheating on a laptop is almost always fixable. Dust buildup and degraded thermal paste cause the majority of cases, and both are resolved with cleaning and repasting at low cost. Start with the software fixes: switch to performance fan mode and install the correct manufacturer GPU driver before opening the laptop. If temperatures remain above 85C under load after those steps, the heatsink needs cleaning and the thermal paste needs replacement. Replacement of the GPU itself is rarely necessary; hardware failure presents differently from thermal failure. If temperatures stay above 90C after a full thermal service, bring the laptop to a repair shop for diagnosis of the heatsink contact or the fan assembly.