
Quick Answer
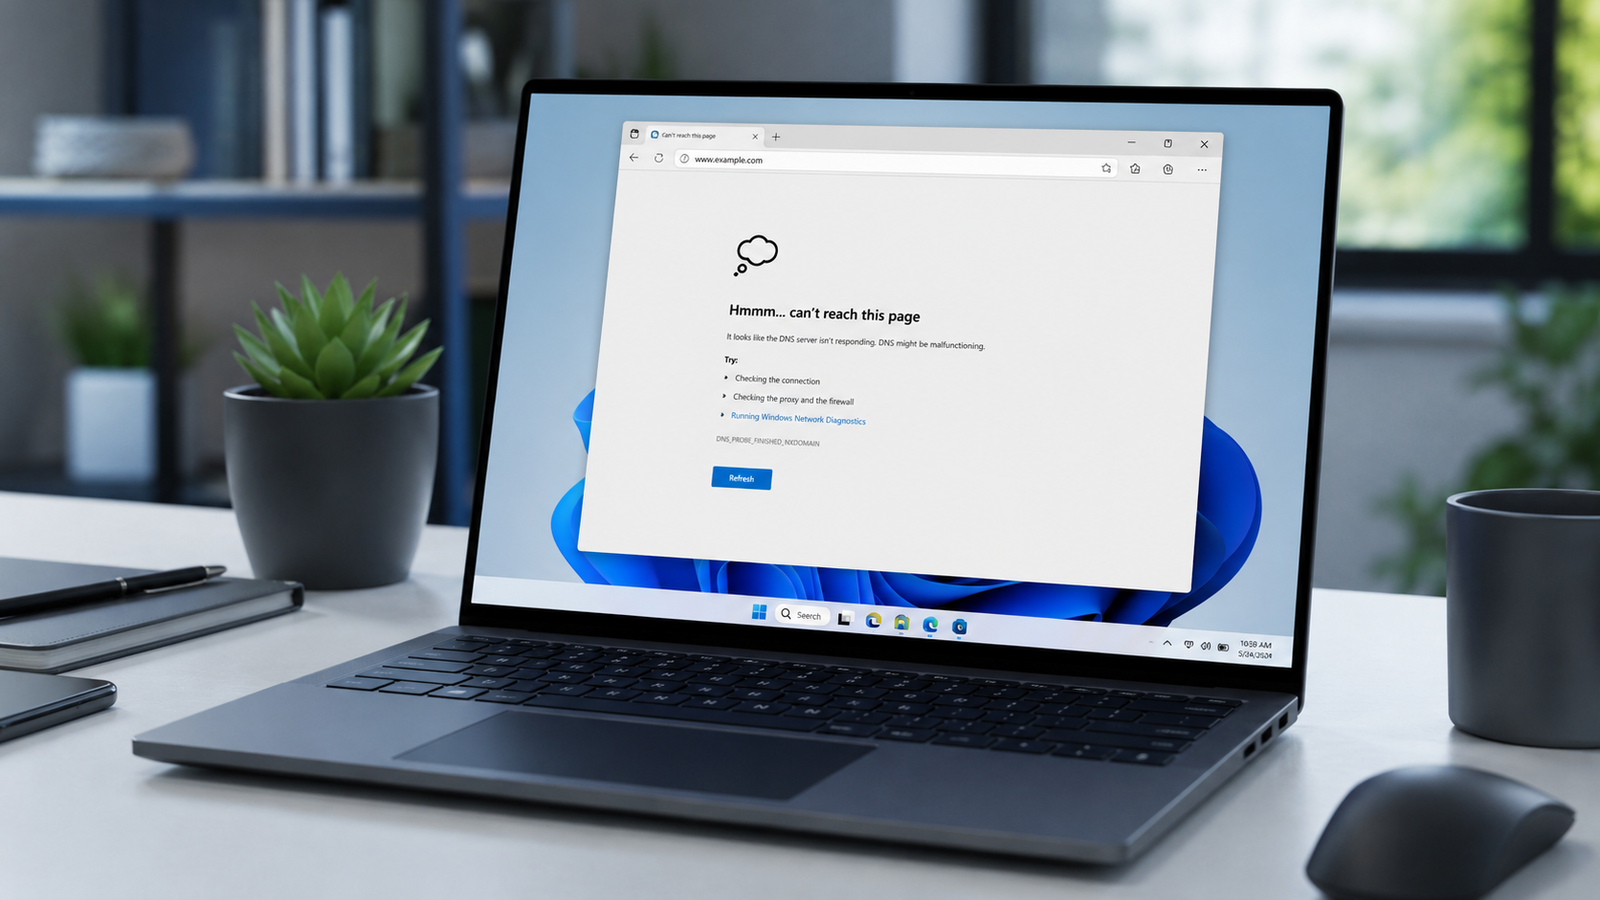
The DNS server not responding error means your laptop cannot reach the system that converts website names into IP addresses. The fastest fix is to flush your DNS cache using ipconfig /flushdns in Command Prompt, then switch to Google’s public DNS (8.8.8.8 / 8.8.4.4). This resolves the problem on most laptops within five minutes.
Introduction
You open Chrome, type in a URL, and nothing loads. Windows runs the network troubleshooter, and it comes back with the same unhelpful message: “DNS server not responding.” Your WiFi shows connected, your phone on the same network loads everything fine, and restarting the router did nothing. That is the exact scenario most people describe when they walk into a repair shop with this error.
DNS stands for Domain Name System. Think of it as your laptop’s phone book. It takes a domain name like google.com and translates it into a numeric IP address your laptop can actually route traffic to. When that translation fails, no websites load, even though your internet connection itself is technically active, which is why the troubleshooter says “DNS server not responding” instead of “no internet connection.”
This guide covers every cause, every fix, and the exact order to try them. You will also get the repair shop perspective on what actually causes this error most often, and the mistakes that send people chasing the wrong problem for hours.
Symptoms of the Problem

- Websites fail to load in all browsers, not just one
- Windows Network Diagnostics reports “DNS server not responding” or “DNS server might be unavailable”
- Ping by domain name fails (e.g., ping google.com) but ping by IP address works (e.g., ping 8.8.8.8)
- WiFi shows as connected with full bars but no pages open
- Other devices on the same network load websites normally
- Error appears only on one browser but other browsers load fine (browser-level DNS cache issue)
- Error appears intermittently, working for a few seconds after each fix then breaking again
- Internet stops working after a Windows update, VPN install, or new antivirus installation
Start Here: Fast Diagnosis
Work through this decision tree before touching any settings. It tells you whether the problem lives on your laptop or your network.
Step 1: Check another device on the same network. If your phone or another laptop loads websites on the same WiFi, the problem is isolated to your laptop. Skip router troubleshooting entirely and jump to the software fixes below.
If no device connects, the problem is your router or ISP. Restart your router first.
Step 2: Try loading a site by IP address. Open Command Prompt and type: ping 8.8.8.8
If that ping succeeds but websites still fail to load, DNS resolution is broken but your internet connection is alive. This is the most common scenario and the fixes below will resolve it.
If the ping to 8.8.8.8 also fails, you have a broader connectivity problem, not just DNS.
Step 3: Try a different browser. If sites load in Firefox but not Chrome, the issue is Chrome’s internal DNS cache, not your system DNS. Clear Chrome’s cache or reset its settings before doing anything else.
If all browsers fail, it is a system-level DNS issue.
Step 4: Check if a VPN or antivirus was recently installed or updated. VPNs and some antivirus tools redirect DNS traffic through their own servers. If the issue started right after an install or update, disable that software first and test immediately.
Tools Needed
Built-in Windows tools:
- Command Prompt (run as Administrator)
- Windows Network Diagnostics (right-click taskbar network icon)
- Device Manager (Win + X, then select Device Manager)
- Network Connections settings (Win + R, type ncpa.cpl)
- Windows PowerShell (Admin)
Built-in commands:
- ipconfig /flushdns
- ipconfig /release and ipconfig /renew
- netsh int ip reset
- netsh winsock reset
- ping 8.8.8.8
Optional third-party tools:
- DNS Benchmark (GRC), which identifies the fastest DNS server for your location
- Wireshark for advanced packet capture for persistent DNS failures
- Manufacturer driver pages: Dell Support Assist, HP Support Assistant, Lenovo Vantage
Troubleshooting Matrix
| Symptom | Likely Cause | Fast Fix |
| All browsers fail, phone works fine | Corrupted system DNS cache | Flush DNS via ipconfig /flushdns |
| All devices on network fail | Router or ISP outage | Restart router, contact ISP |
| One browser fails, others work | Browser-level DNS cache | Clear browser cache or reset browser |
| Works for seconds then breaks again | Network adapter power management | Disable adapter power-saving in Device Manager |
| Started after Windows update | Driver conflict or DNS client service issue | Restart DNS Client service or roll back adapter driver |
| Started after VPN install | VPN hijacking DNS | Disable VPN, flush DNS, retest |
| Started after antivirus install | Antivirus firewall blocking DNS port 53 | Temporarily disable antivirus, test |
| Wired connection works, WiFi fails | WiFi adapter driver conflict | Update or reinstall WiFi adapter driver |
| WiFi works, wired fails | Ethernet adapter driver issue | Update or reinstall Ethernet adapter driver |
What Causes DNS Server Not Responding

Corrupted or Outdated DNS Cache
Your laptop stores a local copy of recent DNS lookups to speed up browsing. Over time this cache collects outdated or incorrect entries. A website might have moved to a new server while your laptop still tries to route you to the old IP address. Windows can also write corrupted entries to the cache after an abrupt shutdown or failed update. When that happens, your laptop sends requests to addresses that no longer exist and the DNS server stops responding.
How to identify it: The error appears suddenly after the laptop had been working fine, often after a forced restart or system crash. Flushing the cache fixes it immediately.
What users misunderstand: Many people flush the DNS cache and think the fix is temporary because the error comes back. The cache is not the underlying problem in those cases. It was just a quick symptom. If the error returns within minutes of flushing, look at the adapter driver or network settings instead.
Confirmation sign: Running ipconfig /flushdns in Command Prompt and getting “Successfully flushed the DNS Resolver Cache” followed by websites loading normally.
Wrong or Unreachable DNS Server Assigned
Your laptop is assigned a DNS server address by your router, usually automatically via DHCP. If that assigned address points to an ISP DNS server that is down, overloaded, or filtered, every DNS request fails. Switching from ISPs also sometimes leaves stale DNS server addresses in your adapter settings. Some routers also misassign DNS after a power cycle.
How to identify it: Other devices on your network work fine. Manually setting DNS to 8.8.8.8 resolves the error immediately.
What users misunderstand: People assume Google DNS (8.8.8.8) is always faster and better. In some regions and network configurations, Cloudflare (1.1.1.1) or your local ISP’s DNS is actually faster. Switching to Google DNS is a reliable fix but not always the optimal long-term setting.
Confirmation sign: Setting a manual DNS address of 8.8.8.8 in your network adapter’s IPv4 properties and websites loading immediately after applying.
Outdated or Corrupted Network Adapter Driver
Your WiFi or Ethernet adapter uses a driver to communicate with Windows. When that driver is outdated, contains bugs, or gets partially overwritten during a Windows update, it can cause intermittent DNS failures. This is especially common with Intel Killer WiFi adapters, Realtek adapters, and Qualcomm Atheros wireless cards, all of which have known power management and driver compatibility issues across Windows updates.
How to identify it: The problem appeared after a Windows update. The error is intermittent, working for a few minutes then failing again. Device Manager shows a yellow warning icon on the network adapter.
What users misunderstand: Windows Update often installs a generic driver version that is not the latest release from the adapter manufacturer. Checking Device Manager and seeing no warnings does not mean the driver is current or the right version.
Confirmation sign: Downloading and installing the latest driver directly from Intel, Realtek, or your laptop manufacturer’s support page resolves the intermittent failures.
Antivirus or Firewall Blocking DNS Traffic
Modern antivirus suites intercept network traffic to scan for threats. Some configurations block DNS queries on port 53 when they detect unusual activity, particularly after a definition update that flags a legitimate DNS server as suspicious. Third-party firewalls can also block the DNS Client service from communicating outbound.
How to identify it: The error appeared right after an antivirus update or installation. Temporarily disabling real-time protection allows websites to load normally.
What users misunderstand: Windows Defender rarely causes this problem on its own. Third-party antivirus tools with their own firewall components, especially older Norton, Kaspersky, or Bitdefender versions. These are the usual suspects. Disabling just the antivirus scan without disabling the firewall component often does not fix the issue.
Confirmation sign: Disabling the antivirus firewall completely (not just the scan) allows DNS to resolve normally. The fix is then to add a DNS exception or whitelist rather than leaving protection off permanently.
VPN Redirecting DNS Through a Failed Server
VPN software creates a virtual network adapter and routes all traffic, including DNS requests, through its own servers. If those VPN DNS servers are down or slow, every website request fails even though the underlying connection is active. This also happens when a VPN is partially connected, meaning the adapter is active but the DNS tunnel is not routing properly.
How to identify it: The error started after installing or enabling a VPN. Disconnecting the VPN and flushing DNS immediately restores internet access.
What users misunderstand: Some VPN clients leave their virtual adapter active even after you click “disconnect.” You may need to fully quit the VPN application from the system tray, not just toggle the connection off, to release the DNS binding.
Confirmation sign: Fully quitting the VPN application from the system tray, flushing DNS, and confirming websites load normally without the VPN active.
Power Management Cutting the Network Adapter
Windows has an aggressive power saving feature that shuts off the network adapter to save battery. On some laptops, particularly those running on battery power or using older adapter drivers, the adapter does not restore its DNS configuration properly when Windows wakes it back up. The adapter reconnects to the network but its DNS cache and assigned server address fail to reinitialize. This produces the intermittent “works for five seconds then breaks again” pattern that drives users in circles.
How to identify it: The error appears after the laptop wakes from sleep, or keeps returning shortly after each fix. The problem is more frequent on battery than when plugged in.
What users misunderstand: Users keep running the network troubleshooter and flushing DNS, both of which temporarily wake the adapter but do not fix the root cause. The troubleshooter often reports success right as the adapter briefly reactivates.
Confirmation sign: Disabling the power saving option in Device Manager under the adapter’s Power Management tab eliminates the recurrence.
DNS Client Service Stopped or Crashed
Windows runs a background service called DNS Client that caches DNS lookups and manages DNS resolution for the entire system. If this service crashes or gets disabled by a Windows update, cleanup tool, or malware, DNS resolution stops working even if all your adapter settings are correct. This is less common but frequently missed because users never think to check Windows services.
How to identify it: ipconfig /flushdns fails with a message about the DNS Client service not running. Websites do not load even after switching to Google DNS.
What users misunderstand: The DNS Client service is rarely listed in guides covering this error. Most users try every adapter fix without ever checking whether the service is running. Services.msc is where you find and restart it.
Confirmation sign: Opening Services (Win + R, type services.msc), finding DNS Client, confirming its status is Stopped, starting it, and watching websites load immediately.
Microsoft Virtual WiFi Miniport Adapter Conflict
Windows creates hidden virtual network adapters called Microsoft Virtual WiFi Miniport Adapters to support features like mobile hotspot and network bridging. On some systems, especially laptops with multiple active adapters, Windows routes DNS requests through the wrong adapter. This is a niche cause but a common one in repair shops when nothing else explains the issue.
How to identify it: You have both WiFi and an active hotspot or virtual adapter visible in Device Manager under View > Show Hidden Devices. The error is specific to WiFi connections.
What users misunderstand: These adapters are hidden by default and do not appear in standard network settings. Users never find them without knowing to enable hidden devices in Device Manager.
Confirmation sign: Disabling the Microsoft Virtual WiFi Miniport Adapters in Device Manager and restarting resolves the DNS failure.
What We See Most Often
In a repair shop, the most common scenario is a laptop that the customer says “suddenly stopped connecting” after a Windows update. The DNS cache is corrupted, the DNS server entry in the adapter settings is wrong, or the adapter driver got a bad update. Flushing the DNS cache and switching to Google DNS (8.8.8.8) fixes it in probably half the cases we see.
The second most common scenario is the intermittent one: works for a few seconds after each fix then breaks again. That one almost always traces back to the power management setting on the network adapter. Disabling “Allow the computer to turn off this device to save power” in Device Manager fixes it permanently in most cases.
The third pattern we see regularly is the post-VPN or post-antivirus install. The customer installed something new and the internet stopped working the next day. In those cases, the new software’s DNS redirection or firewall rule is the cause, and it gets resolved by removing the software’s firewall component or configuring a DNS exception.
Hardware failure is almost never the cause of this specific error. If someone comes in with “DNS server not responding” and we run through all the software fixes without success, we are looking at a corrupted Windows TCP/IP stack, not a bad network card.
How to Diagnose the Problem

Step 1: Run the network troubleshooter
Right-click the network icon in the taskbar and select Troubleshoot Problems. Let it complete.
Expected Result: The troubleshooter identifies “DNS server not responding” and confirms the network adapter and IP assignment are working.
If Failed: If the troubleshooter cannot even complete, the network adapter itself may be disabled or the driver is corrupt. Move to Step 2.
Next Action: Proceed to Step 2 regardless. The troubleshooter confirms the category of problem but rarely fixes it permanently.
Step 2: Ping by IP address to isolate the problem
Open Command Prompt as Administrator. Type: ping 8.8.8.8
Expected Result: You receive replies from 8.8.8.8, confirming internet connectivity is active and only DNS is broken.
If Failed: If the ping fails, the problem is not just DNS. Your laptop may have no connectivity at all. Restart your router and test again.
Next Action: If ping succeeds, proceed to Fix 1 below.
Step 3: Check the DNS Client service
Press Win + R and type services.msc. Scroll to DNS Client. Confirm it shows Running.
Expected Result: DNS Client is running and set to Automatic start.
If Failed: The service is stopped or shows an error. Start it manually and test websites immediately.
Next Action: If DNS Client is running, proceed to the fixes below.
Step 4: Check Device Manager for adapter errors
Press Win + X and select Device Manager. Expand Network Adapters. Look for any yellow warning icons on your WiFi or Ethernet adapter.
Expected Result: No warnings. Adapters show normal operation.
If Failed: A warning icon indicates a driver problem. Proceed to Fix 5 (driver update) before anything else.
Next Action: If no warnings, the issue is configuration-level, not hardware. Start with Fix 1.
Which Fix Usually Works?
| Fix | Typical Success | Cost | Difficulty |
| Flush DNS cache | Very Common | Free | Easy |
| Switch to Google DNS | Very Common | Free | Easy |
| Restart DNS Client service | Common | Free | Easy |
| Disable adapter power management | Common | Free | Easy |
| Reset TCP/IP stack and Winsock | Common | Free | Moderate |
| Update network adapter driver | Common | Free | Moderate |
| Disable antivirus firewall | Occasional | Free | Easy |
| Disable VPN and flush DNS | Occasional | Free | Easy |
| Disable Virtual WiFi Miniport Adapters | Occasional | Free | Moderate |
| Reset network settings (nuclear option) | Rare | Free | Moderate |
| Reinstall Windows | Rare | Free | Hard |
Step-by-Step Fixes

Fix 1: Flush the DNS Cache
Cost: Free Time: 2 minutes Difficulty: Easy
- Press Win + S and type cmd
- Right-click Command Prompt and select Run as Administrator
- Type the following and press Enter: ipconfig /flushdns
- Wait for the confirmation message: “Successfully flushed the DNS Resolver Cache”
- Close Command Prompt and open a browser to test
Expected Result: Websites load immediately after flushing. The error is gone.
If Failed: The cache was not the root cause. Move to Fix 2.
Next Action: If the error returns within minutes, power management is likely the issue. Run Fix 4 next.
Technician Tip: Run the flush command even if you plan to try other fixes. A clean cache prevents old entries from interfering with the results of other fixes.
Fix 2: Switch to Google or Cloudflare DNS
Cost: Free Time: 3 minutes Difficulty: Easy
- Press Win + R and type ncpa.cpl, then press Enter
- Right-click your active network adapter (WiFi or Ethernet) and select Properties
- Double-click Internet Protocol Version 4 (TCP/IPv4)
- Select “Use the following DNS server addresses”
- Set Preferred DNS server to: 8.8.8.8
- Set Alternate DNS server to: 8.8.4.4
- Click OK, then close all windows
- Flush the DNS cache again using ipconfig /flushdns
- Open a browser and test
Expected Result: Websites load immediately. You have bypassed the ISP’s DNS server.
If Failed: The ISP’s DNS is not the problem. Move to Fix 3.
Next Action: If this works but you want faster DNS, try Cloudflare (1.1.1.1 / 1.0.0.1) as an alternative to Google DNS.
Technician Tip: Always flush DNS after changing the server address. Without flushing, Windows may continue using cached entries from the old server for several minutes.
Fix 3: Restart the DNS Client Service
Cost: Free Time: 2 minutes Difficulty: Easy
- Press Win + R and type services.msc, then press Enter
- Scroll down to DNS Client
- If it shows Stopped, right-click it and select Start
- If it shows Running, right-click it and select Restart
- Flush the DNS cache using ipconfig /flushdns
- Test a browser
Expected Result: The DNS Client service restarts cleanly and DNS resolution resumes.
If Failed: The service restarts but the error returns. This points to a driver or TCP/IP stack issue.
Next Action: Proceed to Fix 4.
Technician Tip: If the DNS Client service refuses to start or shows an error, check that the RPC (Remote Procedure Call) service is also running, as DNS Client depends on it.
Fix 4: Disable Network Adapter Power Management
Cost: Free Time: 3 minutes Difficulty: Easy
- Press Win + X and select Device Manager
- Expand Network Adapters
- Right-click your WiFi adapter and select Properties
- Click the Power Management tab
- Uncheck “Allow the computer to turn off this device to save power”
- Click OK
- Repeat for your Ethernet adapter if visible
- Restart the laptop and test
Expected Result: The DNS error no longer returns after the laptop wakes from sleep or stays idle.
If Failed: Power management was not the cause. The adapter is staying active and DNS still fails.
Next Action: Move to Fix 5.
Technician Tip: This fix is especially important on laptops running on battery. Windows is more aggressive about cutting power to adapters when plugged in, but some systems do it while plugged in as well.
Fix 5: Reset TCP/IP Stack and Winsock
Cost: Free Time: 5 minutes Difficulty: Moderate
- Press Win + S and type cmd
- Right-click Command Prompt and select Run as Administrator
- Type each command below and press Enter after each one: netsh int ip reset netsh winsock reset ipconfig /release ipconfig /renew ipconfig /flushdns
- Restart the laptop
- Test a browser after restart
Expected Result: The TCP/IP stack and Winsock catalog are both reset to defaults. DNS resolution works normally after restart.
If Failed: The stack was not corrupted, or the corruption is deeper than a reset can fix.
Next Action: Move to Fix 6 to address the adapter driver.
Expert Warning: This reset removes any custom network configurations, proxy settings, or VPN adapter settings. If you rely on a specific network configuration for work, document it before running these commands.
Fix 6: Update or Reinstall the Network Adapter Driver
Cost: Free Time: 10-20 minutes Difficulty: Moderate
Method A: Windows Device Manager update:
- Press Win + X and select Device Manager
- Expand Network Adapters
- Right-click your WiFi or Ethernet adapter and select Update Driver
- Select Search Automatically for Drivers
- Install any available update and restart
Method B: Manual manufacturer driver (recommended for persistent issues):
- Note your adapter name from Device Manager (e.g., Intel Wi-Fi 6 AX201, Realtek RTL8821CE)
- Visit your laptop manufacturer’s support page or the adapter manufacturer’s site
- Download the latest driver for your Windows version
- Run the installer
- Restart the laptop and test
- For Dell laptops: support.dell.com (enter your Service Tag)
- For HP laptops: support.hp.com (enter your serial number)
- For Lenovo laptops: support.lenovo.com (use Lenovo Vantage)
- For ASUS laptops: asus.com/support (enter your model number)
Expected Result: The updated driver resolves intermittent DNS failures caused by driver bugs or Windows Update overwriting your adapter’s correct driver version.
If Failed: The driver is current and not the cause. Move to Fix 7.
Next Action: Proceed to antivirus and VPN checks.
Technician Tip: When Device Manager reports “best driver is already installed,” that means the latest Windows Update driver. It does not mean the latest driver from Intel or Realtek. Always check the manufacturer’s site directly for adapter driver updates.
Fix 7: Disable Antivirus Firewall Temporarily
Cost: Free Time: 5 minutes Difficulty: Easy
- Locate your antivirus icon in the system tray (bottom-right)
- Right-click it and look for an option to disable firewall or disable network protection
- Set the disable period to 15 minutes or until restart
- Open a browser and test immediately
Expected Result: If websites load with the antivirus firewall disabled, the security software was blocking DNS queries on port 53.
If Failed: The antivirus is not the cause. Re-enable it and move to Fix 8.
Next Action: If the antivirus was causing the issue, add an exception for DNS in the firewall settings rather than keeping it disabled. Set DNS port 53 as allowed outbound on both TCP and UDP.
Expert Warning: Never leave your firewall permanently disabled as a “fix.” This is a diagnostic step only. Always re-enable protection after testing.
Fix 8: Disable VPN and Clear its DNS Settings
Cost: Free Time: 5 minutes Difficulty: Easy
- Fully quit your VPN application from the system tray. Do not just disconnect, fully exit the application
- Open Command Prompt as Administrator
- Run ipconfig /flushdns
- Run netsh winsock reset
- Restart the laptop
- Test a browser without the VPN active
Expected Result: Websites load normally without the VPN. The VPN’s DNS servers were unreachable or misconfigured.
If Failed: The VPN is not the cause. Move to Fix 9.
Next Action: If VPN is confirmed as the cause, update the VPN client, switch its DNS leak protection settings, or contact your VPN provider to check server status.
Technician Tip: Some VPN clients install a permanent virtual adapter that stays active even when the VPN is disconnected. If the problem persists after quitting the VPN app, open Device Manager and check Network Adapters for any VPN-related virtual adapters. Disabling them may be needed.
Fix 9: Disable Virtual WiFi Miniport Adapters
Cost: Free Time: 5 minutes Difficulty: Moderate
- Press Win + X and select Device Manager
- Click View in the menu bar and select Show Hidden Devices
- Expand Network Adapters. You will now see additional hidden adapters
- Look for any adapter named Microsoft Virtual WiFi Miniport Adapter or Microsoft Hosted Network Virtual Adapter
- Right-click each one and select Disable Device
- Flush DNS using ipconfig /flushdns
- Test a browser
Expected Result: DNS requests now route through the correct physical adapter and resolve normally.
If Failed: Virtual adapters are not conflicting. Move to Fix 10.
Next Action: If this fix worked, check whether your mobile hotspot feature re-enables these adapters. You may need to disable the hotspot feature in Windows settings to prevent them from returning.
Technician Tip: These hidden adapters appear only when you enable “Show Hidden Devices.” Most users and even most guides miss them entirely. They are a surprisingly common cause of intermittent DNS failures on laptops with the mobile hotspot feature enabled.
Fix 10: Full Network Reset (Nuclear Option)
Cost: Free Time: 10 minutes + restart Difficulty: Moderate
- Press Win + I to open Settings
- Navigate to Network and Internet
- Scroll down and click Advanced Network Settings
- Click Network Reset at the bottom
- Click Reset Now and confirm
- Your laptop will restart automatically in 5 minutes
- After restart, reconnect to your WiFi and test
Expected Result: All network adapters, settings, and configurations are reset to Windows defaults. DNS should resolve normally.
If Failed: The issue is deeper than network settings, possibly a corrupted Windows installation or a persistent malware infection.
Next Action: Run a full malware scan using Windows Defender Offline Scan. If malware is ruled out, consider a Windows repair install before a full reinstall.
Expert Warning: Network Reset removes all saved WiFi passwords, VPN configurations, and custom network settings. Write these down before proceeding.
Mistakes That Make the Problem Worse
Restarting the troubleshooter repeatedly without trying any fix The Windows network troubleshooter often shows a temporary success message because it briefly resets the adapter while diagnosing. Users see “fixed” and close it, then watch the error return 30 seconds later. The troubleshooter is a diagnostic tool, not a repair tool for DNS issues.
Flushing DNS but not changing the DNS server Flushing the cache clears old entries but does not change which DNS server your laptop is using. If the problem is a bad ISP DNS server, the cache will just fill up with the same wrong responses again. Always combine the flush with a DNS server change if the error returns.
Changing DNS on the router only When you change DNS on your router, devices connected to it inherit the new setting through DHCP. But Windows caches the old DNS server address in the adapter settings. You need to flush DNS on the laptop and sometimes manually remove the old DNS entry from the adapter’s IPv4 settings to force it to use the new assignment.
Disabling the antivirus scan but leaving the firewall on Most antivirus suites have a separate firewall component. Disabling real-time scanning does not disable the firewall. If the antivirus firewall is blocking DNS port 53, toggling the scan off does nothing. You need to disable the firewall component specifically.
Installing multiple network diagnostic tools at once Some users install DNS benchmarking tools, network optimizers, and adapter utilities simultaneously while troubleshooting. These tools can conflict with each other and with the DNS Client service, making the problem worse. Run one tool at a time and remove it if it does not help.
Updating the adapter driver through Windows Update only Windows Update installs a generic driver version that is often months or years behind the adapter manufacturer’s latest release. Checking Device Manager and seeing “best driver installed” only means the best version available through Windows Update. It does not mean you have the actual latest release from Intel, Realtek, or Qualcomm.
Changing DNS inside the browser settings Chrome and Firefox have their own built-in DNS settings under privacy settings. Changing DNS there only affects that browser, not the system. If your problem affects all browsers, you need to change DNS at the network adapter level, not inside a browser’s settings panel.
Leaving the fix half-done before testing Users often run multiple commands in Command Prompt but forget to restart before testing. Commands like netsh winsock reset require a full restart to take effect. Testing immediately after running them without restarting produces confusing results.
Brand-Specific Considerations
Dell
Dell laptops running Intel Killer WiFi adapters (common on Inspiron and XPS models from 2019 onward) are particularly prone to DNS failures caused by the Killer Intelligence Center software. This utility installs its own network prioritization driver that intercepts DNS traffic. Uninstalling Killer Intelligence Center and switching to the standard Intel WiFi driver from Dell’s support page resolves the issue permanently on most affected models. Visit support.dell.com and enter your Service Tag to find the correct Intel WiFi driver for your specific model.
HP
HP laptops frequently show DNS failures after Windows updates that roll back the Realtek or Intel WiFi driver to an older Windows-compatible version. HP Support Assistant can sometimes apply the wrong driver version automatically. Download the latest network driver directly from HP’s support page using your serial number rather than relying on Support Assistant for driver updates. HP laptops with Realtek adapters also sometimes need the “Realtek PCIe GbE Family Controller” driver reinstalled from HP’s site when the Ethernet adapter shows DNS issues.
Lenovo
Lenovo Vantage occasionally pushes network driver updates that conflict with existing configurations, particularly on ThinkPad models. If DNS failures started after a Vantage update, check Lenovo’s support page for the specific adapter driver your ThinkPad shipped with. ThinkPad models using Intel adapters benefit from downloading drivers directly from Intel’s website rather than through Vantage, as Intel’s releases are more current. IdeaPad models running Qualcomm Atheros adapters have a documented history of DNS instability on Windows 11. The Qualcomm site and Lenovo’s IdeaPad support page carry separate driver versions for this.
ASUS
ASUS laptops, particularly ZenBook, VivoBook, and ROG models, sometimes have the Armory Crate or MyASUS software interfere with network settings. These utilities can modify DNS settings as part of “network optimization” features. Disabling the network management features inside Armory Crate before attempting DNS fixes prevents them from reverting your changes. For gaming models (ROG Strix, TUF), check whether GameFirst is installed. GameFirst is a known cause of DNS routing conflicts on ASUS gaming laptops.
Acer
Acer laptops running Nitro Sense or the Care Center software occasionally apply network settings that override DNS configurations. On Acer Aspire and Nitro models, uninstalling Care Center and reinstalling the WiFi adapter driver from Acer’s support page resolves persistent DNS issues more reliably than running system-level resets.
MSI
MSI Dragon Center and its successor MSI Center include a network boost feature that can interfere with DNS on some configurations. Disabling the network boost feature inside MSI Center before troubleshooting DNS prevents the software from re-applying settings that conflict with your manual fixes.
Repair Shop Diagnosis

When a laptop comes in with “DNS server not responding,” the first thing we check is whether the problem is isolated to that laptop or affecting the whole network. We do this by connecting a known-working laptop to the same router. If both fail, the router or ISP is the problem and we restart the router first.
If it is isolated to the customer’s laptop, we open Command Prompt and run ping 8.8.8.8 immediately. A successful ping tells us internet connectivity is intact and only DNS resolution is broken. A failed ping tells us the problem is broader.
Next we check Device Manager for adapter warnings, then look at running services. We check the DNS Client service before touching any settings. If it is stopped, starting it is the fastest possible fix.
If none of those immediate checks resolve it, we run the full command sequence: ipconfig /flushdns, ipconfig /release, ipconfig /renew, netsh int ip reset, netsh winsock reset, then restart. That resolves roughly 70 percent of laptop DNS issues we see.
For the remaining cases, we look at the adapter driver version versus what the manufacturer’s support page carries, check for VPN or antivirus conflicts, and check for virtual adapter conflicts.
Typical repair costs for professional DNS troubleshooting:
- Remote software fix session: $30 to $60
- In-shop software troubleshooting (per hour): $50 to $90
- Driver reinstallation service: $40 to $75
- Full network configuration reset: $60 to $100
Professional repair is worth it when you have tried every fix above and the issue persists, or when the problem is affecting a work laptop with complex network configurations you do not want to risk disrupting.
When Hardware Replacement Is Necessary
DNS server not responding is almost never caused by hardware failure. The error is fundamentally a software and configuration issue. There are, however, edge cases where hardware replacement becomes necessary:
Network adapter failure: If your WiFi adapter produces constant errors in Device Manager even with fresh drivers, the adapter hardware itself may be failing. External USB WiFi adapters cost $15 to $40 and can confirm this. If the USB adapter connects without DNS issues and the built-in adapter continues to fail, replacement of the internal adapter is the next step.
Motherboard-level failures: On some ultrabooks where the WiFi chip is soldered to the motherboard, a failing WiFi chip requires a full motherboard replacement or a USB adapter workaround. Prices for soldered WiFi chip replacement range from $150 to $400 depending on the model.
Router hardware failure: If DNS failures affect every device in the home and restarting the router does not help, the router itself may be failing. Router replacement averages $50 to $150 for a reliable home model.
Stop Troubleshooting and Seek Professional Repair If
- Every fix above has been tried in order and the error persists after a full network reset and restart
- The laptop shows DNS failures even when connected through a USB Ethernet adapter (suggests OS-level corruption)
- Device Manager shows your network adapter with a Code 10 error that does not resolve with driver reinstallation
- Websites fail to load even in Safe Mode with Networking enabled (suggests a deep system corruption)
- A malware scan reveals an active infection that has modified DNS settings. Professional removal is needed to confirm all system changes are reversed
- The error appears on a work laptop with domain-joined network settings that you do not have permission to modify yourself
Prevention Tips

Use a reliable public DNS server as your primary. ISP DNS servers experience outages more often than most people realize. Setting Google DNS (8.8.8.8) or Cloudflare (1.1.1.1) as your permanent DNS prevents ISP-side DNS outages from affecting your laptop.
Disable adapter power management from day one. The power-saving setting on network adapters causes more intermittent connectivity problems than any other single setting in Windows. Turn it off on every laptop you own, even if you are not currently experiencing issues.
Keep your network adapter driver current using the manufacturer’s site, not just Windows Update. Check your adapter manufacturer’s driver page once every few months. Dell, HP, and Lenovo all have auto-update tools that can help, but verify against the manufacturer site for adapter-specific updates.
Avoid installing multiple network utility programs. Killer Intelligence Center, network optimizer tools, and third-party DNS management utilities frequently conflict with each other. Use Windows’ built-in network settings unless you have a specific reason to install a third-party utility.
Restart your router monthly. Home routers accumulate stale DNS data and connection tables over time. A monthly restart clears those tables and keeps DNS assignment fresh for all devices on the network.
When installing a VPN, check its DNS settings immediately. Configure your VPN’s kill switch and DNS leak protection before using it for the first time. Poorly configured VPN DNS settings are one of the most common causes of DNS failures on laptops used for both work and personal browsing.
Create a System Restore point before installing major software. Antivirus suites, VPN clients, and gaming overlay software frequently change network settings during installation. A restore point lets you roll back quickly if they cause DNS issues.
Frequently Asked Questions

Why does DNS server not responding appear on my laptop but not on my phone? Your phone and laptop use different DNS settings. Phones on WiFi typically get fresh DNS assignments directly from the router each time they reconnect, while Windows laptops cache DNS settings in the adapter configuration and the DNS resolver cache. A corrupted cache or stale adapter setting on the laptop causes the error without affecting other devices. Running ipconfig /flushdns and switching to Google DNS resolves this in most cases.
Why does the fix work for a few seconds and then break again? This pattern almost always points to the network adapter’s power management setting. Windows cuts power to the adapter during idle periods to save battery, and when it wakes the adapter back up, the DNS configuration fails to reinitialize properly. Disable “Allow the computer to turn off this device to save power” in the adapter’s Device Manager properties to stop the recurrence.
Does DNS server not responding mean my internet is broken? Not exactly. It means your laptop’s ability to translate website names into IP addresses is broken, but the underlying internet connection may be perfectly active. You can confirm this by running ping 8.8.8.8 in Command Prompt. If that ping succeeds, your internet is working fine and only the DNS layer is failing.
Will changing DNS to 8.8.8.8 make my internet faster? Sometimes, yes. If your ISP’s DNS servers are overloaded or slow, switching to Google DNS (8.8.8.8) or Cloudflare (1.1.1.1) can noticeably reduce page load times because website addresses resolve faster. For most users the difference is small, but for users on ISPs with poor DNS infrastructure it can be meaningful.
Does flushing DNS delete anything important? No. The DNS resolver cache is a temporary file that Windows rebuilds automatically as you browse. Flushing it removes cached lookups so your laptop makes fresh requests for each site. There is nothing to back up and no risk of data loss from flushing the cache.
My DNS was working yesterday. What changed? The most common overnight changes that break DNS are Windows Updates that overwrite your network adapter driver, VPN or antivirus software that updates its own configuration automatically, or your router assigning a new DNS address after a restart. Check your Windows Update history, look for any software that auto-updated overnight, and restart your router to rule out each cause in turn.
Is this a virus? DNS hijacking is a real form of malware that redirects DNS queries to malicious servers to serve fake websites. Signs of DNS hijacking include websites loading with unusual login pages, browser redirects to unexpected sites, or new toolbars appearing in your browser. If any of those symptoms appear alongside the DNS error, run a full scan with Windows Defender Offline before attempting any network fixes.
Should I contact my ISP? Contact your ISP if every device in the home fails to connect, the problem started with no changes on your end, or the DNS error persists after switching to Google DNS (which bypasses the ISP’s DNS servers entirely). If switching to Google DNS fixes the issue, the ISP’s DNS servers were the problem, but you do not need to call them since you have already bypassed it.
Conclusion
Most DNS server not responding errors on laptops come down to a corrupted cache, a bad DNS server assignment, a power management setting cutting the adapter, or a driver conflict triggered by a Windows update. Flush your DNS cache first, switch to Google DNS (8.8.8.8), and disable the adapter’s power-saving setting. Those three steps resolve the majority of cases. If the error persists, work through the TCP/IP stack reset, driver update, and antivirus checks in order. Hardware replacement is almost never needed for this specific error.