
Quick Answer
Most dots people call “dead pixels” are actually stuck pixels, which are fixable with free software tools in under 30 minutes. True dead pixels (permanently black) cannot be revived by software and require a screen replacement or warranty claim. Run a pixel test first to confirm what you are dealing with before trying any fix.
Introduction
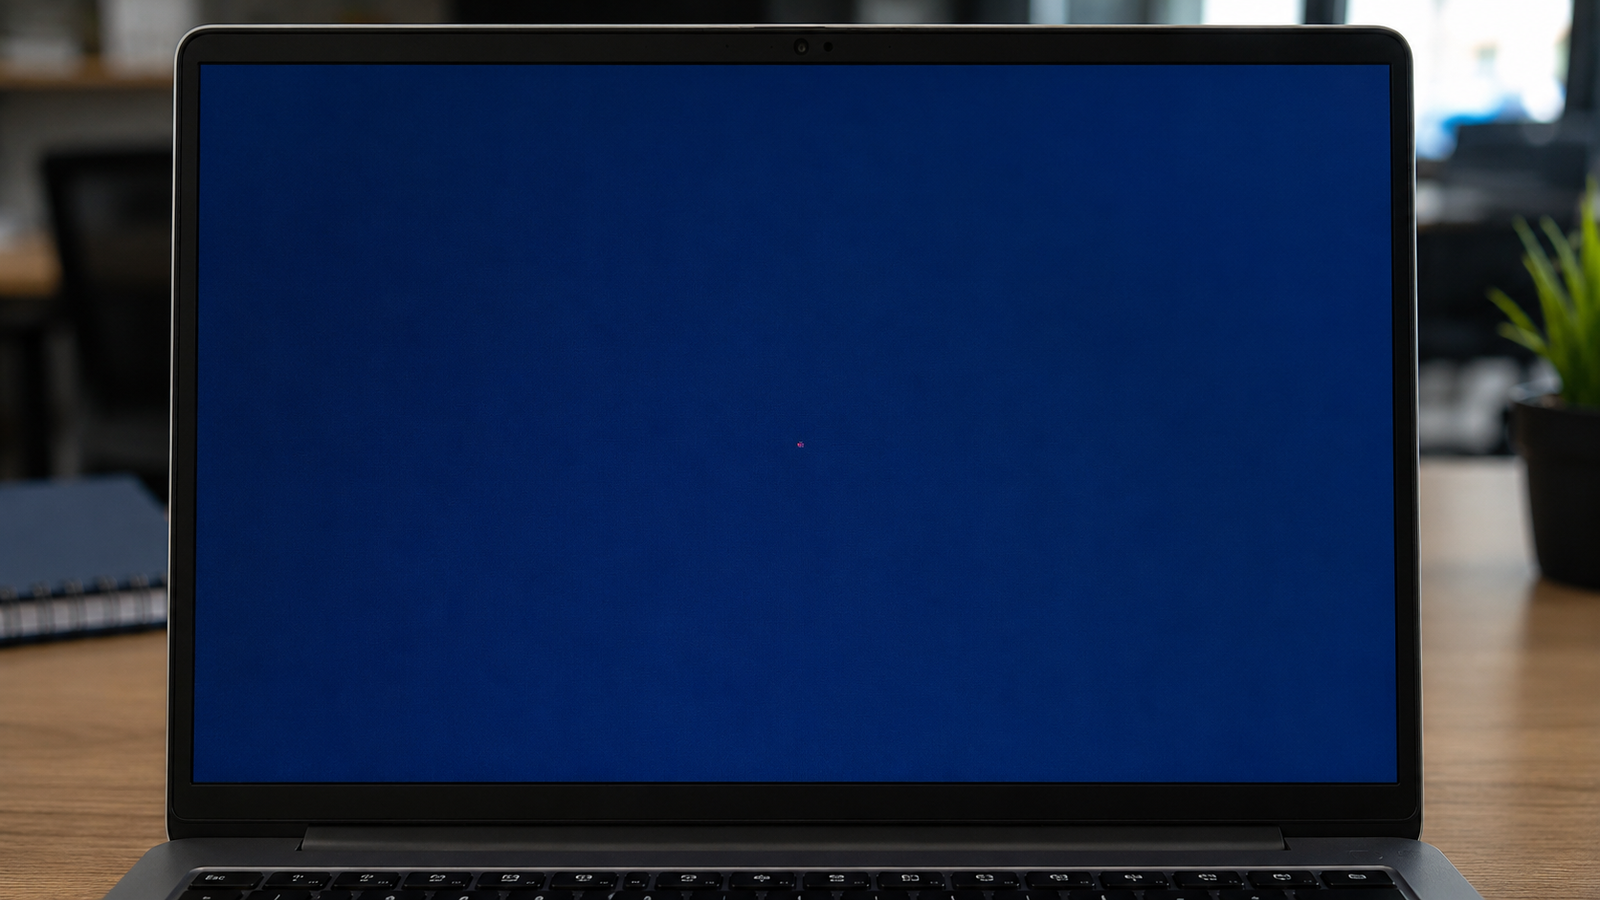
You notice a tiny dot sitting in the same spot on your screen no matter what you display. It does not move, does not change color, and does not respond to anything. That is a pixel defect, and figuring out exactly which type it is determines whether you can fix it yourself or need to push for a warranty replacement.
Most guides on this topic lump dead pixels and stuck pixels together as if they are the same thing. They are not. Dead pixels are unlit transistors that no software can revive. Stuck pixels are pixels frozen on a single color due to a power or signal fault, and they respond well to software fixes in many cases. That distinction changes everything about how you approach this problem.
This guide walks through proper identification, free fix tools, the pressure method risks, brand-specific warranty thresholds, and when screen replacement becomes your only path forward.
Symptoms of the Problem

- A single dot that stays black regardless of what is on screen
- A dot that stays red, green, blue, white, or another fixed color at all times
- Multiple small dots clustered together in one area
- A dot visible during BIOS startup screens (before Windows loads)
- A dot that appears on solid-color backgrounds but not complex images
- The defect is in the same fixed location across every app and every restart
- The dot disappears when you connect to an external monitor
Start Here: Fast Diagnosis
Work through this in order before touching any fix.
Is the dot completely black at all times? It is likely a dead pixel (transistor failure). Software tools rarely fix this. Skip to the warranty section.
Is the dot a fixed color (red, green, blue, white, cyan, yellow)? It is almost certainly a stuck pixel. Software pixel fixers and the pressure method both have a real chance of working here. Start with Fix 1.
Does the dot disappear on white or very bright content and only show on dark backgrounds? This may be a backlight bleed spot rather than a pixel defect. See the Backlight Bleed note in the Causes section.
Does the dot show up when you take a screenshot? If it appears in screenshots: the fault is in the GPU signal or driver layer, not the physical panel. Update your graphics driver before anything else.
If it does not appear in screenshots: the fault is in the physical panel. That is a hardware issue and software driver fixes will not help.
Is the dot visible during BIOS startup (before Windows loads)? If yes: the defect is definitively in the hardware panel, not the driver or operating system.
If no (only in Windows): test a driver update first. A handful of defects that look like stuck pixels are caused by corrupted GPU driver output.
Tools Needed
Built-in tools:
- Windows screenshot (Win + PrintScreen) for the screenshot diagnosis test
- Device Manager for GPU driver check
- BIOS startup screen for hardware confirmation
Free software tools:
- JScreenFix (browser-based, works on any OS, no download)
- UDPixel (Windows download, more control over flashing window size and speed)
- PixelHealer by Aurelitec (Windows, allows custom flash colors and timers)
- EIZO Monitor Test (browser-based, for identifying pixel type before fixing)
- DeadPixelTest.org (fast visual test across multiple solid background colors)
Hardware tools (only for pressure method on stuck pixels):
- Microfiber cloth (required, do not substitute paper towels or tissue)
- Soft stylus or pencil eraser wrapped in cloth (blunt tip only)
Troubleshooting Matrix
| Symptom | Likely Cause | Fast Fix |
| Permanently black dot, visible in BIOS | Dead pixel, transistor failure | Warranty claim or screen replacement |
| Colored dot (red/green/blue/white) | Stuck pixel, power fault to subpixel | JScreenFix or UDPixel for 30 min |
| Dot shows in screenshots | GPU/driver signal issue | Update or reinstall GPU driver |
| Dot only on dark backgrounds | May be backlight bleed, not a pixel | No pixel fix needed, different problem |
| Cluster of dots appearing suddenly | Pressure damage or LCD layer crack | Screen replacement needed |
| Dot present since unboxing | Manufacturing defect | Retailer return (fastest route) |
| Multiple dots spreading over weeks | LCD panel degradation | Professional diagnosis, replacement |
What Causes Dead Pixels on Laptop Screens

Transistor Failure (True Dead Pixels)
Each pixel on an LCD screen is controlled by a thin-film transistor (TFT). When that transistor stops supplying power to the subpixels (red, green, and blue), the pixel produces no light and stays permanently black. This is a hardware failure at the component level. No software signal, no pressure, and no temperature change can restart a dead transistor.
How to identify it: The dot is permanently black regardless of screen content, background color, or brightness setting. It is visible in BIOS before Windows loads. A screenshot taken of the screen does not capture the dot because the fault is physical, not in the signal being processed.
What users misunderstand: Many users run pixel fixer software for hours expecting results. Dead transistors do not respond. If the dot is black and shows in BIOS, stop troubleshooting and move to the warranty section.
Confirmation sign: The dot is absent on an external monitor connected via HDMI while the laptop screen is still visible.
Stuck Liquid Crystal (Stuck Pixels)
In a functioning pixel, liquid crystals shift position in response to electrical signals, controlling how much backlight passes through to create color. A stuck pixel occurs when the liquid crystal in one or more subpixels gets frozen in place, either fully open or fully closed, creating a permanently colored dot. This is a signal or power delivery issue rather than a complete hardware failure.
How to identify it: The dot holds a specific color (red, blue, green, white, cyan, magenta, or yellow) instead of being black. On some panels the stuck subpixel only activates on certain background colors, making it seem to appear and disappear. The dot may show up in screenshots in some cases.
What users misunderstand: Stuck pixels look alarming but are the recoverable version of this problem. Rapid color cycling forces the liquid crystal to shift repeatedly, which in many cases breaks the frozen state and restores normal function.
Confirmation sign: The dot changes color, flickers, or disappears during a color cycling test even briefly.
Hot Pixels (Always-White Dots)
A hot pixel is the opposite of a dead pixel. The transistor is stuck in the “on” position, allowing maximum light through all three subpixels simultaneously, producing a permanently white or very bright dot. Hot pixels are more visually disruptive than dead pixels on dark content.
How to identify it: A white or very bright dot visible against dark backgrounds. The dot is present in BIOS and does not respond to resolution changes.
What users misunderstand: Hot pixels are just as difficult to fix as dead pixels and for the same reason: the transistor has failed in the open position. Software pixel fixers do not fix hot pixels. Warranty is the correct path.
Confirmation sign: The dot is pure white on a fully black background.
Manufacturing Defects
LCD and OLED panels contain millions of subpixels. During production, it is not possible to achieve a 100% yield rate where every transistor functions correctly from day one. Industry standards (ISO 9241-307 Class II) define an acceptable number of defects that manufacturers are permitted to ship. Most consumer laptop panels are Class II, which allows up to 2 always-bright and 2 always-dark pixel defects within tolerance.
How to identify it: The defect was present from the first use of the device. Checking the pixel during the retailer’s return window (typically 14 to 30 days) is the fastest and most effective remedy for manufacturing defects.
What users misunderstand: Discovering a dead pixel on day 45 when the return window closed on day 30 puts you in a much harder position than discovering it immediately. Test any new laptop for pixel defects within the first 48 hours of ownership.
Confirmation sign: The defect is in a fixed location from day one with no physical damage or dropped history.
Physical Pressure or Impact Damage
Pressing against the LCD panel from the outside, placing objects on the keyboard with the lid closed, or any sharp impact against the screen can crack the liquid crystal layer internally without visibly breaking the glass. This creates a dark patch, ink-like spread, or multiple defects clustered together rather than a single clean dot.
How to identify it: Multiple dots appearing after a known impact, pressure event, or after discovering the laptop under something heavy. The affected area often has a slight color tint or darkening around the defect rather than a clean isolated dot.
What users misunderstand: Impact damage to the LCD layer looks similar to dead pixels but typically creates a spreading dark region rather than a single clean point defect. Warranty claims for this type of damage are usually denied as physical damage is excluded.
Confirmation sign: Multiple defects in a cluster, or a spreading dark region rather than a single pixel point.
GPU Driver or Signal Fault (Rare)
In rare cases a corrupted or outdated GPU driver creates display artifacts that appear as stuck or colored pixels in Windows but are not present in BIOS. This is a software-layer issue that a driver reinstall resolves.
How to identify it: The dot appears in Windows screenshots. The dot is absent during BIOS startup. Updating or reinstalling the graphics driver eliminates it.
What users misunderstand: This is the only type of “pixel defect” a driver fix can resolve. Every other type listed above is a hardware issue.
Confirmation sign: The defect disappears after uninstalling and reinstalling the GPU driver.
What We See Most Often
The most common scenario at a repair shop is a user who bought a laptop recently, noticed a colored dot on screen, tried JScreenFix for an hour, and is now wondering what to do next. About half the time the pixel fixer works within 20 to 30 minutes for stuck pixels. The other half we are looking at a manufacturer warranty conversation.
The second pattern we see regularly is users who ran pixel fixer software on an OLED panel for several hours. On OLED screens, extended rapid color cycling at the same spot accelerates pixel aging and can create a new, larger problem. OLED pixel fixers should run for a maximum of 10 to 15 minutes per session.
The most common misdiagnosis is confusing backlight bleed (a soft glow near screen edges from the backlight leaking past the bezel) with pixel defects. Backlight bleed does not respond to pixel fixers because it is not a pixel issue at all.
We rarely see users take advantage of retailer return windows. Most people assume they need to deal with the manufacturer directly. If the laptop is under 30 days old, a same-unit exchange at the retailer is dramatically faster and less frustrating than a warranty claim with the manufacturer.
How to Diagnose the Problem

Step 1: Run a pixel test
Open any solid-color background test. DeadPixelTest.org cycles through black, white, red, green, and blue full-screen backgrounds. View each color and note the exact location of any defects.
Expected Result: You can see the defect clearly on at least one background color and confirm its position.
If Failed: If the dot is only visible at very specific angles, it may be a polarizer scratch or surface defect rather than a pixel issue. Check the screen with the brightness at maximum.
Next Action: Note whether the dot is black (dead or hot pixel situation) or a fixed color (stuck pixel situation).
Step 2: Take a screenshot
Press Win + PrintScreen. Open the screenshot in Photos and zoom into the area where the defect is. Check whether the dot appears in the screenshot file.
Expected Result: A result either way is useful. Dot in screenshot means a GPU or driver layer issue. Dot not in screenshot means a hardware panel defect.
If Failed: Some very faint stuck subpixels are hard to see in compressed screenshots. Try using Snipping Tool in PNG format for a lossless capture.
Next Action: If the dot appears in the screenshot, update your graphics driver before trying physical pixel fixes.
Step 3: Check BIOS
Shut down the laptop completely. Power it on and hold the BIOS key for your brand (Del or F2 for most brands, F1 for ThinkPads, F10 for HP). Look at the BIOS screen carefully for the defect.
Expected Result: If visible in BIOS, the defect is confirmed hardware and no software fix will work. If absent in BIOS, software or driver fixes are worth trying.
If Failed: BIOS screens are often grey or low-contrast backgrounds. Switch to a different BIOS menu tab with a plain solid background if available.
Next Action: If visible in BIOS, move directly to Fix 4 (Stuck Pixel Software) to test if it is stuck rather than dead, or proceed to the warranty section.
Step 4: Test external monitor
Connect your laptop to an external monitor via HDMI. View the same content on both screens. Check whether the external monitor shows the same defect.
Expected Result: The external monitor shows normal pixels, confirming the defect is in the laptop panel rather than the GPU.
If Failed: If the same defect appears on the external monitor, the GPU itself is producing incorrect output. That is a different and more serious problem than a panel pixel defect.
Next Action: With the external monitor confirmed normal, proceed to stuck pixel software testing or warranty evaluation.
Which Fix Usually Works?
| Fix | Typical Success | Cost | Difficulty |
| GPU driver reinstall (dot in screenshot only) | Very Common for that specific type | Free | Easy |
| JScreenFix / UDPixel (stuck pixels, colored dot) | Common for genuine stuck pixels | Free | Easy |
| Pressure method (stuck pixels only) | Occasional | Free | Medium, risk of damage |
| Retailer return/exchange (within return window) | Very Common | Free | Easy |
| Manufacturer warranty claim | Common (when threshold met) | Free | Medium (admin process) |
| LCD panel replacement | Very Common (solves the physical defect) | $80-250 | Hard (professional repair) |
| Accepting the defect | N/A | Free | None |
Step-by-Step Fixes
Fix 1: GPU Driver Check (Screenshot Test First)
Cost: Free Time: 15 minutes Difficulty: Easy
Run the screenshot test from the diagnosis section. If the defect appears in the PNG screenshot file, a corrupted GPU driver is producing the artifact.
- Right-click the Start Menu and open Device Manager.
- Expand Display Adapters.
- Right-click your GPU and select Uninstall Device.
- Check the box for “Delete the driver software for this device.”
- Restart the laptop. Windows will install a basic display driver automatically.
- Visit your laptop manufacturer’s support page and download the correct GPU driver for your model.
- Install it, restart, and test the screen again with a solid background.
Expected Result: If the defect was driver-caused, it will be gone after the fresh driver install.
If Failed: The defect was not driver-related. Move to Fix 2.
Technician Tip: Always download GPU drivers from the laptop manufacturer’s support page (Dell, HP, Lenovo) rather than directly from NVIDIA or Intel for laptops. OEM-tuned drivers handle power management and display output better on laptops than the generic versions.
Fix 2: Pixel Fixer Software (JScreenFix)
Cost: Free Time: 20-60 minutes Difficulty: Easy
This works only on stuck pixels (colored dots, not black). JScreenFix runs in a browser and requires no installation.
- Open your browser and go to jscreenfix.com.
- Click “Launch JScreenFix.” A small box of rapidly flashing colors will appear.
- Drag the flashing box over the location of the stuck pixel on your screen.
- Leave it running for 20 to 30 minutes.
- After 30 minutes, stop the tool and check whether the stuck pixel has cleared.
Expected Result: On genuine stuck pixels, roughly half resolve within a 30-minute session. Some take multiple sessions across consecutive days.
If Failed: Try a second session. If it has not cleared after two sessions of 30 minutes each, move to Fix 3 or Fix 4.
Technician Tip: Running the tool for more than one hour in a single session rarely improves results over a 30-minute session. Multiple shorter sessions are more effective than one very long one.
Expert Warning: On OLED laptop screens (common on premium models from Dell XPS, Samsung Galaxy Book Pro, and LG Gram series), limit pixel fixer sessions to 10 to 15 minutes maximum. Prolonged rapid color cycling on OLED panels causes premature pixel aging and can accelerate burn-in.
Fix 3: UDPixel or PixelHealer (Windows, More Control)
Cost: Free Time: 30-60 minutes Difficulty: Easy
These Windows tools offer more control than JScreenFix, including adjustable flash window size and speed.
- Download UDPixel from the official source or PixelHealer from Aurelitec’s website.
- Open the tool and locate your stuck pixel on screen.
- Position the flashing window directly over the defective area. Make the window small enough to cover only the stuck pixel and its immediate neighbors.
- Set the flash interval to the fastest available setting.
- Run for 20 to 30 minutes.
- Stop and check the pixel against a solid background.
Expected Result: Stuck pixel clears or shows signs of responding (flickering, color change during the session).
If Failed: Proceed to Fix 4 only if you have an LCD panel (not OLED or touchscreen).
Technician Tip: Any flicker or color change during the cycling session is a positive sign that the pixel is responding. Stop the session and check whether it cleared before running longer.
Fix 4: Pressure Method (LCD Non-Touch Panels Only)
Cost: Free Time: 5 minutes Difficulty: Medium
This only applies to stuck pixels on traditional LCD panels. Do not attempt on OLED screens, touchscreen panels, or any laptop still within its return window.
- Shut down the laptop completely.
- Wrap the tip of a stylus, pencil eraser, or blunt-ended tool in a clean microfiber cloth.
- Identify the exact pixel location you need to treat.
- Apply light, steady pressure directly on the stuck pixel location through the cloth. Do not press hard, firm and gentle is the correct pressure.
- While maintaining that pressure, press the power button and let the laptop boot to the Windows desktop.
- Once the screen is visible, slowly release the pressure.
- Test the pixel against a solid black or white background.
Expected Result: Some stuck pixels clear immediately. Others require one additional attempt.
If Failed: Do not attempt a third time. Repeated pressure increases the risk of LCD layer damage. Move to warranty claim or professional repair.
Technician Tip: The mechanism here is physical agitation of frozen liquid crystal. The technique works because the liquid crystal in a stuck pixel has not distributed evenly. Pressure combined with the screen powering on gives it a chance to redistribute.
Expert Warning: Two attempts maximum. Pressing too hard, too long, or too many times causes permanent LCD layer damage and turns a single stuck pixel into a much larger dark patch. A light touch is essential.
Fix 5: Warm Screen Session Before Software Fix
Cost: Free Time: 20 minutes Difficulty: Easy
Liquid crystal viscosity decreases slightly with warmth. Running pixel fixer software while the screen is warm from normal operation gives the cycling a better chance of working.
- Use the laptop normally for 15 to 20 minutes to warm the screen to operating temperature.
- While it is warm, immediately launch JScreenFix or UDPixel over the stuck pixel location.
- Run the cycling tool for 20 to 30 minutes.
Expected Result: A slightly better response rate from stuck pixels that did not clear with cold-start software cycling.
If Failed: This is a supplementary technique, not a standalone fix. If it does not help, move to the warranty section.
Technician Tip: Only natural operating warmth is appropriate here. Never apply heat guns, hair dryers, or heating pads to the screen. External heat sources create uneven temperature across the panel and cause far more damage than any stuck pixel.
Fix 6: Retailer Return or Exchange (Within Return Window)
Cost: Free Time: 1-2 days Difficulty: Easy
If the laptop is within the retailer’s return window (Amazon: 30 days, Best Buy: 15 to 30 days depending on membership tier, others vary), this is the fastest and most reliable solution for any pixel defect regardless of type or count.
- Document the defect with photos and a screen recording showing the static location of the dot against multiple solid backgrounds.
- Contact the retailer’s support via chat or phone and request an exchange rather than a return.
- Reference the defect as a manufacturing defect visible from day one.
- Complete the exchange process.
Expected Result: Same-unit exchange with no dead pixel.
If Failed: Outside the return window, move to the manufacturer warranty claim process.
Technician Tip: Always test a new laptop for pixel defects within 48 hours of purchase. The retailer exchange path is dramatically simpler than a manufacturer warranty claim. Missing the return window turns a same-day swap into a weeks-long repair process.
Fix 7: Manufacturer Warranty Claim
Cost: Free (within warranty coverage) Time: 1-4 weeks Difficulty: Medium
Follow this process if the return window has closed and the laptop is still within warranty.
- Document the defect thoroughly: photograph it against a black background, record the BIOS test showing it is visible before Windows loads, and record the exact location.
- Contact manufacturer support and open a case.
- Reference the pixel count and location explicitly. A single center-screen defect is more likely to receive goodwill coverage than a corner defect.
- If front-line support cites the ISO multi-pixel threshold and declines, ask to escalate to a supervisor. Escalation teams often have goodwill replacement authority below the published threshold.
- Know your brand’s published threshold before calling (see Brand-Specific Considerations below).
Expected Result: Replacement or repair authorization if your pixel count meets the brand’s threshold, or goodwill coverage for center-screen defects.
If Failed: Request written confirmation of denial for records. Consider consumer rights law avenues in your region (EU Consumer Rights Directive, UK Consumer Rights Act, Australian Consumer Law all provide broader remedies than manufacturer warranty thresholds in many cases).
Expert Warning: Manufacturer warranty claims for pixel defects vary enormously by brand and product line. Knowing your specific model’s coverage before calling saves significant time in the support call.
Fix 8: LCD Panel Replacement (Professional Repair)
Cost: $80-250 depending on panel size, resolution, and brand Time: 1-3 days at a repair shop Difficulty: Hard (professional repair)
When the warranty has expired, the return window has closed, and the defect count does not meet the manufacturer’s replacement threshold, panel replacement is the final hardware fix.
- Identify your exact panel model. Open Device Manager and look under Monitors, or search your laptop model number followed by “display panel specs.”
- Source a compatible replacement panel. Prices range from $40 to $150 for the part depending on resolution, size, and panel type (IPS vs TN vs OLED).
- Bring the laptop to a repair technician or, for experienced users, follow a model-specific disassembly guide.
- Panel replacement typically requires removing the bezel, disconnecting the display cable, and swapping the panel.
Expected Result: A fully functioning screen with no pixel defects.
If Failed: If defects persist on the new panel, the GPU or display cable is the source rather than the panel itself.
Technician Tip: A repair shop panel replacement typically costs $80 to $150 for labor plus the part cost. On a laptop valued at $400 or more, this repair is usually worth it. On budget laptops under $300, evaluate whether the total repair cost makes sense against the laptop’s remaining value.
Mistakes That Make the Problem Worse
1. Running pixel fixer software on OLED screens for hours OLED pixels degrade from rapid cycling. A 4-hour JScreenFix session on an OLED laptop can cause localized pixel aging that is visible as uneven color across the treated area. Limit sessions to 10 to 15 minutes on any OLED panel.
2. Pressing directly on the screen without a cloth Fingers and bare styluses scratch the anti-glare coating and leave oils that are very difficult to remove. Always use a clean microfiber cloth between any object and the panel surface.
3. Applying too much pressure during the pressure method Light, steady pressure is what moves stuck liquid crystal. Hard pressing compresses the LCD layers beyond their design tolerance and creates a permanent dark patch around the treated area. Two light attempts maximum.
4. Attempting the pressure method on OLED or touchscreen panels OLED panels have no liquid crystal layer. The pressure method is designed for LCD and does nothing for OLED stuck pixels except risk physical damage. Touchscreen panels add a digitizer layer that is easy to damage under pressure.
5. Assuming a black dot is a stuck pixel Black dots do not respond to pixel fixer software because dead transistors receive no power signal that software can influence. Running tools for hours on a dead pixel wastes time that should be spent on a warranty claim.
6. Missing the retailer return window Most people assume they need to contact the manufacturer for any hardware defect. The retailer exchange path is faster and does not require meeting any pixel count threshold. Use it while it is available.
7. Not documenting the defect before contacting support Support agents need to see clear evidence of the defect, its location, and that it predates the support call. A short screen recording of the dot against a black background and a BIOS photo are the two most useful pieces of evidence.
8. Contacting support only once and accepting the first answer Front-line support agents apply the published pixel threshold policy. Supervisors and escalation teams frequently have goodwill replacement authority for center-screen defects below the threshold. One escalation attempt is always worth making.
Brand-Specific Considerations
Dell
Dell separates its consumer and premium lines significantly for pixel policy. Standard consumer Inspiron models use the ISO Class II threshold (multiple defects required for coverage). The Dell Premium Panel Guarantee on XPS, Alienware, and UltraSharp displays covers any single bright pixel defect during the warranty term. If you have an XPS or Alienware, even one stuck pixel qualifies for replacement. Check your specific model’s warranty documentation at Dell’s support site to confirm whether Premium Panel Guarantee applies.
BIOS key: F2 on most models. Dell SupportAssist can run a built-in display test that documents defects and generates a report for warranty claims.
HP
HP’s consumer policy aligns with ISO 9241-307 Class II, requiring multiple subpixel defects before coverage activates. HP evaluates single dead pixels on a case-by-case basis at supervisor discretion. Business-class Z-series and DreamColor panels apply stricter criteria. HP SupportAssist (pre-installed on most HP laptops) includes a hardware diagnostic that can confirm and document display defects for warranty submissions.
BIOS key: Esc then F10, or F2 depending on model. HP’s warranty evaluation considers pixel location, so a center-screen defect has a stronger case than a corner defect.
Lenovo
Consumer IdeaPad and Yoga lines follow standard multi-defect thresholds. ThinkPad models, particularly those sold with ThinkPad Premium Support, have historically offered single-pixel coverage and more flexible evaluation. Lenovo Vantage (pre-installed) includes a display health diagnostic that detects stuck pixels and generates documentation.
BIOS key: F1 for ThinkPads, F2 for IdeaPad and Yoga lines. Lenovo’s published consumer threshold is 3 bright subpixel defects or 5 dark subpixel defects before coverage activates, but escalation agents can deviate for center-screen defects.
ASUS
ASUS splits its policy sharply by product line. ProArt monitors and select high-end ROG displays carry a zero-bright-dot guarantee covering any single stuck pixel. Standard consumer VivoBook, ZenBook, and most TUF models apply the ISO Class II baseline. Check the product specifications page or the sticker on the original box for the applicable pixel guarantee for your specific model.
BIOS key: F2 for most ASUS laptops. ASUS MyASUS includes a display diagnostic for documenting defects.
Acer
Acer follows the standard ISO Class II multi-defect threshold for most consumer laptop lines. Their published policy allows a certain number of subpixel defects based on the panel’s native resolution. Single dead pixel coverage is generally not offered on standard consumer models without goodwill escalation.
BIOS key: F2 or Del on most Acer models.
MSI
MSI gaming laptops use panels from the same suppliers as other brands and are subject to similar ISO Class II tolerances. MSI’s Dragon Center or MSI Center application does not include a dedicated pixel diagnostic. For gaming-focused MSI models, documenting the defect independently (photos, BIOS test, external monitor comparison) is necessary before contacting support.
BIOS key: Del on most MSI gaming laptops.
Repair Shop Diagnosis

When a laptop comes in with a reported pixel defect, the first check is always the BIOS test. Technicians power the machine on and look at the BIOS screen before Windows touches anything. If the defect appears there, it is hardware. If not, the driver stack and GPU output are tested next.
The second check is the external monitor connection. Plugging into an external display via HDMI immediately confirms whether the defect is isolated to the panel or exists in the GPU signal. A clean external display with the laptop panel defect present confirms a panel-only fault.
For stuck pixels, shops often run a pixel cycling tool for 15 to 30 minutes while the technician works on other machines. If the pixel clears, no further work is needed. If not, the conversation moves to panel replacement or warranty routing.
Panel replacement takes 30 to 60 minutes for an experienced technician. The work involves removing the display bezel, disconnecting the display cable, swapping the panel, reconnecting, and reassembling. The most time-consuming part is usually sourcing a compatible panel for less common laptop models.
Typical repair costs at an independent repair shop: $80 to $150 for labor plus the panel cost ($40 to $150 depending on size, resolution, and type). Total out-of-pocket range is usually $120 to $250. Manufacturer service centers typically charge more for the same work.
When Hardware Replacement Is Necessary
Single confirmed dead pixel (black, visible in BIOS): Panel replacement or warranty claim. No software fix exists for a dead transistor.
Hot pixel (permanently white dot): Same as dead pixel. Transistor failure in the open position. Panel replacement or warranty.
Impact damage creating multiple defects or spreading dark region: Panel replacement. The LCD layer has been physically damaged and will continue to degrade.
Pixel defects spreading or increasing in number over weeks: The panel is degrading. This pattern suggests a hardware fault beyond an isolated pixel issue and panel replacement is the correct solution before the situation worsens.
Pixel fixer software and pressure method have both been attempted without result: For stuck pixels that do not respond to two sessions of software cycling and two light pressure attempts, panel replacement is the practical next step if warranty is unavailable.
Stop Troubleshooting and Seek Professional Repair If
Multiple defects appeared suddenly after an impact: This is physical LCD damage, not a pixel defect. The damage may spread further. Stop using the laptop heavily and get it assessed.
Dark liquid-like spreading across the screen: This is liquid crystal leakage from a cracked LCD layer. The panel has been physically damaged and continued use accelerates the damage. Seek professional repair immediately.
The screen flickers or produces visual artifacts in addition to the pixel defect: This combination suggests display cable damage or GPU issues beyond a pixel fault. A technician needs to assess the full display chain.
You notice unusual heat near the display panel: LCD panel failures from thermal stress occasionally produce this. It warrants professional diagnosis before it becomes a larger problem.
Any pressure method attempt caused a larger dark area to appear: You have created additional LCD layer damage. Stop immediately and bring it to a technician. Continuing to apply pressure will make the damage worse.
Prevention Tips

Test new laptops for pixel defects within 48 hours of purchase. The retailer return window is the easiest path to a defect-free panel. Run a full pixel test (DeadPixelTest.org works well) before the window closes.
Never place objects on the keyboard with the lid closed. Books, chargers, tablets, and other items placed on top of a closed laptop press directly against the LCD panel. This is one of the most common causes of pressure-induced pixel damage.
Carry the laptop in a case that provides structure around the lid. Thin sleeves that allow the lid to flex under external pressure in a bag can gradually damage the LCD layer over time. Rigid-sided cases or bags with dedicated laptop compartments protect the panel.
Avoid touching the screen surface directly. Repeated pressure from fingers, especially on the same areas, can create mechanical stress on subpixel structures over time. If you have a touchscreen, clean the panel gently rather than pressing firmly.
Do not expose the laptop to extreme temperature swings. Leaving a laptop in a cold car and then bringing it into a warm room creates condensation risk and thermal stress on the LCD layers. Allow the laptop to reach room temperature before turning it on.
Keep the panel surface clean with the correct tools. A microfiber cloth lightly dampened with distilled water is the correct cleaning method. Ammonia-based cleaners and paper towels both damage the anti-glare coating over time. Coating damage does not create dead pixels, but it does make defects harder to see clearly and affects overall image quality.
Monitor any stuck pixel for spreading. A single stuck pixel that has not responded to two software sessions and has remained isolated and stable for several weeks is not an urgent repair. A defect that is growing, multiplying, or changing character needs professional evaluation.
Frequently Asked Questions

Can dead pixels be fixed?
True dead pixels (permanently black, visible before Windows loads) cannot be fixed by software. The transistor powering that pixel has failed at the hardware level. Stuck pixels (colored dots) can sometimes be fixed with pixel cycling software. Most people have stuck pixels rather than dead ones, so it is worth running the diagnosis test before assuming the worst.
How do I know if my pixel is dead or stuck?
A dead pixel stays completely black on every background color including white. A stuck pixel holds one specific color (red, green, blue, white, cyan) and may be visible only on certain background colors. Take a screenshot and check whether the dot appears in the image. Dead pixels do not appear in screenshots because the fault is physical. A dot that shows in your screenshot is either a stuck pixel or a driver artifact, both of which have higher chances of being fixed.
Does JScreenFix actually work?
JScreenFix works on stuck pixels where the liquid crystal is frozen rather than the transistor physically dead. It does not work on true dead pixels. For stuck pixels specifically, it resolves the issue in a reasonable portion of cases. Run it for 20 to 30 minutes and evaluate. It cannot make a dead pixel worse, so it costs nothing to try on any colored dot.
How many dead pixels before a laptop qualifies for warranty replacement?
This varies significantly by brand and product line. Most consumer laptops from HP, Lenovo consumer lines, Acer, and standard ASUS models require multiple subpixel defects (typically 3 to 5 bright or 5 dark) before the published threshold activates. Dell XPS and Alienware with Premium Panel Guarantee, ASUS ProArt, and Dell UltraSharp cover any single bright pixel defect. Always confirm your specific model’s warranty documentation.
Is it safe to use a laptop with a dead pixel?
A single isolated dead pixel does not indicate a safety risk and does not affect the rest of the laptop’s performance. You can continue using the machine normally. If the defect is spreading, multiplying, or appeared after an impact, it warrants professional assessment to confirm the panel is not physically damaged in a way that could worsen.
Can I fix a dead pixel with the pressure method?
The pressure method is designed for stuck pixels with frozen liquid crystal, not dead pixels with failed transistors. Applying pressure to a dead pixel produces no improvement. For stuck pixels, the pressure method has a modest success rate but requires a very light touch and should not be attempted more than twice. It should never be used on OLED panels or touchscreen displays.
What is a hot pixel and how is it different from a dead pixel?
A hot pixel is permanently white or very bright, caused by a transistor stuck in the fully-on position. A dead pixel is permanently black, caused by a transistor stuck in the off position. Both are transistor failures and neither responds to software pixel fixers. Both require warranty claim or screen replacement. Hot pixels are actually more visually disruptive on dark content because they glow brightly.
Will a dead pixel spread to neighboring pixels?
Isolated transistor failures do not spread to neighboring pixels. However, if the underlying cause is LCD layer physical damage (from impact or pressure), the damage can spread as the liquid crystal continues to leak from the cracked area. One isolated dot that has been stable for weeks is very unlikely to grow. A dark spreading region after an impact absolutely can and often does continue spreading.
Conclusion
A dot on your screen is either a stuck pixel, which software can sometimes fix in 30 minutes, or a true dead pixel, which requires a warranty claim or screen replacement. Running the BIOS test and the screenshot test tells you which category you are in before wasting time on fixes that will not work. If the laptop is still within the retailer’s return window, a same-unit exchange is faster and more reliable than any repair or warranty process.