
Quick Answer
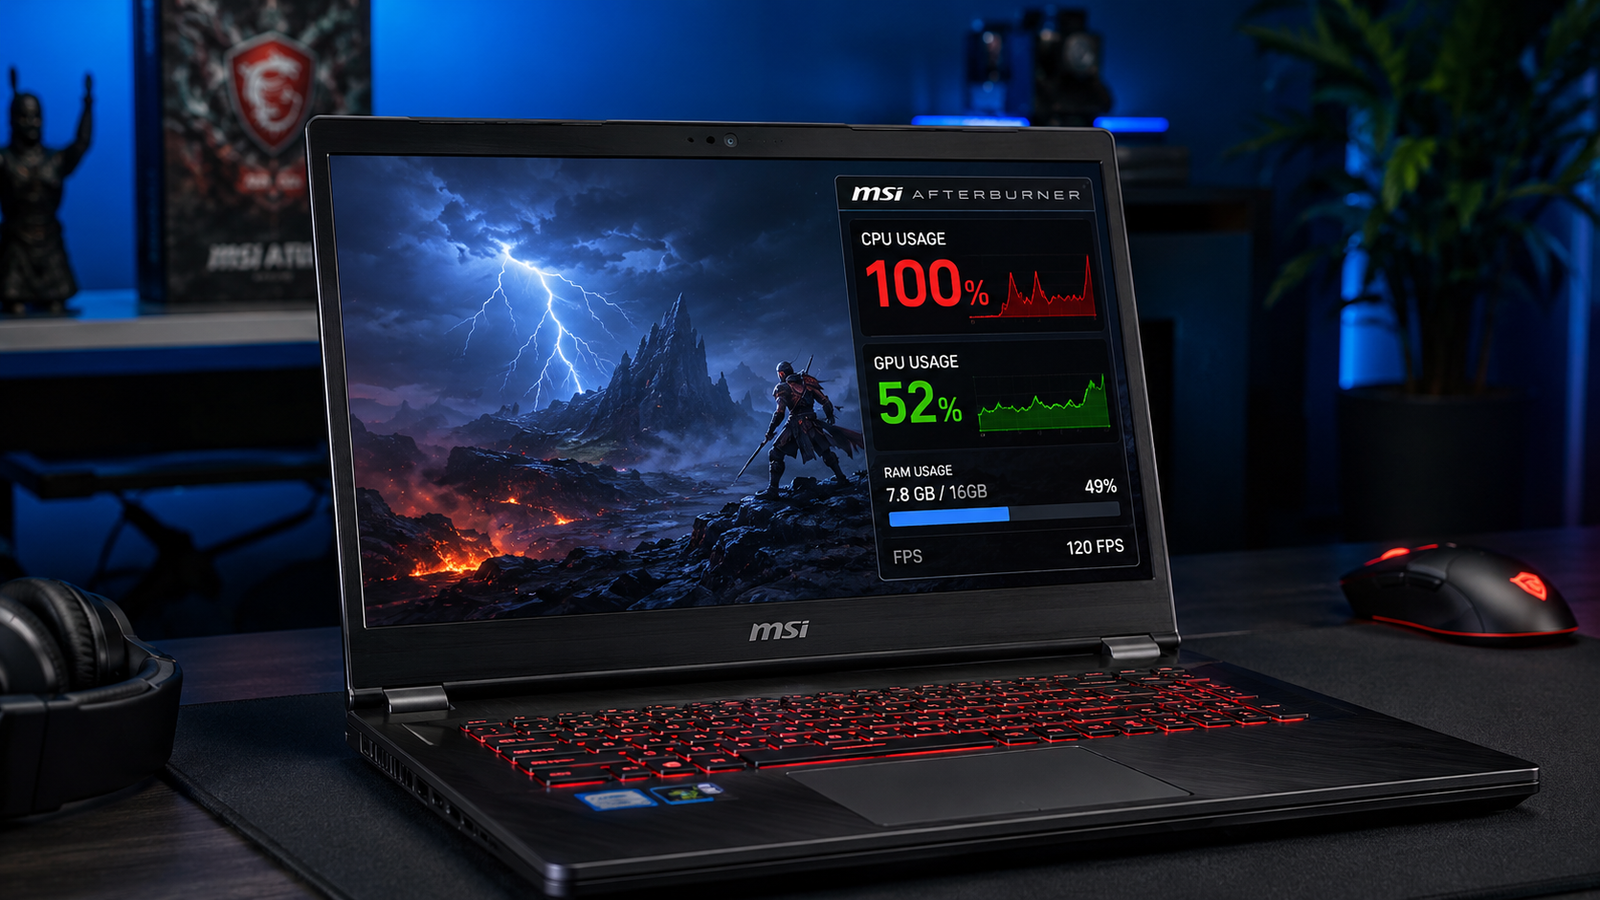
A CPU bottleneck on a laptop happens when the processor cannot feed the GPU fast enough, leaving GPU usage low while CPU usage stays near 100%. The fastest fix is checking for fake causes first: wrong power plan, single-channel RAM, or thermal throttling. Fix those before assuming you need a new processor.
Introduction
You lowered your graphics settings, updated your drivers, and your GPU still sits at 50% while your CPU is maxed out. Frames drop. Stuttering hits during busy scenes. Nothing you try seems to move the needle.
That pattern points to a CPU bottleneck : but on laptops, the real cause is often not what people assume. Thermal throttling, single-channel RAM, a wrong power plan, and single-core saturation all produce identical symptoms to a genuine processor mismatch. Most users skip those checks and immediately start shopping for a new CPU or a new machine.
This guide walks you through confirming the bottleneck correctly, ruling out the fake causes, and applying every practical fix in the right order : starting with the ones that cost nothing.
Symptoms of a CPU Bottleneck

Performance symptoms:
- FPS stays low even after dropping resolution or turning graphics settings down
- Stuttering and frame drops during busy scenes: open-world areas, large crowds, combat with many characters
- 1% lows (the worst frames) feel far worse than average FPS suggests
- Frame time spikes happen in bursts rather than steady degradation
Monitoring symptoms:
- CPU usage sits at 90 to 100% while GPU usage is below 70 to 75%
- One or two CPU cores are pinned at 100% while others are mostly idle
- CPU temperature climbs above 90°C during sustained load
- GPU clocks are lower than their rated boost speed
Game behavior symptoms:
- Performance degrades more in CPU-heavy games (strategy, simulation, open-world RPGs, AI-heavy titles) than in GPU-heavy titles (shooters at 4K)
- Loading times are long even with a fast NVMe SSD
- Multitasking while gaming : Discord open, browser tabs running : makes FPS noticeably worse
Common misread symptoms:
- Low overall CPU percentage in Task Manager (can hide a single pinned core)
- GPU usage looks “fine” but FPS is still low
Start Here: Fast Diagnosis
Work through this before touching any settings.
Step 1: Check CPU and GPU usage while gaming Open Task Manager during a demanding game session. If CPU is near 100% and GPU is below 70%, move to Step 2.
Step 2: Check individual CPU cores In Task Manager, right-click the CPU graph and select Logical Processors. If one or two cores are at 100% while overall CPU reads 40 to 60%, that is a single-thread bottleneck : not a hardware capacity problem.
Step 3: Check CPU temperature If CPU temperature is above 90°C and performance drops after 10 to 15 minutes, thermal throttling is reducing clock speed. The bottleneck is heat, not the processor itself. Thermal throttling fix: clean vents, repaste, use a cooling pad. Start there.
Step 4: Check power plan Go to Windows Power Options. If the plan is set to Balanced or Power Saver, the CPU may be running below its rated speed the entire time. Power plan fix: switch to High Performance or use the laptop’s OEM performance tool.
Step 5: Check RAM configuration Open CPU-Z and go to the Memory tab. If it shows Single Channel, you are losing up to 30 to 50% of memory bandwidth on Ryzen-based laptops. RAM fix: add a matching second stick to enable dual-channel mode.
If all five checks pass and the CPU is still the limit, you have a genuine hardware bottleneck. Continue to the fix section.
Tools Needed
Built-in tools:
- Windows Task Manager (Ctrl + Shift + Esc)
- Windows Power Options
- BIOS / UEFI (accessed at startup via F2, Del, or Fn + F2 depending on brand)
Free software tools:
- HWiNFO64 : per-core temperatures, clock speeds, throttling flags
- CPU-Z : RAM channel mode, CPU clock speed
- MSI Afterburner + RivaTuner Statistics Server : on-screen GPU and CPU overlay while gaming
- ThrottleStop : CPU power limit and throttle flag monitoring (advanced)
Hardware tools:
- Compressed air can (vent cleaning)
- Thermal paste (Thermal Grizzly Kryonaut or Arctic MX-6)
- Phillips screwdriver set (for accessing internals)
- Laptop cooling pad (optional but useful for ruling out heat issues)
Troubleshooting Matrix
| Symptom | Likely Cause | Fast Check |
| CPU 100%, GPU under 70% | True CPU bottleneck or thermal throttle | Check temps in HWiNFO64 |
| CPU shows 40%, GPU still low | Single-core pinning | Check per-core view in Task Manager |
| Performance drops after 10to15 min | Thermal throttling | CPU temp above 90°C in HWiNFO64 |
| GPU usage low on battery only | Power plan limiting CPU speed | Switch to High Performance |
| FPS bad, single RAM stick | Single-channel bandwidth starvation | CPU-Z Memory tab shows Single Channel |
| Bottleneck only in specific games | Game is single-threaded | Test across multiple titles |
| Bottleneck after Windows update | Background service using CPU | Check Task Manager for rogue processes |
What Causes a CPU Bottleneck on a Laptop

Old or Underpowered Processor Paired with a Newer GPU
Why it happens: GPU technology advances faster than CPU technology. A laptop bought in 2019 or 2020 with an upgraded or mid-range GPU may have a processor that could not keep up even when the system was new, let alone now.
How to identify it: Check your CPU against GPU benchmarks for your specific games. If GPU usage never climbs above 60 to 65% even at 1080p low settings, the CPU cannot send frames fast enough regardless of settings.
What users misunderstand: Lowering resolution and graphics settings reduces GPU load, not CPU load. In CPU-bottlenecked scenarios, lowering settings actually makes the bottleneck more visible because the GPU finishes work faster and waits longer for the CPU.
One confirmation sign: FPS improves noticeably when you raise resolution (1440p vs 1080p), because that forces the GPU to do more work and the imbalance shrinks.
Thermal Throttling Masquerading as a Bottleneck
Why it happens: Laptop CPUs operate inside tight thermal envelopes. When the CPU temperature hits 95 to 100°C, the processor reduces its clock speed automatically to protect itself. A Core i7 running at 4.5 GHz that throttles down to 2.8 GHz looks exactly like an underpowered processor.
How to identify it: Open HWiNFO64 during gaming and watch for “Package Power Limit” or “Thermal Throttling” flags. Alternatively, watch the CPU clock speed. If it drops significantly after 10 to 15 minutes under load, throttling is occurring.
What users misunderstand: Cooling pads do not always fix this. If the thermal paste has dried out or the heatsink fins are clogged with dust, external airflow cannot compensate.
One confirmation sign: CPU temperature is above 90°C and performance is noticeably better in the first 5 minutes of gaming than after 20 minutes.
Single-Channel RAM
Why it happens: Many budget and mid-range laptops ship with a single RAM stick to hit a lower price point. On AMD Ryzen platforms, single-channel RAM cuts memory bandwidth roughly in half. The CPU is constantly waiting for data it cannot receive fast enough.
How to identify it: Open CPU-Z, go to the Memory tab, and look at the Channel field. If it reads Single, you are in single-channel mode. On laptops with soldered RAM, this cannot be changed.
What users misunderstand: This does not look like a RAM problem. It looks like a CPU problem because the bottleneck shows up as CPU-side starvation, not a memory error. GPU usage drops, FPS suffers, and the CPU never gets the bandwidth it needs to feed the GPU frames.
One confirmation sign: Adding a second matching RAM stick causes a measurable jump in GPU usage and FPS without changing any other setting.
Wrong Power Plan or TDP Limits
Why it happens: Windows Balanced power plan reduces CPU clock speed to save power. On many gaming laptops, this can cut the processor to its base clock or below during what should be peak gaming. OEM software sometimes imposes TDP limits in “Silent” or “Eco” modes.
How to identify it: Check your current power plan in Control Panel. Watch CPU clock speeds in HWiNFO64 during gaming. If the CPU never reaches its rated boost clock, a power limit is in effect.
What users misunderstand: Plugging in the charger does not always fix this. Some laptops require the power plan to be explicitly set to High Performance even when plugged in. Some OEM modes (ASUS Armory Crate, Lenovo Vantage, HP Omen Gaming Hub) impose separate TDP profiles that override Windows power plans.
One confirmation sign: Switching the OEM software performance mode from Silent or Balanced to Turbo or Performance immediately changes CPU clock behavior in HWiNFO64.
Single-Core Saturation (The Hidden One)
Why it happens: Most game engines still run the bulk of their logic : AI, physics, game state calculations : on a single main thread. That one thread pins its CPU core at 100% while the other cores sit at low utilization. Overall CPU usage reads 25 to 40%, which looks fine.
How to identify it: In Task Manager, right-click the CPU graph and switch to Logical Processors view. Look for one core significantly higher than the rest during gaming.
What users misunderstand: Task Manager’s default average CPU view completely hides this. You can have a 12-core CPU showing 35% overall usage with one core completely pinned, causing stuttering that looks impossible given the “available headroom.”
One confirmation sign: Stutter occurs rhythmically rather than during random load spikes, and HWiNFO64 shows one core consistently hitting 95 to 100% while GPU usage dips at the same moments.
Background Processes Consuming CPU
Why it happens: Windows Defender scanning, Windows Update downloading and installing, cloud sync clients (OneDrive, Google Drive), and antivirus scans all compete with games for CPU time.
How to identify it: Open Task Manager during a gaming session and sort by CPU usage. Any process other than your game using more than 5 to 10% of CPU is stealing cycles.
What users misunderstand: Many users exclude their game folder from antivirus but forget that Defender also scans system directories during updates. Scheduling updates and scans for off-hours eliminates this class of problem entirely.
One confirmation sign: Closing or pausing the background process immediately improves FPS : no other change was made.
What We See Most Often
In a repair shop setting, the majority of CPU bottleneck complaints from laptop users are not hardware mismatches. They fall into three categories.
The most common is thermal throttling. Dust-clogged heatsinks and dried-out thermal paste reduce a capable processor’s effective speed by 30 to 50%. The laptop was fine when new and gradually slowed over 2 to 3 years. Cleaning the vents and repasting resolves this in most cases.
The second most common is single-channel RAM in AMD Ryzen laptops. Budget gaming laptops frequently ship with a single 8GB stick. Customers sometimes buy a discrete GPU upgrade or an external GPU setup and cannot understand why the upgrade made no difference. Adding a second matching RAM stick costs $20 to $40 and often delivers more improvement than a CPU upgrade would.
The third category is a genuine hardware mismatch: a Core i5 or older Core i7 paired with an RTX 3060 or higher. No software fix changes this. The only resolution is a CPU upgrade (when the socket allows it) or a new system.
How to Diagnose the CPU Bottleneck

Follow these steps in order. Each step narrows the problem.
Step 1: Monitor CPU and GPU usage simultaneously
Open Task Manager. Switch to the Performance tab. Launch your game and play for 10 to 15 minutes in a demanding area. Alt-tab out and check readings.
Expected Result: You want to see CPU near 100% and GPU clearly below 75 to 80%.
If Failed: Both are near 100% : you do not have a CPU bottleneck, the system is simply at its limit. Both low : a frame cap, Vsync, or power limit is restricting output. Continue to next step.
Step 2: Switch to per-core CPU view
While still in the Performance tab, right-click the CPU graph and select “Change graph to : Logical Processors.” Return to the game for a few minutes, then alt-tab.
Expected Result: One or two cores are at 90 to 100% while others are much lower.
If Failed: All cores are relatively equal and none are maxed : single-core bottleneck is not the issue. Continue.
Step 3: Check CPU temperature and clock speed under load
Download and run HWiNFO64. Select Sensors Only at launch. In the game, watch CPU Package Temperature and CPU Core Speed values.
Expected Result: Temperature stays below 85°C and clock speed stays near the rated boost. If temperature exceeds 90°C consistently, thermal throttling is the problem. Fix that before anything else.
If Failed: Temperature is normal and clocks are full. Not a heat problem.
Step 4: Check RAM channel mode
Open CPU-Z and go to the Memory tab. Look at Channels.
Expected Result: Dual for a healthy configuration.
If Failed: Single : add a second RAM stick that matches your current one. Test again after the change.
Step 5: Check power plan and OEM performance mode
Open Control Panel, go to Power Options, and confirm High Performance is selected. Open any OEM app (Armory Crate, Vantage, Omen Gaming Hub, Dragon Center) and check the performance mode.
Expected Result: High Performance or Turbo mode active, CPU reaching boost clocks in HWiNFO64.
If Failed: Switch modes, retest immediately.
Step 6: Close background processes
Open Task Manager, sort by CPU usage, and close everything not related to your game. Include browser tabs, cloud sync, Discord updates, and any scheduled scans.
Expected Result: Overall CPU usage drops by 5 to 15%, GPU usage climbs.
If Failed: Background apps were not the problem. The bottleneck is a hardware limitation.
Which Fix Usually Works?
| Fix | Typical Success Likelihood | Cost | Difficulty |
| Switch to High Performance power plan | Common | Free | Easy |
| Close background processes | Common | Free | Easy |
| Enable XMP / EXPO in BIOS | Common | Free | Easy |
| Add second RAM stick (dual-channel) | Very Common (Ryzen) | $20to$40 | EasytoModerate |
| Clean vents and repaste CPU | Very Common | $5to$15 for materials | Moderate |
| Enable OEM Turbo / Performance mode | Common | Free | Easy |
| CPU overclock / undervolt | Occasional | Free | Advanced |
| CPU upgrade (socketed only) | Occasional | $50to$200 | Advanced |
| New laptop | Rare (last resort) | $400+ | N/A |
Step-by-Step Fixes

Fix 1: Switch Windows Power Plan to High Performance
Cost: Free Time: 2 minutes Difficulty: Easy
- Press Windows + R, type powercfg.cpl, and press Enter.
- Select High Performance. If it is not visible, click “Show additional plans.”
- If High Performance is not listed, open Command Prompt as administrator and run: powercfg -duplicatescheme SCHEME_MIN
- Close the window and relaunch your game.
Expected Result: CPU now reaches its rated boost clock instead of sitting at base speed. FPS improves noticeably in CPU-bound scenarios.
If Failed: The power plan was already fine, or an OEM software profile is overriding it. Move to Fix 2.
Technician Tip: On laptops, High Performance should only be selected when plugged in. Running it on battery drains charge rapidly and adds heat.
Fix 2: Enable OEM Performance Mode
Cost: Free Time: 3 minutes Difficulty: Easy
- Open your manufacturer’s management app:
- ASUS: Armory Crate
- Lenovo: Vantage
- HP: Omen Gaming Hub or HP Command Center
- MSI: Dragon Center or MSI Center
- Dell: Alienware Command Center or Dell Mobile Connect
- Look for a Performance Mode or Scenario Mode setting.
- Switch from Silent, Balanced, or Eco to Performance or Turbo.
- Close the app and test in-game.
Expected Result: CPU TDP limits increase. Clock speeds reach or exceed rated boost. Temperatures rise slightly, which is expected and acceptable.
If Failed: Mode was already at max, or the software’s own TDP profile is the bottleneck at the firmware level. Contact the manufacturer for a BIOS update.
Technician Tip: Some ASUS and MSI gaming laptops have a keyboard shortcut to toggle performance modes : often Fn + F5 or a dedicated key : faster than opening the software.
Fix 3: Close Background Processes and Schedule Windows Tasks
Cost: Free Time: 5 minutes Difficulty: Easy
- Press Ctrl + Shift + Esc to open Task Manager.
- Click the CPU column header to sort by CPU usage descending.
- Close any process using more than 2 to 3% CPU that is not your game. Right-click and choose End Task.
- Do not close explorer.exe, antimalware process, or hardware-related services.
- To prevent Windows Update from running during gaming: open Settings, go to Windows Update, Advanced Options, and set Active Hours to your gaming schedule.
- To add a game folder exclusion to Defender: open Windows Security, Virus and Threat Protection, Manage Settings, and add the game directory under Exclusions.
Expected Result: CPU headroom increases by 5 to 15%. Stutters caused by background scan spikes disappear.
If Failed: Background apps were not contributing significantly. Continue to the next fix.
Technician Tip: Discord’s video processing uses more CPU than most people realize. Disabling hardware acceleration in Discord’s Voice and Video settings reduces its CPU load considerably.
Fix 4: Enable XMP or EXPO in BIOS
Cost: Free Time: 10 minutes Difficulty: Easy to Moderate
- Restart the laptop and enter BIOS by pressing F2, Del, or Fn + F2 at the manufacturer logo screen. The exact key varies by brand.
- Navigate to Advanced, Overclocking, or Tweaker settings depending on the BIOS.
- Find XMP (Intel platforms), DOCP, or EXPO (AMD platforms).
- Enable XMP Profile 1 or EXPO Profile 1.
- Save with F10 and let the laptop reboot.
- After booting, open CPU-Z and check the Memory tab. The DRAM Frequency should now match the speed printed on your RAM stick (note: CPU-Z shows half the rated speed, so 1600 MHz in CPU-Z equals 3200 MHz DDR4).
Expected Result: Memory bandwidth increases significantly. CPU-to-GPU data throughput improves, GPU usage climbs, and FPS improves in memory-bandwidth-sensitive games.
If Failed: The laptop does not POST after enabling XMP : re-enter BIOS and disable it. Some budget laptop BIOS versions do not support XMP even when the RAM theoretically supports it.
Expert Warning: Not all laptops expose XMP in their BIOS. Many OEMs lock it out to ensure stability across configurations. If the option is not present, the RAM is already running at its default speed and cannot be changed without a BIOS mod or hardware swap.
Fix 5: Add a Second RAM Stick (Enable Dual-Channel)
Cost: $20 to $50 depending on speed and capacity Time: 20 to 40 minutes Difficulty: Moderate
- Open CPU-Z and note the exact specs on the Memory tab: type (DDR4/DDR5), speed, and timing.
- Check the Slot tab to see how many RAM slots your laptop has and whether any are empty.
- Purchase a matching stick that shares the same type and speed. Identical brand and model is ideal, but compatible specs also work on most laptop platforms.
- Power off, unplug from the wall, and open the laptop’s RAM access panel (usually one screw on the bottom).
- Insert the new stick at a 45-degree angle, press down until the clips lock.
- Boot and confirm dual-channel mode in CPU-Z.
Expected Result: Memory bandwidth roughly doubles. On AMD Ryzen platforms this produces a visible FPS gain, especially in CPU-bound or integrated graphics scenarios. On Intel platforms with dedicated GPUs the gain is smaller but still measurable.
If Failed: Only one slot available, or RAM is soldered : dual-channel is not possible on this machine. Check the laptop’s service manual or iFixit page before purchasing.
Expert Warning: If the laptop has two existing RAM slots with different capacity sticks (e.g. 8GB + 16GB), dual-channel will only activate on the first 8GB of each stick. This is called asymmetric dual-channel and is less efficient than matching sticks, but still better than single-channel.
Fix 6: Clean Vents and Replace Thermal Paste
Cost: $5 to $20 for materials Time: 30 to 60 minutes Difficulty: Moderate
- Power off completely, unplug, and remove the battery if removable.
- Use a compressed air can to blast out dust through the exhaust vents. Cover the intake vents with a cloth to prevent dust from recirculating inside.
- If temperatures remain above 90°C after cleaning, open the bottom panel and locate the CPU heatsink.
- Remove the heatsink screws in the order printed on the heatsink (usually numbered 1 to 4). Lift the heatsink away gently.
- Clean old thermal paste from both the CPU die and heatsink contact surface using 99% isopropyl alcohol and a lint-free cloth.
- Apply a small pea-sized dot of new thermal paste to the center of the CPU die. Do not spread it : pressure from the heatsink will distribute it.
- Reseat the heatsink and tighten screws in numbered order, applying even pressure.
- Boot and monitor CPU temperature in HWiNFO64.
Expected Result: CPU temperatures drop by 10 to 20°C. The processor runs at full boost clock for the entire gaming session instead of throttling after 10 to 15 minutes.
If Failed: Temperatures are still high after repasting. Either the heatsink fins are physically damaged, airflow is fundamentally blocked by laptop design, or the CPU’s own TDP exceeds what the cooling system can handle at max boost.
Technician Tip: Dried thermal paste is the single most common cause of gradual performance degradation in gaming laptops between 2 and 4 years old. If your laptop performed well when new and performance has slowly declined, start here.
Expert Warning: Disassembling the laptop to access the heatsink voids the manufacturer warranty on most brands. If the laptop is still under warranty, contact support first.
Fix 7: Adjust In-Game Settings to Reduce CPU Load
Cost: Free Time: 10 minutes per game Difficulty: Easy
Some game settings tax the CPU rather than the GPU. Identifying and reducing these settings can move more of the workload to the GPU, which has available headroom.
CPU-heavy settings to reduce:
- Crowd density or population count (open-world games)
- NPC AI quality or simulation distance
- Draw distance / render distance
- Foliage and vegetation density
- Physics quality or object interaction count
Settings that primarily hit the GPU (lowering these does not help a CPU bottleneck):
- Texture quality
- Shadow resolution
- Anti-aliasing quality
- Ambient occlusion
- Screen-space reflections
Expected Result: Reducing CPU-heavy settings shifts load off the processor, allowing GPU to run closer to full utilization. FPS improves without visually significant quality loss.
If Failed: The game does not expose CPU-specific settings, or the bottleneck is too severe for settings to compensate. Hardware changes are needed.
Technician Tip: In open-world games like Cyberpunk, GTA V, and Microsoft Flight Simulator, crowd density and simulation distance cause more CPU load than any other single setting. Test reducing those first.
Fix 8: Raise In-Game Resolution
Cost: Free Time: 2 minutes Difficulty: Easy
This sounds counterintuitive but works when the GPU has significant headroom.
At 1080p, a bottlenecked CPU leaves the GPU underworked. At 1440p or higher, the GPU must do more work per frame, reducing the gap between what the CPU feeds and what the GPU can process.
- Go to in-game video settings and raise resolution to 1440p or use a render scale above 100% if 1440p is not available on your display.
- Alternatively, enable DLDSR or similar super-resolution rendering at a higher internal resolution.
- Monitor GPU usage after the change.
Expected Result: GPU usage rises toward 90 to 100%. The bottleneck ratio improves, producing smoother overall performance even though each frame is more GPU-intensive.
If Failed: The GPU was already near full load, or the display does not support higher resolutions. This fix only works when GPU has genuine headroom.
Technician Tip: This works best with RTX 3060 and above. On weaker GPUs the GPU maxes out immediately at higher resolutions and FPS tanks instead of improving.
Fix 9: CPU Undervolting (Advanced)
Cost: Free Time: 30 to 60 minutes Difficulty: Advanced
Undervolting reduces the voltage the CPU needs to maintain its clock speed. Lower voltage means less heat, less thermal throttling, and more sustained performance.
Tools: Intel XTU for Intel platforms; AMD Ryzen Controller or Ryzen Master for AMD; ThrottleStop for fine-grained Intel control.
- Download Intel XTU (Intel) or Ryzen Master (AMD).
- For Intel: go to Advanced Tuning, find Core Voltage Offset, and apply a small negative offset in steps of -0.05V. Test stability between steps using a 10-minute gaming session or Cinebench run.
- For AMD: use Ryzen Master to reduce the CPU voltage or set a manual all-core offset.
- Stop if the system crashes or artifacts appear. Reduce the offset one step and retest.
Expected Result: CPU runs 5 to 15°C cooler at load. Sustained clock speeds increase because thermal throttling occurs less frequently. FPS in sustained sessions improves.
If Failed: Some laptops lock voltage tuning at the BIOS level. Many recent Intel laptops (12th and 13th generation) lock undervolting via BIOS after the Plundervolt vulnerability patch.
Expert Warning: Incorrect undervolting can cause system instability and crashes. Always test stability before settling on an offset value. Never apply overvolting.
Fix 10: CPU Upgrade
Cost: $50 to $300+ Time: 60 to 120 minutes for removal and installation Difficulty: Advanced
Most modern laptops use soldered CPUs (BGA package) that cannot be replaced. A small number of business class and older consumer laptops use socketed CPUs (PGA or LGA) that can be swapped.
- Identify your CPU package: Intel Ark or AMD spec pages list whether the CPU uses BGA (soldered) or PGA/LGA (socketed).
- Check your laptop’s service manual for CPU socket type and supported upgrade paths.
- If socketed: remove the heatsink assembly, unlock the CPU socket, remove the existing chip, install the replacement, apply thermal paste, reassemble.
- Update BIOS to the latest version before and after the swap.
Expected Result: Higher IPC or additional cores eliminate the bottleneck. Works permanently for cases where the old CPU was genuinely insufficient.
If Failed: Laptop BIOS does not recognize the new CPU, or the heatsink cannot handle the new chip’s TDP. Both situations require reverting to the original CPU.
Expert Warning: Upgrading a soldered CPU requires reballing and soldering equipment and is not realistic for most users. If your CPU is BGA, evaluate whether buying a new laptop is more practical than the upgrade cost.
Mistakes That Make the Problem Worse
Lowering graphics settings as a first move. When the CPU is the bottleneck, lowering GPU-side settings gives the GPU even more idle time while the CPU still runs at the same speed. The bottleneck does not shrink. It sometimes looks worse because GPU usage drops and the imbalance is more obvious.
Using overall CPU percentage to diagnose. Task Manager’s default view averages all cores together. A single core pinned at 100% with seven others at 10% shows roughly 21% overall : which looks fine but represents a significant single-thread bottleneck. Always switch to per-core view.
Buying a new GPU to fix a CPU bottleneck. A faster GPU cannot fix a CPU that cannot supply frames fast enough. Adding an RTX 4070 to a Ryzen 5 3500U based laptop wastes the GPU entirely. Confirm which component is the bottleneck before purchasing any hardware.
Ignoring thermal throttling. The most common mistake in a shop environment. A laptop throttling down from 4.5 GHz to 2.4 GHz under sustained load looks like a slow CPU. Cleaning the vents and repasting fixes this entirely and costs almost nothing. Many users have replaced laptops that only needed $10 of thermal paste.
Overclocking without fixing heat first. Pushing a CPU that already runs at 95°C to higher clocks makes the throttling worse, not better. Always fix thermal issues before attempting any overclocking.
Using online bottleneck calculators as a final diagnosis. These calculators use average performance data and cannot account for your specific laptop’s thermal situation, RAM configuration, power plan, or driver state. Use them as a rough starting point only.
Disabling background processes aggressively. Some users kill processes that are necessary for Windows and hardware to function correctly. Do not end tasks you cannot identify. Sorting by CPU and closing only obvious offenders (browsers, cloud sync, update services) is enough.
Repasting with poor-quality thermal paste. Using low-grade paste after disassembly can actually result in higher temperatures than before the job. Thermal Grizzly Kryonaut, Arctic MX-6, or Noctua NT-H1 are reliable choices for laptop repasting.
Brand-Specific Considerations
Dell
Dell XPS and Inspiron laptops default to a conservative TDP profile that limits CPU performance well below rated boost. The Dell Power Manager app lets you switch between “Quiet,” “Balanced,” and “Ultra Performance” modes. On XPS models, Ultra Performance mode also raises the GPU power limit. Dell’s BIOS on many models does not expose XMP : RAM runs at JEDEC defaults. If the laptop shipped with 2666 MHz DDR4, it is likely running at 2133 MHz without XMP access.
HP
HP OMEN and Victus gaming laptops use the OMEN Gaming Hub to control performance profiles. The default mode is “Default” : switching to “Performance” increases both CPU and GPU TDP. HP business laptops (EliteBook, ProBook) sometimes throttle aggressively on battery even when plugged into lower-wattage chargers. Ensure the correct wattage charger is connected, especially on 65W and 90W variants.
Lenovo
Lenovo ThinkPads and IdeaPads use Lenovo Vantage’s Intelligent Cooling setting. IQ “Quiet” mode is aggressive in CPU limiting. Switch to “Performance” for gaming use. Lenovo Legion gaming laptops have a keyboard shortcut (Fn + Q on most models) to cycle through performance modes without opening software. Legion laptops also support BIOS-level overclocking on many SKUs via the BIOS’s “OC” menu.
ASUS
ASUS ROG and TUF laptops use Armory Crate. The “Turbo” mode in Armory Crate raises the CPU TDP significantly and also enables Hyper Fan mode. ASUS’s MUX switch (on ROG models) bypasses the iGPU and connects the dGPU directly to the display, which can reduce CPU overhead and improve frametimes. XMP and DOCP are accessible in most ASUS gaming laptop BIOS setups under the “AI Tweaker” section.
Acer
Acer Nitro and Predator laptops use NitroSense and PredatorSense apps. The “Turbo” mode increases fan speed and raises TDP. Acer’s BIOS (InsydeH20) is one of the most locked-down in the industry : XMP is rarely exposed, and TDP tuning is usually only available through the OEM software layer. Acer Predator Triton and Helios models support more BIOS options than Nitro models.
MSI
MSI Dragon Center (renamed MSI Center) controls performance profiles. “Extreme Performance” mode raises CPU and GPU TDP simultaneously. MSI’s Cooler Boost function (Fn + F7 on most models) forces all fans to maximum speed. Note that many budget MSI Thin models use a single-fan design that simply cannot cool the CPU and GPU under sustained combined load : this is a hardware limitation, not a software fix. Thermal throttling complaints are extremely common on the GF63 and Thin B12 series.
Repair Shop Diagnosis

When a laptop comes in with suspected CPU bottleneck complaints, the first thing we do is attach HWiNFO64 and run a 20-minute gaming session while logging all sensors. The log tells us three things within the first few minutes: peak and sustained temperatures, whether any throttling flags are triggered, and whether clock speeds hold at rated boost or decay under load.
In the majority of cases, the log shows thermal throttling. Clock speed decay is the tell : a CPU that starts at 4.2 GHz and drops to 2.9 GHz after 12 minutes is not a weak CPU. It is a hot CPU.
After thermal issues are addressed, the next check is RAM configuration via CPU-Z. Single-channel setups on Ryzen laptops are immediately addressed by adding a second stick before any further diagnosis. It costs the customer $25 to $35 and often resolves the complaint without any other work.
If temps are fine and RAM is dual-channel, we look at the power plan and OEM software profile. These get misconfigured after Windows updates with surprising frequency.
Only after ruling out all of the above do we tell a customer that they have a genuine hardware mismatch and that a CPU or system upgrade is the real solution.
Typical diagnostic fee: $40 to $80 depending on shop Repasting service: $60 to $120 including materials and labor RAM upgrade (adding a stick): $50 to $90 including parts and labor
When Hardware Replacement Is Necessary
A CPU upgrade or new machine becomes necessary when:
The CPU socket is soldered (BGA) and the processor has a genuinely low single-thread score. Ryzen 3 3300U, Core i5-8250U, Core i3-based laptops from 2018 to 2020 paired with anything RTX 2060 or newer are at the hardware mismatch threshold. No software fix closes that gap meaningfully.
Thermal throttling cannot be resolved by repasting. If the laptop’s heatsink contact pad is too small for its CPU TDP class, or if cooling pipes have dried out and cracked, cleaning and repasting extends the life but does not solve sustained load performance. Some thin-and-light laptops have CPUs that their cooling system cannot sustain at rated TDP.
The CPU only has 2 or 4 cores with no hyper-threading. Modern games in 2025 and 2026 expect 6 to 8 threads as a baseline. A dual-core processor cannot maintain adequate frame delivery for current titles regardless of clock speed.
RAM is fully soldered in single-channel and cannot be expanded. Some ultrabooks solder 8GB in a single-channel configuration. Dual-channel is not possible, and the only fix is a new machine.
Stop Troubleshooting and Seek Professional Repair If
The CPU or GPU temperature regularly exceeds 100°C even after cleaning and repasting. Sustained operation above 100°C can cause permanent die degradation over time.
Thermal throttling is severe and consistent from the moment the laptop boots, not just under load. This suggests a short circuit, failing VRM, or sensor fault that requires professional diagnosis.
You smell burning or notice discoloration around the CPU area. Power off immediately. Do not restart. A component may have failed.
The system crashes or produces artifacting after repasting. Incorrect heatsink pressure or a static discharge during disassembly can damage components. Have a technician inspect before powering back on.
The laptop has been repasted and cleaned multiple times without improvement. At this point the problem is likely the heatsink itself (deformed pipes, failed vapor chamber) or a motherboard power delivery issue.
Any liquid damage history exists. Corrosion on the PCB causes all kinds of erratic performance behavior that mimics software problems. Professional cleaning is required before any other diagnosis is useful.
Prevention Tips
Keep vents clear during use. Flat surfaces, pillows, and bedding block bottom intake vents entirely. A $10 to $20 laptop stand or even a hard book under the chassis maintains airflow.
Blast vents with compressed air every 3 to 6 months. You do not need to open the laptop for routine cleaning. Two or three seconds of compressed air through the exhaust vent loosens and clears accumulated lint before it becomes a performance problem.
Replace thermal paste every 2 to 3 years. Factory-applied thermal paste dries out over time. On a gaming laptop used daily, 18 to 24 months is a realistic replacement schedule for maintaining peak temperatures.
Set Windows Update and Defender scans to run at 2 to 3 AM. Both compete with games for CPU cycles if they run during gaming sessions. Scheduling them for hours when the laptop is idle and plugged in eliminates this source of unexpected performance drops.
Always game on the High Performance power plan when plugged in. Some OEM laptops reset the power plan after major Windows updates. Check it periodically.
Match RAM sticks when upgrading. Always check your current RAM’s exact speed and timing before buying a second stick. A mismatch in speed causes the system to run both sticks at the slower speed.
Keep the BIOS updated. Manufacturers release BIOS updates that improve thermal management, fix power delivery bugs, and add new performance profiles. Check your manufacturer’s support page every 6 to 12 months.
Never block the exhaust vent. Users sometimes place the laptop’s exhaust side against a wall or the back of a desk. The exhaust vent needs 2 to 3 inches of clear space to expel heat.
Frequently Asked Questions

Can a CPU bottleneck be fixed without upgrading hardware?
Yes, in many cases. Thermal throttling, single-channel RAM, wrong power plan, and background processes all create CPU bottleneck symptoms that software and configuration changes can fix. A genuine hardware mismatch between CPU and GPU is the only situation where software changes cannot close the gap.
How do I know if my bottleneck is the CPU or GPU?
Monitor both simultaneously. If CPU usage is near 100% and GPU usage is below 70 to 75%, the CPU is the limiting component. If GPU usage is near 100% and CPU usage is moderate across all cores, the GPU is the limit. Watch individual CPU cores, not just the overall average, to avoid missing single-core saturation.
Is 100% CPU usage always a bottleneck?
Not always. During video rendering, compression, or compiling, 100% CPU usage is expected and healthy. It only indicates a bottleneck when GPU usage is simultaneously low and the task is something that should use both (like gaming). A CPU running at 100% with no GPU involved is simply a CPU-bound task, which is normal.
Does a bottleneck damage my laptop?
The bottleneck itself does not cause hardware damage. The consequence of the bottleneck : higher sustained temperatures in a CPU working at maximum load for long periods : can contribute to thermal degradation over time, but this is a heat issue, not the bottleneck directly. Keeping temperatures under control is more important than eliminating the bottleneck.
Will adding more RAM fix a CPU bottleneck?
It depends on the cause. If your laptop runs single-channel RAM, adding a second stick to enable dual-channel mode genuinely improves performance by increasing memory bandwidth : the processor can receive data faster. If your RAM is already dual-channel, adding more capacity does not fix a CPU bottleneck.
Can I overclock my laptop CPU to fix a bottleneck?
On Intel platforms, many laptops support limited overclocking through XTU or ThrottleStop, though recent generations lock voltage tuning. On AMD platforms, Ryzen Master allows frequency adjustments on supported mobile chips. Overclocking generates more heat, so it must always be paired with good thermal management to avoid worsening throttling.
What is a good CPU-to-GPU ratio for laptops?
There is no single universal ratio. As a practical guideline: if GPU usage averages 80 to 95% during normal gaming with CPU at 60 to 75%, the balance is healthy for most scenarios. The imbalance becomes a problem when GPU usage consistently sits below 60 to 65% while the CPU is maxed.
Conclusion
Most CPU bottleneck complaints on laptops have a software or configuration cause, not a hardware limit. Check your power plan, RAM channel mode, background processes, and CPU temperature before assuming the processor is genuinely insufficient. Thermal throttling alone accounts for a large share of cases where a capable CPU appears too slow. If all free fixes are exhausted and the hardware is genuinely mismatched, a new machine is a better investment than trying to upgrade a soldered CPU.