
Quick Answer
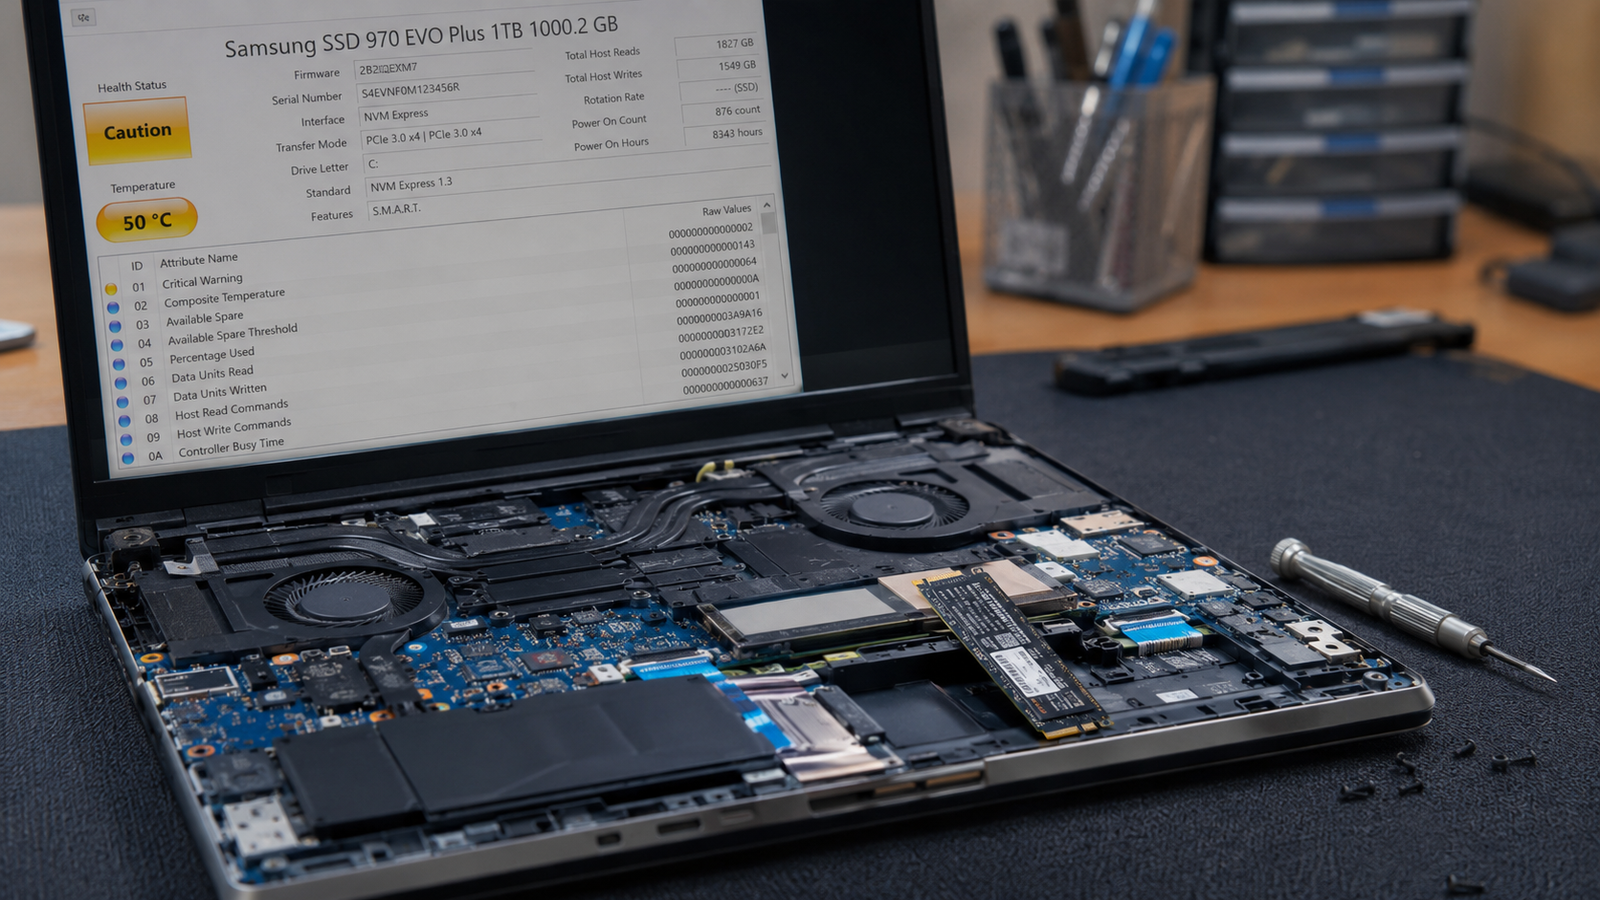
The most common signs your SSD is failing are slow boot times that keep getting worse, files taking too long to open or save, random system freezes, blue screens with disk-related error codes, and files suddenly going corrupt or disappearing. Run CrystalDiskInfo (free) to check SMART health data. If the status shows Caution or Bad, back up your data immediately and plan for a replacement.
Introduction
Your laptop has been getting slower over the past few weeks. Boot takes twice as long. A file you saved yesterday has vanished or opened corrupted. The system freezes mid-task and nothing you do seems to fix it. You have already reinstalled drivers and run Windows Update, but nothing helps.
The problem is almost certainly your SSD.
SSDs fail differently from old hard drives. There is no clicking, no grinding, and no warning sound. The failure creeps in through small symptoms that most people chalk up to software problems, and by the time the drive fully dies, taking a backup is often already too late.
This guide gives you a complete, fast-moving process for confirming a failing SSD, understanding what the symptoms actually mean, and deciding whether you need to run a data backup right now or whether you still have time to troubleshoot.
Symptoms of a Failing SSD

Watch for these signs. One symptom alone might not mean much. Two or more together is a red flag.
Performance symptoms:
- Boot time keeps getting slower over days or weeks, not just occasionally
- Programs that used to open instantly now hang for several seconds before loading
- File transfers that used to complete quickly now freeze partway through
- The Windows loading spinner runs much longer than usual at startup
Freeze and crash symptoms:
- System freezes randomly during normal use, not just under heavy load
- Blue screens (BSODs) that reference storage errors such as INACCESSIBLE_BOOT_DEVICE, NTFS_FILE_SYSTEM, or CRITICAL_PROCESS_DIED
- Laptop restarts on its own without warning, especially mid-task
- System requires multiple reboots before it starts up successfully
File and data symptoms:
- Files saved yesterday are missing or show zero bytes
- Documents open corrupted even though you saved them normally
- Windows reports errors when you try to copy, move, or delete files
- Programs throw errors about missing or unreadable files they previously handled fine
Drive detection symptoms:
- BIOS no longer shows the SSD in its device list
- Windows reports “No bootable device found” at startup
- The SSD suddenly shows up as read-only in File Explorer or Disk Management
- Drive letter disappears from File Explorer without explanation
Error message symptoms:
- “The file or directory is corrupted and unreadable”
- “Windows detected a hard disk problem” notification in the system tray
- Event Viewer flooding with disk error entries (Event ID 7, 11, 51, or 153)
- Chkdsk finding errors and bad sectors during its scan
Start Here: Fast Diagnosis
Work through this decision tree before running any software. It narrows down the cause faster than guessing.
Laptop boots slowly and performance is degrading: Check CrystalDiskInfo health status first. If health shows Caution or Bad, the SSD is the primary suspect. If health shows Good, rule out startup programs in Task Manager before assuming hardware.
Laptop freezes randomly during normal use: Open Event Viewer (Win + X, select Event Viewer) and check Windows Logs > System. If you see repeated disk errors (Event IDs 7, 11, or 51), the SSD is failing. If you see memory errors instead, test RAM with Windows Memory Diagnostic before replacing the drive.
Files are corrupting or disappearing: Run chkdsk /f /r from an elevated Command Prompt and restart to let it run on the next boot. If chkdsk finds and cannot repair errors, the drive has bad blocks and needs replacement. If chkdsk finds nothing, check for virus or ransomware activity instead.
BIOS no longer detects the SSD: Reseat the SSD if it is an M.2 drive (power off, open bottom panel, remove and reinstall the drive, retighten the screw). If BIOS still cannot see it after reseating, try a known-good M.2 USB enclosure to test the drive externally. No detection externally either means the drive controller has likely failed.
Windows shows “No bootable device” at startup: Enter BIOS (F2 or Del at startup depending on brand) and check whether the SSD appears in the storage device list. If it does not appear, see “SSD Not Showing in Laptop” (link below) before assuming the drive is dead. Incorrect BIOS storage mode (AHCI vs. RAID) causes this without any actual drive failure.
Tools Needed
Built-in Windows tools:
- Event Viewer (Win + X)
- Chkdsk (Command Prompt, elevated)
- Windows Memory Diagnostic (for ruling out RAM)
- Disk Management (Win + X)
- PowerShell with Get-PhysicalDisk command (NVMe health check)
Free software tools:
- CrystalDiskInfo: best overall SMART reader for SATA and NVMe SSDs
- HD Sentinel: alternative with a cleaner health percentage display
- CrystalDiskMark: read/write speed benchmarking to detect performance degradation
Brand-specific tools (more accurate for your specific drive):
- Samsung Magician (Samsung SSDs)
- WD Dashboard (Western Digital / SanDisk SSDs)
- Crucial Storage Executive (Crucial / Micron SSDs)
- HP UEFI Diagnostics (HP laptops, accessible at startup via F2)
- Dell SupportAssist (Dell laptops, pre-installed or downloadable)
- MyASUS System Diagnosis (ASUS laptops, Diagnostic Tool section)
- Lenovo Vantage (Lenovo laptops, Hardware Scan feature)
Hardware tools (optional, advanced):
- M.2 NVMe USB enclosure (to test the drive externally when BIOS cannot detect it)
- Anti-static wrist strap (when physically reseating the drive)
Troubleshooting Matrix
| Symptom | Likely Cause | Fast Fix |
| Slow boot, getting worse over weeks | SSD degradation or bad blocks | Run CrystalDiskInfo, check SMART health |
| Random freezes, not heat-related | Bad blocks or failing SSD controller | Run chkdsk, check Event Viewer disk errors |
| Files corrupt or missing | Write failures from bad blocks | Chkdsk /f /r, then check SMART |
| Blue screen: INACCESSIBLE_BOOT_DEVICE | SSD failing or BIOS mode mismatch | Check BIOS detection first, then SMART |
| Drive not in BIOS | Loose M.2 connection or dead controller | Reseat drive, test in USB enclosure |
| Drive shows read-only | SSD entering self-protection mode | Back up immediately, replacement needed |
| “No bootable device” at startup | Boot drive missing or boot config broken | Check BIOS storage list, reseat if M.2 |
| Very slow file transfers | Bad blocks or near-full drive (above 90%) | Check SMART and free up space |
What Causes SSD Failure

Bad Blocks (the Most Common Hardware Cause)
NAND flash cells have a limited number of write cycles before they become unreliable. When a cell can no longer hold data properly, it gets remapped to a spare area of the drive. This process is transparent and harmless at first. The problem starts when spare cells run out and bad blocks accumulate faster than the drive can remap them. At that point, reads and writes start failing in ways Windows cannot hide.
How to identify it: CrystalDiskInfo shows a Reallocated Sectors Count that is no longer zero. Any non-zero value there means the drive is actively managing bad blocks. A rapidly rising count is a serious warning sign.
What users misunderstand: People often see a “Good” SMART health status alongside a rising reallocated sector count and assume the drive is fine. SMART health is an aggregate, and a drive can show Good while still accumulating bad blocks faster than is safe. Always look at the raw attribute values, not just the overall status color.
Confirmation sign: Boot times that keep getting incrementally slower, not just sporadically, alongside chkdsk finding errors it cannot fully repair.
SSD Controller Failure
The controller is the chip that manages all reads, writes, wear leveling, and error correction on the drive. When it fails, the symptoms can be extreme: the drive vanishes from BIOS entirely, refuses to read or write at all, or enters read-only mode as a self-protection response. NVMe drives are more vulnerable here because the controller handles far higher data speeds and thermal stress than SATA models.
How to identify it: The drive disappears from BIOS with no warning. Reseating does not restore detection. An external USB enclosure also fails to detect the drive.
What users misunderstand: Controller failure is often diagnosed as a dead drive when the actual NAND cells containing the data are still intact. Professional data recovery services can sometimes recover data even after full controller failure.
Confirmation sign: Drive completely absent from BIOS after physically verifying the connection is secure.
Wear Leveling Exhaustion (TBW Limit Reached)
Every SSD has a Terabytes Written (TBW) rating from the manufacturer. A typical consumer 500GB NVMe SSD is rated for around 300TBW. Once you approach or exceed this rating, the drive becomes increasingly unreliable even if no single symptom is dramatic yet. Heavy users who write large files frequently (video editing, large downloads, virtual machines) can reach this limit faster than expected.
How to identify it: CrystalDiskInfo shows the “Total Host Writes” attribute. Compare this to your drive model’s official TBW rating on the manufacturer’s spec sheet. Above 80% of the TBW limit, start planning a replacement even if the drive still seems fine.
What users misunderstand: Everyday laptop users who mostly browse the web and use Office rarely hit TBW limits within the useful life of a laptop. Video editors and developers writing gigabytes of data daily can hit it within two to three years.
Confirmation sign: Total Host Writes in CrystalDiskInfo is close to or exceeds the manufacturer’s published TBW rating.
Overheating
SSDs, especially NVMe M.2 drives, are sensitive to heat. Consumer M.2 drives mounted in a tight laptop chassis with poor airflow can reach temperatures that trigger thermal throttling or even hardware damage over time. NVMe drives in particular can sustain temperatures above 70 degrees Celsius during heavy use without an adequate heatsink.
How to identify it: CrystalDiskInfo shows the current temperature and historical high. Consistent temperatures above 70°C under normal use indicate a thermal problem. HWiNFO64 can show real-time NVMe temperatures during stress.
What users misunderstand: SATA SSDs (the older 2.5-inch style) are much more thermally stable and rarely overheat inside a laptop. The overheating problem is primarily a modern M.2 NVMe issue in thin laptops with cramped thermal design.
Confirmation sign: Performance degrades noticeably during tasks that write large amounts of data (large downloads, video rendering) but recovers after a few minutes of idle time.
Firmware Bugs and Corruption
Certain firmware versions on specific SSD models have bugs that cause data corruption, unexpected slowdowns, or intermittent disappearance from BIOS. This is separate from physical wear. A firmware update from the manufacturer can resolve it, which is why brand-specific tools are worth checking before assuming the drive is dying.
How to identify it: Check your SSD model and firmware version in CrystalDiskInfo. Then look up the manufacturer’s firmware release page for your exact model.
What users misunderstand: Many people replace a drive that only needed a firmware update. Dell laptops in particular have flagged this issue with certain NVMe models where a BIOS update resolved drive detection problems rather than any physical drive fault.
Confirmation sign: Problems started after a Windows update or a BIOS update rather than developing gradually over time.
What We See Most Often
In a shop environment, the most common scenario is a laptop that has been freezing randomly and the owner has already reinstalled Windows once. After the reinstall, the freezes returned within a week. That pattern is almost always a storage issue.
When we pull the SMART data on those machines, we typically see a Reallocated Sectors Count that has been climbing for weeks. The drive was failing before the reinstall and the fresh Windows installation could not fix it.
The second most common pattern is a laptop that will not boot and whose BIOS has stopped detecting the SSD entirely. In the majority of those cases, the drive is physically unseated rather than dead. M.2 SSDs rely on a single screw to hold them at the correct angle, and that screw can work loose over time, especially on laptops that get tossed around in bags. Reseating the drive takes three minutes and resolves the issue without any data loss.
The third pattern we see is users who ran a brand diagnostic tool, saw a Passed result, and concluded the drive was fine. The manufacturer tools are good for quick health checks, but they do not catch intermittent bad blocks that only show up under sustained read/write pressure. CrystalDiskInfo with a full chkdsk run gives a more complete picture.
How to Diagnose the Problem

Step 1: Check CrystalDiskInfo
Cost: Free | Time: 5 minutes | Difficulty: Easy
Download CrystalDiskInfo from crystalmark.info and run it as Administrator. Look at the health status color (Blue = Good, Yellow = Caution, Red = Bad) and check these specific SMART attributes for non-zero raw values: Reallocated Sectors Count, Current Pending Sector Count, Uncorrectable Sector Count, Wear Leveling Count.
Expected Result: All listed attributes show zero in the Raw Values column and overall status is Good.
If Failed: Any non-zero value in Reallocated Sectors Count or Current Pending Sector Count is a warning. Caution or Bad status means back up your data today before doing anything else.
Next Action: If health is Caution, move to Step 3. If health is Bad, skip troubleshooting and go straight to “When Hardware Replacement Is Necessary.”
Step 2: Check Event Viewer for Disk Errors
Cost: Free | Time: 10 minutes | Difficulty: Easy
Press Win + X and open Event Viewer. Navigate to Windows Logs > System. Filter by Event Source “disk” and look for Error entries with Event IDs 7, 11, 51, or 153. A handful of these over months is normal. Dozens over the past week means the drive is actively failing.
Expected Result: No disk error entries in the past week, or one or two isolated entries.
If Failed: Repeated disk errors confirm the drive is experiencing I/O failures. Proceed to Step 3.
Next Action: If errors are sparse, check RAM with Windows Memory Diagnostic before blaming the SSD.
Step 3: Run Chkdsk
Cost: Free | Time: 15 minutes to 2 hours | Difficulty: Easy
Open Command Prompt as Administrator and type: chkdsk C: /f /r then press Enter. Type Y when prompted to schedule it on next restart and reboot. Let it run completely. Review the results in Event Viewer under Windows Logs > Application, Source: Wininit after it completes.
Expected Result: “Windows has scanned the file system and found no problems.”
If Failed: Chkdsk reporting bad clusters it could not repair, or stage 4/5 never completing, confirms active bad block failure. The drive needs replacement.
Next Action: If chkdsk repairs minor file system errors but drive health shows Good in CrystalDiskInfo, monitor for two to three days. If problems return, replace the drive.
Step 4: Run a Speed Benchmark
Cost: Free | Time: 5 minutes | Difficulty: Easy
Download CrystalDiskMark and run a standard test on the SSD. Compare results to the manufacturer’s published sequential read/write speeds for your specific drive model.
Expected Result: Sequential read within 15 to 20% of the rated speed. Random 4K speeds are always lower than sequential, so use sequential for comparison.
If Failed: Read or write speeds below 50% of rated specs on an NVMe drive suggest controller degradation or severe thermal throttling. On a SATA drive, speeds below 200MB/s read on a drive rated above 500MB/s indicate significant failure.
Next Action: If speeds are degraded but SMART shows Good, check temperatures under load first (see overheating cause above) before concluding the drive is physically dying.
Step 5: Check BIOS Detection
Cost: Free | Time: 5 minutes | Difficulty: Easy
Restart the laptop and enter BIOS (typically F2, Del, or Esc at the manufacturer splash screen). Navigate to the Storage or Boot section and verify the SSD is listed with its model name and capacity.
Expected Result: SSD appears in BIOS by name and capacity.
If Failed: Drive not detected in BIOS. Power off completely, open the bottom panel, and physically reseat the M.2 drive. On SATA SSDs, check the data and power connector. If not detected after reseating, test in an external USB enclosure.
Next Action: If drive is detected in an external enclosure but not in BIOS, the laptop’s M.2 slot or motherboard connector may be damaged, which requires shop diagnosis.
Which Fix Usually Works?
| Fix | Typical Success Likelihood | Cost | Difficulty |
| Reseat M.2 SSD | Very Common | Free | Easy |
| Update SSD firmware | Common | Free | Easy |
| Run chkdsk to repair file system | Common | Free | Easy |
| Update NVMe / storage controller driver | Occasional | Free | Easy |
| Change BIOS storage mode (AHCI vs RAID) | Occasional | Free | Moderate |
| Replace failing SSD | Very Common (when drive is actually bad) | $40 to $150 | Moderate |
Step-by-Step Fixes

Fix 1: Reseat the M.2 SSD
Cost: Free Time: 10 minutes Difficulty: Easy to Moderate
Steps:
- Shut down the laptop completely. Do not just restart.
- Unplug the charger and hold the power button for 10 seconds to discharge residual power.
- Remove the bottom panel screws using a Phillips PH0 screwdriver.
- Locate the M.2 slot. The SSD will be lying at a 30 to 45 degree angle held by one screw at the end.
- Remove the retaining screw and lift the SSD free from the slot.
- Inspect the M.2 edge connector for dust or debris and blow it out with compressed air.
- Reinsert the SSD at the correct angle until it clicks into the slot, then press it flat and replace the screw.
- Reassemble the laptop and test.
Expected Result: BIOS detects the SSD again and Windows boots normally.
If Failed: Check whether the M.2 slot contacts look bent or corroded. If so, the slot itself is damaged and a shop inspection is needed.
Technician Tip: The single retaining screw on M.2 drives is more critical than it looks. A loose screw lets the drive angle upward slightly, causing intermittent connection loss that shows up as random freezes or BIOS detection failures. Always confirm it is snug.
Fix 2: Update SSD Firmware
Cost: Free Time: 15 to 30 minutes Difficulty: Easy
Steps:
- Open CrystalDiskInfo and note your drive model name exactly (example: Samsung 980 Pro, WD SN850X).
- Go to the manufacturer’s website and download their drive management tool (Samsung Magician, WD Dashboard, Crucial Storage Executive, etc.).
- Install and open the tool.
- Navigate to the Firmware or Drive Management section.
- If a firmware update is available, follow the prompts. Most updates complete within a few minutes and require a restart.
Expected Result: Drive firmware is current. Any bugs fixed in previous versions no longer affect operation.
If Failed: If the tool cannot detect the drive, the drive has likely progressed past a firmware issue into physical failure. Proceed to hardware replacement.
Expert Warning: Do not interrupt a firmware update by unplugging power or forcing a shutdown. A failed firmware flash can brick the drive.
Fix 3: Run Chkdsk to Repair File System Errors
Cost: Free Time: 15 minutes to 2 hours Difficulty: Easy
Steps:
- Right-click Start and select Terminal (Admin) or Command Prompt (Admin).
- Type: chkdsk C: /f /r and press Enter.
- Type Y when asked to schedule a scan on next restart.
- Restart the laptop and leave it running. Do not force a shutdown during the scan.
- After the laptop restarts into Windows, open Event Viewer (Win + R, type eventvwr.msc) and navigate to Windows Logs > Application. Filter by Source: Wininit to read the chkdsk report.
Expected Result: Chkdsk completes all five stages and reports no problems, or reports minor errors that were repaired.
If Failed: Chkdsk finds errors in Stage 4 or 5 that it cannot repair, or it loops endlessly without finishing. This confirms physical bad blocks on the drive. Skip further software fixes and move to hardware replacement.
Technician Tip: The /r flag forces chkdsk to physically scan every sector, which is much slower but much more thorough than /f alone. On a failing drive, this can take several hours. Let it finish completely.
Fix 4: Update NVMe or Storage Controller Driver
Cost: Free Time: 15 minutes Difficulty: Easy
Steps:
- Open Device Manager (Win + X).
- Expand Disk Drives and locate your SSD.
- Right-click it and select Update Driver, then Search Automatically.
- Also expand Storage Controllers and update the Microsoft NVMe or SATA AHCI controller listed there.
- Restart after any driver update completes.
Expected Result: Drive stability improves, especially if intermittent disconnections or read errors were driver-related rather than hardware failures.
If Failed: Driver updates do not resolve the symptoms. The problem is hardware, not software. Proceed to SSD replacement.
Technician Tip: On Dell laptops specifically, the NVMe driver in Windows Update is sometimes outdated compared to what Dell distributes on their support site. Download directly from dell.com/support using your laptop’s Service Tag for the most current storage driver.
Fix 5: Replace the Failing SSD
Cost: $40 to $150 for the drive | $50 to $100 labor if done at a shop Time: 30 to 60 minutes (self-install) | 1 to 2 hours (shop with data migration) Difficulty: Moderate
Steps:
- Before removing the old SSD, clone it to the new drive using Macrium Reflect Free (if the drive is still accessible). This preserves Windows, your apps, and all your data without a reinstall.
- If the drive is no longer accessible, prepare a Windows installation USB from a working PC using the official Microsoft Media Creation Tool.
- Shut down, discharge residual power, open the bottom panel, and remove the old SSD (see Reseat steps above for reference).
- Install the new SSD in the same M.2 slot and tighten the retaining screw.
- If you cloned: boot normally. Windows should load from the new drive.
- If you are doing a fresh install: boot from the USB, select the new SSD as the installation target, and follow the Windows setup prompts.
Expected Result: System boots from the new SSD. All previously cloned data is accessible. Performance returns to or exceeds original speeds.
If Failed: If Windows does not recognize the new drive during installation, confirm the BIOS storage mode is set to AHCI and that the drive is fully seated.
Technician Tip: When buying a replacement, check your laptop’s service manual or the manufacturer’s compatibility page first. Some thin laptops (Dell XPS, Lenovo ThinkPad X1) require a specific M.2 size (2230 vs. 2280) or even a proprietary interface. Installing the wrong physical size or the wrong protocol (SATA vs. NVMe) into an incompatible slot means the new drive will not be detected.
Expert Warning: Never buy a used SSD as a replacement. There is no reliable way to verify how many write cycles a used NAND drive has consumed, and you may be installing a drive that is already most of the way through its lifespan.
Mistakes That Make the Problem Worse
Running multiple chkdsk passes on a drive that is actively failing. Chkdsk performs writes during repair, which puts additional stress on bad sectors. If SMART already shows Critical status or the drive has escalating bad blocks, do not run chkdsk repeatedly. Back up first, then run it once.
Reinstalling Windows without testing the drive. Reinstalling Windows on a failing SSD does not fix the hardware. The new installation will degrade again quickly, often within a week, because the underlying storage problem is still there. Always check SMART health before doing a clean install.
Ignoring the “Windows detected a hard disk problem” notification. Windows rarely triggers this alert without reason. Many users dismiss it or assume it is a false alarm. It is almost always based on SMART data showing real drive degradation. Act on it immediately.
Defragmenting an SSD. Windows should not defragment SSDs automatically (it runs TRIM instead), but third-party optimization tools sometimes do. Defragmenting writes data across the drive unnecessarily and accelerates cell wear. If you are running a disk optimizer, confirm it is SSD-aware and runs TRIM, not traditional defrag.
Not confirming the BIOS storage mode before a fresh Windows installation. Installing Windows with the BIOS in RAID mode when the slot is in AHCI mode (or vice versa) can corrupt the boot configuration and cause symptoms that look identical to a failing drive. Confirm BIOS is set to AHCI before installing Windows on a new SSD.
Buying the wrong replacement SSD size or protocol. Many users discover after opening the laptop that their replacement drive is the wrong physical length (2230 vs. 2280) or the wrong protocol (SATA vs. NVMe). The drive fits mechanically but the laptop simply will not detect it. Check the manufacturer’s compatibility page before ordering.
Waiting too long to clone after seeing early symptoms. Bad blocks multiply. A drive that has a few reallocated sectors today may be uncloneable in two weeks. Clone the drive the same day you confirm SMART shows any Caution attribute.
Brand-Specific Considerations
Dell
Dell laptops primarily use M.2 NVMe SSDs in modern models. Run the built-in hardware diagnostics by pressing F12 at startup and selecting Diagnostics. The SSD test runs automatically and gives a clear pass/fail. On some Dell models, SSD detection issues have been traced to BIOS updates rather than drive failures. Check Dell’s support site using your Service Tag before replacing a drive that fails to appear in BIOS after a BIOS update.
HP
HP includes a UEFI diagnostics tool accessible by pressing F2 at startup. Navigate to Component Tests > Hard Drive. Run both Quick Test and Extensive Test. HP frequently uses Samsung and WD SSDs; Samsung Magician or WD Dashboard will give more detailed SMART data than the built-in tool provides. HP laptops in the Spectre and Envy line use 2230 M.2 SSDs, not the standard 2280, so double-check dimensions before ordering a replacement.
Lenovo
Lenovo Vantage on Windows includes a Hardware Scan feature under the Devices section. Run the Full Scan option, which tests the SSD alongside RAM and battery. ThinkPad models typically have excellent upgrade documentation available from Lenovo’s support site, including which M.2 key type the slot supports. Some ThinkPad models support both SATA and NVMe M.2, so confirm which protocol is present before buying a replacement.
ASUS
MyASUS includes a System Diagnosis section. Open MyASUS, click System Diagnosis, and run the Solid State Disk diagnostic. ASUS gaming laptops (ROG, TUF) tend to run NVMe drives significantly hotter than business-class models due to aggressive chassis design. If you are seeing performance degradation on an ASUS gaming laptop, check NVMe temperature under load using HWiNFO64 before concluding the drive is failing.
Acer
Acer does not ship a robust built-in diagnostic tool on most consumer models. Use CrystalDiskInfo and chkdsk for primary diagnosis. Some Acer models run a proprietary NVMe SSD that requires the matching Acer recovery media to reinstall Windows; standard Windows USB installations can fail to detect the drive until the correct driver is injected. Check Acer’s support page for your specific model before attempting a clean install on a replacement drive.
MSI
MSI gaming laptops push NVMe drives hard during gaming sessions. The combination of sustained high write rates and limited thermal headroom in thin chassis designs accelerates wear. Check SMART data with CrystalDiskInfo quarterly if the laptop sees heavy gaming use. MSI laptops frequently use 2280 NVMe SSDs with PCIe Gen 4 interfaces, so replacement drives should match the Gen 4 spec to maintain full performance.
Repair Shop Diagnosis

When a laptop comes in with suspected SSD failure, the first step is always BIOS detection. If the drive appears in BIOS, we pull SMART data using CrystalDiskInfo or the manufacturer tool. The reallocated sector count and the raw read error rate give the clearest picture of physical degradation.
If the BIOS does not see the drive, we reseat it before doing anything else. In our experience, a loose M.2 screw accounts for a meaningful number of “dead drive” service calls.
After confirming the drive is failing, we run chkdsk to assess whether data is still retrievable. If files are accessible and chkdsk completes, we clone the drive to a new SSD using Macrium Reflect before removing the original. Cloning rather than reinstalling saves the customer from losing installed programs and settings.
Professional SSD replacement at a shop typically costs $80 to $150 in labor depending on the model’s disassembly complexity, on top of the drive cost. Budget laptops (accessible M.2 slots behind a single panel) sit at the low end. Thin ultrabooks where the motherboard must be partially removed to access the SSD sit at the high end.
Data recovery on a completely failed SSD is a different service. Firmware-level recoveries or NAND chip-off work at specialist data recovery labs can cost from $300 to over $1,000. If the data on the drive is irreplaceable and you have no backup, professional recovery is worth pursuing before writing the drive off entirely.
When Hardware Replacement Is Necessary
Replace the SSD when any of the following are true:
- CrystalDiskInfo shows Bad status (red) with non-zero values in Reallocated Sectors Count or Uncorrectable Sector Count
- BIOS cannot detect the drive after reseating
- Chkdsk fails to complete or reports errors it cannot repair
- The drive has gone into read-only mode (the SSD’s firmware self-protection has triggered)
- Total Host Writes has exceeded or is near the manufacturer’s published TBW limit
- Performance benchmarks show speeds below 50% of rated specs and temperature is not the cause
- The laptop continues to freeze or crash after a clean Windows reinstall on the same drive
Replacement SSD cost is now very reasonable. A quality 500GB NVMe SSD from Samsung, WD, or Crucial runs $50 to $80 at major retailers. A 1TB model runs $70 to $120. This is one of the most cost-effective hardware repairs on a laptop and restores full performance when done correctly.
For an existing article on drive detection issues that often accompany a failing SSD, see SSD Not Showing in Laptop? The Real Fix for the full diagnosis workflow.
Stop Troubleshooting and Seek Professional Repair If
The SSD has completely disappeared from BIOS after reseating. The M.2 slot contacts may be damaged on the motherboard, which requires bench testing and potentially soldering work.
You have tried cloning and the clone fails partway through. A clone failure usually means bad blocks in critical areas of the source drive are spreading. The window for data recovery is closing and a specialist lab is the best path.
The laptop had liquid exposure before the drive problems started. Liquid damage can affect the M.2 slot, the storage controller on the motherboard, or the SSD itself. Diagnosing and repairing liquid damage requires component-level testing that goes beyond what software tools can reveal.
You see burn marks or smell anything unusual when the laptop is powered on. Power delivery issues from the motherboard can damage storage devices. Any sign of electrical damage means hands-off: power down immediately and bring it to a shop.
The device is still under warranty. Dell, HP, Lenovo, ASUS, and Acer all cover SSD failure under their standard warranty. Opening the bottom panel yourself may void that warranty. Contact manufacturer support first before touching the hardware.
Prevention Tips

Keep the SSD no more than 80% full. NAND drives slow down and degrade faster when nearly full because wear leveling algorithms have less free space to work with. 80% capacity is a practical limit for maintaining performance and longevity.
Enable TRIM in Windows. TRIM is enabled by default on most Windows 10/11 installations, but confirm it by running fsutil behavior query DisableDeleteNotify in Command Prompt. A result of 0 means TRIM is active. A result of 1 means it is disabled, and you should re-enable it with fsutil behavior set DisableDeleteNotify 0.
Check SMART health with CrystalDiskInfo every three to six months. Most SSD failures are not sudden. Reallocated sector counts and wear indicators drift upward gradually over months. A quarterly check catches problems while you still have time to clone and replace calmly.
Keep the laptop BIOS and SSD firmware updated. SSD manufacturers release firmware patches that address wear issues, thermal throttling bugs, and occasional data integrity problems. Lenovo, Dell, and HP push firmware updates through their respective support apps. Check every six months.
Do not run the laptop on battery during large file operations. Writing several gigabytes of data while the battery is below 20% risks an incomplete write if power drops suddenly. Incomplete writes stress the controller and can corrupt file structures in a way that accelerates drive degradation.
Avoid running the laptop on surfaces that block bottom vents. Beds, pillows, and soft surfaces block airflow, causing NVMe drive temperatures to spike. Sustained high temperatures are one of the leading accelerators of SSD wear, especially in thin ultrabooks.
Keep at least one backup of critical data at all times. SSDs can fail without warning, even when SMART data looks fine. A backup on an external drive or cloud service eliminates the catastrophic data loss scenario entirely, making SSD failure a minor inconvenience rather than a disaster.
Frequently Asked Questions

Can a laptop SSD fail suddenly with no warning?
Yes, and it is more common than people expect. SMART data catches many gradual failures, but controller failures in particular can happen without any prior warning attributes. The most reliable protection is a regular backup, not just monitoring health.
My CrystalDiskInfo shows Good but my laptop is still freezing. What now?
SMART has limits. It does not catch all failure modes, and intermittent bad blocks that have not yet been remapped will not show up in the attribute values. Run a full chkdsk scan and check Event Viewer for disk error IDs (7, 11, 51, 153). Those logs often show problems that SMART misses.
How long do laptop SSDs usually last?
Most consumer SSDs last five to ten years under typical use, which is usually longer than the laptop they are installed in. Heavy write workloads (video editing, large file downloads, running virtual machines) shorten the lifespan. Checking the TBW rating for your specific model gives a rough ceiling.
Is it worth replacing the SSD on an older laptop?
Generally yes, if the rest of the hardware is still functional. A replacement 500GB NVMe SSD costs around $50 to $80 and takes under an hour to install. It is one of the most cost-effective repairs available and often makes a five-year-old laptop feel significantly faster.
What is the difference between a failing SSD and failing RAM in terms of symptoms?
The symptoms overlap considerably. Freezes, BSODs, and random reboots can come from either. The fastest way to differentiate is SMART data (RAM has no equivalent monitoring) and Event Viewer. Disk error IDs point to storage. Memory errors point to RAM. Run Windows Memory Diagnostic overnight if SMART looks clean but symptoms persist.
My laptop shows “No bootable device.” Is the SSD dead?
Not necessarily. Enter BIOS at startup and check whether the SSD appears in the device list. If it does appear in BIOS but not as a bootable option, the boot configuration is likely corrupted rather than the drive itself. Boot from a Windows USB, open Recovery, and run Startup Repair first before concluding the drive is bad.
Can I recover data from a fully failed SSD myself?
In most cases, no. If the drive is not detected by the operating system or by an external USB enclosure, the controller has likely failed. Self-recovery tools cannot work without drive detection. A specialist data recovery lab with the right equipment can sometimes recover NAND data even from controller-dead drives, but this is expensive.
Conclusion
Most SSD failures give you warnings before the drive fully dies, but those warnings are easy to misread as software problems. Slow boots that keep getting worse, file corruption, repeated freezes that survive a Windows reinstall, and a rising reallocated sector count in CrystalDiskInfo are the four signs that together make a strong case for replacement. Back up your data the same day you suspect a problem and clone the drive while it is still accessible. For slow laptop startups that may or may not be storage-related, the guide at Laptop Startup Taking Too Long? Here Is How to Fix It Fast covers the full diagnostic path including how to isolate SSD speed from other boot-time factors.