Quick Answer
A laptop that breaks after a Windows update is almost always a software problem, not a hardware failure. The most common causes are a corrupted update file, a driver conflict, or a restart that interrupted installation. Booting into Windows Recovery Environment and uninstalling the update or running Startup Repair fixes most laptops within 15 to 30 minutes.
Introduction
You restarted your laptop, Windows installed an update, and now something is wrong. Maybe the screen is black, maybe it’s stuck in a boot loop, maybe it boots but WiFi or the touchpad stopped working. This happens because update packages replace system files, drivers, and boot configuration data all at once, and any interruption or conflict during that process leaves the laptop in a half-finished state.
This guide walks through exactly how to diagnose what broke, in what order to try fixes, and when the problem stops being a Windows issue and starts being a hardware issue. Everything here follows the order a repair technician would actually use on a bench, starting with the fastest checks first.
Symptoms of the Problem

- Black screen after the Windows logo, with or without a spinning cursor
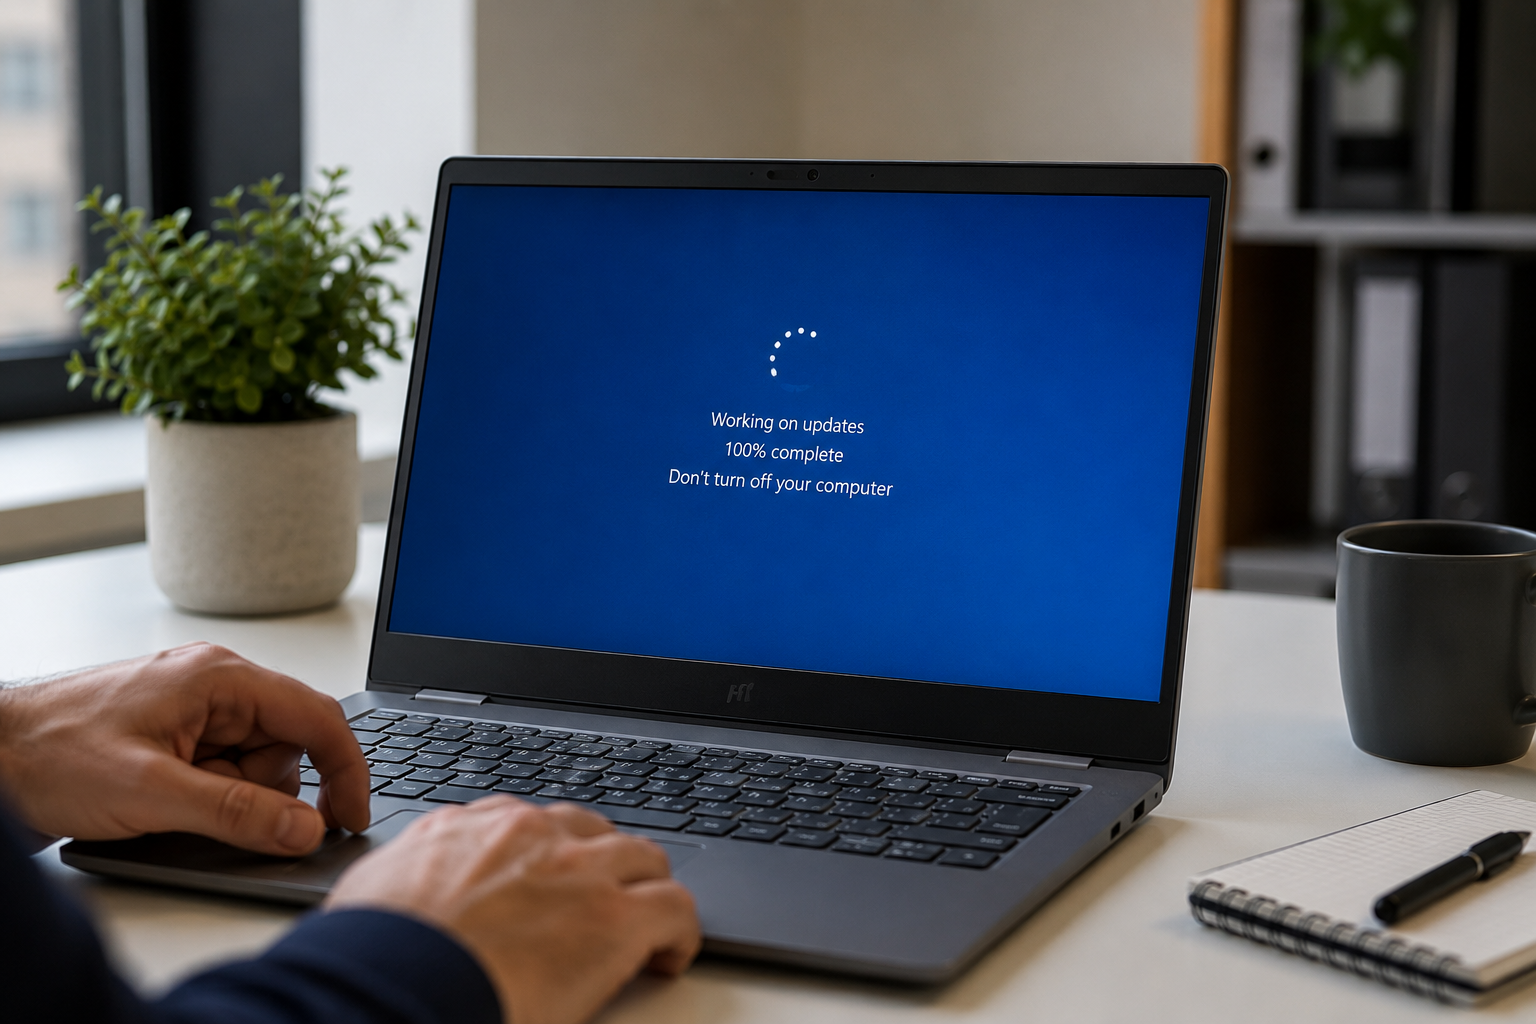
- Laptop stuck on “Working on updates, don’t turn off your computer” for over an hour
- Automatic Repair loop that fails and restarts repeatedly
- Boots to desktop but WiFi, Bluetooth, or touchpad no longer work
- Blue screen errors immediately after the update finished installing
- Noticeably slower boot times compared to before the update
- Missing or unrecognized external monitor after the update
- Battery draining much faster than normal right after the update
Start Here: Fast Diagnosis
Use this before trying any fix below. It tells you which section to jump to.
If the screen shows “Working on updates” and the laptop has been running less than 2 hours → Leave it alone. It’s very likely still installing.
If it has been stuck on the same screen for more than 2 hours with no disk activity light → Treat it as a failed update. Go to Step-by-Step Fixes.
If the laptop boots to a black screen with no logo at all → Check an external monitor first. If that also shows nothing, this leans hardware, not the update.
If it boots to Windows but specific features are broken (WiFi, Bluetooth, touchpad, display scaling) → This is a driver conflict from the update. Go to Fix 5.
If Automatic Repair keeps looping and failing → The update corrupted boot files. Go to Fix 2 or Fix 3.
Tools Needed
- Built-in Windows Recovery Environment (WinRE), accessed by holding Shift and clicking Restart, or by forcing 3 failed boots in a row
- A USB recovery drive or Windows installation USB, useful if WinRE itself won’t load
- Device Manager, accessible from a WinRE command prompt if the desktop won’t load
- A second working computer to create a recovery USB if needed
- An external monitor and cable to rule out display failure
- A USB mouse and keyboard, in case the built-in touchpad or keyboard driver broke
Troubleshooting Matrix
| Symptom | Likely Cause | Fast Fix |
| Stuck on “Working on updates” past 2 hours | Failed update installation | Force shutdown, boot into WinRE, uninstall update |
| Boot loop with Automatic Repair failing | Corrupted boot configuration data | Run Startup Repair from recovery menu |
| Boots fine but WiFi or Bluetooth missing | Driver replaced or corrupted by update | Roll back or reinstall the driver in Device Manager |
| Black screen, no logo, no BIOS access | Possible hardware fault unrelated to update | Test with external monitor, check RAM and SSD |
| Blue screen right after the update | Driver or system file conflict | Boot into Safe Mode, run SFC and DISM |
| Laptop noticeably slower after update | Background reindexing or a pending second update | Wait one full restart cycle, check Task Manager |
What Causes Windows Update Failures

Interrupted Installation
Windows updates install in stages, and some stages require a mid-process restart. If the power cuts out, the lid closes and triggers sleep, or someone force-restarts during this window, the update can be left half-written.
How to identify it: the laptop worked normally before the last restart, and the break happened on the very next boot.
What users misunderstand: people assume the laptop froze and force restart it, when it was actually still writing files to disk.
Confirmation sign: Event Viewer under Windows Logs > System shows update-related errors tied to the Windows Update service.
Driver Conflicts
Major updates often replace network, display, and audio drivers with generic Microsoft versions. If your manufacturer customized a driver for specific hardware, the generic replacement can fail silently.
How to identify it: one specific feature stops working (WiFi, touchpad, external display) while everything else runs fine.
What users misunderstand: they reinstall Windows entirely when a single driver rollback would have fixed it.
Confirmation sign: a yellow warning triangle on the affected device in Device Manager.
Corrupted Update Files
Sometimes the update package downloads incompletely or gets corrupted in the SoftwareDistribution folder. Windows tries to install a broken package and fails partway through.
How to identify it: the same update fails repeatedly even after multiple restart attempts.
What users misunderstand: they keep restarting expecting a different result, when the corrupted file needs clearing first.
Confirmation sign: error codes like 0x800f0922 or 0xc1900101 in Windows Update history.
Firmware and BIOS Incompatibility
Large feature updates occasionally expect a firmware version the laptop doesn’t have, especially on older models with no recent BIOS update.
How to identify it: the laptop boots into BIOS fine but Windows itself never loads, even after update removal.
What users misunderstand: they assume this only happens to brand-new hardware, when it’s actually more common on neglected, outdated firmware.
Confirmation sign: checking the BIOS version against the manufacturer’s support page shows it several versions behind.
Failing Storage Drive Exposed by the Update
An update writes a large amount of data very quickly. A drive that was already failing slowly can tip into full failure under that stress.
How to identify it: the laptop was already running slow or freezing occasionally before the update.
What users misunderstand: they blame the update entirely, when the update simply exposed a drive that was already dying.
Confirmation sign: a drive health check from WinRE command prompt shows reallocated sectors or SMART warnings.
What We See Most Often
Most laptops that “broke” after a Windows update did not actually suffer hardware damage. In a typical repair queue, the large majority of these cases resolve with uninstalling the update or repairing the driver it replaced. A genuine hardware failure that happens to coincide with an update is far less common, though it does happen, especially on laptops with an aging hard drive or SSD.
The biggest misdiagnosis we see is people assuming a black screen means the laptop is dead, when it usually means Windows simply didn’t finish loading. The second most common misdiagnosis is blaming the update for a battery or storage problem that was already developing beforehand.
How to Diagnose the Problem

- Check how long the laptop has been stuck. Expected Result: if under 2 hours with a blinking disk activity light, it’s likely still working. If Failed: if over 2 hours with no activity, treat it as frozen and move to step 2.
- Force a shutdown by holding the power button for 10 seconds, then power back on. Expected Result: the laptop boots normally or enters Automatic Repair. If Failed: if it goes straight back to a black screen, move to step 3.
- Test with an external monitor connected. Expected Result: if the external display shows the BIOS logo or recovery menu, the internal screen or its cable is the problem, not the update. If Failed: if the external monitor also shows nothing, move to step 4.
- Force entry into Windows Recovery Environment by interrupting boot 3 times in a row. Expected Result: the “Choose an option” recovery menu appears. If Failed: if WinRE never appears, boot from a USB recovery drive instead.
- From WinRE, check Event Viewer or run a quick drive health check via command prompt. Expected Result: clear evidence pointing to update failure, driver conflict, or drive failure. If Failed: if the drive isn’t detected at all, this points toward hardware failure.
Which Fix Usually Works?
| Fix | Typical Success Likelihood | Cost | Difficulty |
| Wait out the update | Very Common | Free | Easy |
| Uninstall the update via WinRE | Very Common | Free | Easy |
| Startup Repair | Common | Free | Easy |
| Roll back or reinstall a driver | Common | Free | Easy |
| System Restore | Common | Free | Easy |
| SFC and DISM repair | Occasional | Free | Moderate |
| Clean install Windows | Occasional | Free | Moderate |
| BIOS firmware update | Rare | Free | Moderate |
| RAM or SSD replacement | Rare | $40 to $120 | Moderate to Hard |
Step-by-Step Fixes

Fix 1: Wait Out the Update
Cost: Free Time: Up to 2 hours Difficulty: Easy
Steps:
- Leave the laptop plugged in and powered on.
- Watch for a disk activity light or listen for fan or drive noise.
- Don’t press the power button or close the lid during this window.
Expected Result: the update finishes and the laptop boots to the desktop normally. If Failed: if there’s no activity for over 30 minutes past the 2-hour mark, move to Fix 2. Technician Tip: a percentage stuck at the same number for over an hour with zero disk activity is a strong sign it’s actually frozen, not working.
Fix 2: Uninstall the Problematic Update
Cost: Free Time: 15 to 30 minutes Difficulty: Easy
Steps:
- Force shutdown, then power on and interrupt boot 2 to 3 times to trigger WinRE.
- Select Troubleshoot, then Advanced Options, then Uninstall Updates.
- Choose “Uninstall latest quality update” or “Uninstall latest feature update.”
- Restart and check if the laptop boots normally.
Expected Result: the laptop boots back to the state it was in before the update. If Failed: move to Fix 3. Technician Tip: quality updates are smaller monthly patches, feature updates are larger version upgrades. Try the quality update removal first since it’s faster. Expert Warning: removing a feature update can take 20 minutes or longer on its own. Don’t interrupt it once started.
Fix 3: Run Startup Repair
Cost: Free Time: 10 to 20 minutes Difficulty: Easy
Steps:
- From the WinRE menu, select Troubleshoot, then Advanced Options, then Startup Repair.
- Let it scan and attempt automatic fixes to boot configuration.
- Restart when prompted.
Expected Result: the laptop boots normally without manual intervention. If Failed: move to Fix 4. Technician Tip: if Startup Repair fails twice in a row with the same error, the underlying corruption usually runs deeper than this tool can fix alone.
Fix 4: Use System Restore
Cost: Free Time: 15 to 30 minutes Difficulty: Easy
Steps:
- From WinRE, select Troubleshoot, then Advanced Options, then System Restore.
- Choose a restore point dated before the update installed.
- Confirm and let the laptop restart and apply the restore.
Expected Result: system settings return to the pre-update state, personal files stay untouched. If Failed: if no restore points exist, move to Fix 5. Technician Tip: System Restore doesn’t touch personal files like documents or photos, only system settings and recently installed software.
Fix 5: Fix the Specific Broken Driver
Cost: Free Time: 10 to 20 minutes Difficulty: Easy
Steps:
- Boot into Safe Mode if the desktop loads at all.
- Open Device Manager and look for a yellow warning icon.
- Right-click the device, select Update Driver, then “Search automatically.”
- If that fails, select Roll Back Driver, or uninstall it and let Windows reinstall on restart.
Expected Result: the missing feature (WiFi, touchpad, display) returns to normal. If Failed: download the exact driver version from the manufacturer’s support page instead of using Windows Update’s generic version. Technician Tip: manufacturer-specific drivers almost always outperform the generic Microsoft driver for WiFi and touchpad hardware.
Fix 6: Run SFC and DISM System File Repair
Cost: Free Time: 20 to 45 minutes Difficulty: Moderate
Steps:
- Open Command Prompt from WinRE or Safe Mode.
- Run: DISM /Online /Cleanup-Image /RestoreHealth
- After it completes, run: sfc /scannow
- Restart once both scans finish.
Expected Result: corrupted system files get replaced and the laptop boots cleanly. If Failed: move to Fix 7. Technician Tip: run DISM before SFC, not after. DISM repairs the underlying image that SFC pulls clean files from.
Fix 7: Reset This PC, Keep Files
Cost: Free Time: 1 to 2 hours Difficulty: Moderate
Steps:
- From WinRE, choose Troubleshoot, then Reset This PC.
- Select “Keep my files.”
- Let the process complete fully without interrupting power.
Expected Result: Windows reinstalls cleanly while personal files remain in place, apps need reinstalling. If Failed: move to Fix 8. Expert Warning: back up anything irreplaceable to a USB drive first if at all possible. A reset carries some risk even with “keep files” selected.
Fix 8: Clean Install Windows
Cost: Free, requires a USB drive Time: 1 to 2 hours Difficulty: Moderate
Steps:
- Create installation media on another computer using the Microsoft Media Creation Tool.
- Boot the broken laptop from the USB drive.
- Choose Custom Install and select the option to format the main partition.
- Complete setup and reinstall drivers from the manufacturer’s site afterward.
Expected Result: a fully clean Windows installation with no leftover corruption. If Failed: if installation fails or the drive isn’t detected, this points to hardware failure. Move to Fix 11. Expert Warning: this erases all personal files on that drive. Only proceed if backups exist or files aren’t recoverable anyway.
Fix 9: Update BIOS Firmware
Cost: Free Time: 15 to 30 minutes Difficulty: Moderate
Steps:
- Identify the exact laptop model and current BIOS version from System Information.
- Download the latest BIOS update from the manufacturer’s support page for that exact model.
- Run the update tool while plugged into power, never on battery alone.
- Let the laptop restart on its own during the flash process.
Expected Result: firmware compatibility issues with the new Windows update get resolved. If Failed: move to Fix 10. Expert Warning: never power off or close the lid during a BIOS flash. An interrupted firmware update can make the laptop unbootable in a way that requires professional recovery.
Fix 10: Reseat RAM and Check Internal Connections
Cost: Free Time: 15 to 20 minutes Difficulty: Moderate to Hard
Steps:
- Power off completely and disconnect the charger.
- Open the bottom panel following the manufacturer’s service guide.
- Remove and reseat RAM modules, and check the SSD connection.
- Reassemble and power on.
Expected Result: a connection-related fault that coincided with the update gets resolved. If Failed: move to Fix 11. Technician Tip: this rarely fixes an update issue directly, but it rules out a loose connection that surfaced at the same time and got blamed on the update.
Fix 11: Test and Replace a Failing SSD
Cost: $40 to $120 depending on capacity Time: 1 to 3 hours including data transfer Difficulty: Hard
Steps:
- Boot from a USB Linux or diagnostic drive to check if the SSD is detected at all.
- If detected, run a SMART health check for reallocated sectors or wear warnings.
- If the drive is failing, back up any accessible data immediately.
- Replace the SSD and perform a clean Windows installation on the new drive.
Expected Result: a genuinely failing drive gets replaced before total failure causes data loss. If Failed: if symptoms persist on a new drive, the problem is elsewhere, possibly the motherboard. Expert Warning: a failing drive can fail completely at any moment. Prioritize backing up data over troubleshooting once SMART warnings appear.
Mistakes That Make the Problem Worse
Force restarting repeatedly during “Working on updates” People assume it’s frozen and restart multiple times. Why it fails: each interruption increases the chance of corrupting the update files further. Safer alternative: wait at least 2 hours before assuming it’s stuck.
Letting the battery die mid-update This happens when people walk away assuming it’s fine. Why it fails: a power loss during installation almost always corrupts the in-progress files. Safer alternative: always keep the laptop plugged in during any update.
Downloading random “repair tools” from unofficial websites Searching for a fast fix leads many people to sketchy download sites. Why it fails: many of these tools install adware or worse, on top of an already broken system. Safer alternative: only use Microsoft’s built-in recovery tools or the manufacturer’s official support page.
Doing a factory reset before trying System Restore Reset feels like the “complete” fix. Why it fails: it erases installed apps and settings that a simple restore point would have preserved. Safer alternative: always try uninstalling the update or System Restore first.
Ignoring BIOS-level symptoms and assuming it’s purely software A black screen before the Windows logo even appears gets blamed on the update. Why it fails: if the laptop never reaches the Windows logo, the problem may be hardware, not the update at all. Safer alternative: confirm the laptop reaches at least the manufacturer logo or BIOS screen before assuming it’s a Windows issue.
Disabling antivirus to “speed up” the recovery process Some guides suggest this to rule out conflicts. Why it fails: it leaves the system exposed during the exact moment files are being modified and replaced. Safer alternative: leave built-in protection running through the recovery process.
Skipping a backup before attempting deeper fixes Confidence that “it will probably work” leads people to skip backing up first. Why it fails: Reset This PC and clean installs both carry a small risk of data loss even when keeping files is selected. Safer alternative: copy anything important to a USB drive before any fix beyond Fix 5.
Brand-Specific Considerations
Dell Press F12 at startup for the boot menu, or F2 for BIOS setup. Dell SupportAssist can run hardware diagnostics directly from this menu if Windows itself won’t load. Dell’s recovery partition is accessible from the same F12 menu under Repair Your Computer.
HP Press Esc repeatedly at startup, then F11 for HP Recovery Manager. HP laptops sometimes need “Fast Boot” disabled in BIOS before WinRE will reliably trigger from repeated interrupted boots. HP Support Assistant, if accessible, can redownload manufacturer-specific drivers after an update wipes them out.
Lenovo Look for the small Novo button near the power button, which opens a recovery menu independent of Windows. Lenovo Vantage handles driver updates more reliably than Windows Update for WiFi and touchpad hardware on most ThinkPad and IdeaPad models. OneKey Recovery, where present, restores to a factory or user-created backup image.
ASUS Press F9 during startup for the recovery partition, separate from F2 which opens BIOS. MyASUS software is the most reliable source for correct driver versions after an update breaks WiFi or touchpad function. Some ASUS gaming laptops need “Fast Boot” disabled in BIOS to reliably enter WinRE.
Acer Press Alt and F10 together at startup for Acer’s recovery partition. Acer Care Center handles driver redownloads and flags outdated BIOS versions during its health check. Older Acer models sometimes need the boot order manually reset in BIOS after a failed update leaves the boot manager confused.
MSI MSI Center manages driver rollback and reinstallation more reliably than Windows Update on most MSI laptops. BIOS Flash Back+ allows a firmware update even if the system won’t boot at all, useful if firmware incompatibility is suspected. Press Del at startup for BIOS, where boot order and Fast Boot settings live.
Repair Shop Diagnosis

A technician’s first move is almost always checking Event Viewer and Windows Update history before touching anything else, since the exact error code there narrows down the cause immediately. A quick SMART health check on the drive rules out a coincidental hardware failure in under 5 minutes.
Typical workflow follows the same order as this guide: check for a still-in-progress update, then try update removal, then driver fixes, then deeper repair, then hardware testing only if everything else fails. Most shops charge between $60 and $120 for this kind of software diagnosis and repair, with a clean Windows reinstall sometimes priced separately.
Professional repair is worth it when the laptop holds files without a backup, when BIOS-level symptoms suggest hardware involvement, or when multiple fix attempts have already failed.
When Hardware Replacement Is Necessary
SSD Failure If a SMART health check shows reallocated sectors, pending sectors, or the drive not being detected at all, replacement is necessary regardless of what the update did. An update simply stresses a drive enough to expose a failure that was already building.
RAM Failure If reseating RAM doesn’t resolve random freezes or blue screens that started around the same time as the update, and a memory diagnostic tool reports errors, the module itself needs replacing. This is uncommon but does happen on laptops running the same RAM for 4 or more years.
Motherboard Failure This is rare and usually only suspected after a failed BIOS update, or when no software fix restores boot function and hardware tests come back clean otherwise. A laptop in this state needs professional diagnosis with proper test equipment.
Stop Troubleshooting and Seek Professional Repair If
Liquid damage anywhere near the time the update problem started changes the entire diagnosis, since corrosion can mimic software symptoms. A burning smell or visible smoke means stop immediately and disconnect power, since this points to an electrical fault that troubleshooting cannot fix.
A visibly swollen battery is a safety hazard on its own, and the laptop shouldn’t be charged or used until it’s replaced. Visible damage on the motherboard, such as burn marks or bulging capacitors, means no software fix will help.
Any sign of an electrical short, such as the laptop shutting off the instant it’s plugged in, needs a technician with proper equipment, not more troubleshooting. Repeated shutdowns specifically under load rather than at idle often point to a cooling or power delivery problem that coincided with, rather than was caused by, the update.
Prevention Tips

- Pause updates during important work periods through Settings, Windows Update, Pause Updates, for up to 5 weeks at a time.
- Keep at least 20GB of free disk space before allowing a major feature update to install.
- Update BIOS firmware before installing a major Windows feature update, not after problems appear.
- Manually create a restore point before installing any update you have a choice about delaying.
- Keep an external backup of important files on a schedule, not just when something breaks.
- Never close the lid or unplug the laptop while an update shows installation progress on screen.
- Check the manufacturer’s driver page after major updates, even if everything seems to be working.
- Review Windows Update history periodically to know exactly which update installed before any new issue appeared.
Frequently Asked Questions

Why did my laptop break after a Windows update? Most of the time it’s a corrupted update file, an interrupted installation, or a driver conflict, not hardware failure. The update process touches system files, drivers, and boot configuration all at once, so any disruption during that window can leave the laptop in a broken state.
Can I undo a Windows update that broke my laptop? Yes, through Windows Recovery Environment under Troubleshoot, Advanced Options, Uninstall Updates. This works even if the desktop itself won’t load, as long as WinRE is accessible.
How long does “Working on updates” normally take? Most updates finish within 20 to 60 minutes, though large feature updates can take up to 2 hours on slower drives. Anything beyond 2 hours with no disk activity light blinking should be treated as stuck.
Will I lose my files if I roll back a Windows update? No, uninstalling an update through WinRE doesn’t touch personal files like documents, photos, or videos. It only removes the specific update package and its system-level changes.
Is it safe to keep using my laptop if it boots but feels broken after an update? It’s safe in the short term if it boots normally, but ignoring small symptoms like a missing driver lets a minor issue go unaddressed. Fix the specific broken feature in Device Manager rather than continuing to use the laptop in a degraded state long term.
Why does my WiFi or Bluetooth disappear after a Windows update? The update often replaces a manufacturer-specific driver with a generic Microsoft version that doesn’t fully support that exact hardware. Rolling back the driver or downloading the correct version from the manufacturer’s support page almost always fixes this.
Should I do a clean install if uninstalling the update doesn’t work? Only after Startup Repair, System Restore, and SFC and DISM repairs have all been tried first. A clean install is effective but erases the drive, so it belongs near the end of the troubleshooting order, not the beginning.
Conclusion
A laptop that breaks after a Windows update is almost always a software problem caused by an interrupted installation, a corrupted update file, or a driver conflict. Uninstalling the update or running Startup Repair through Windows Recovery Environment resolves the large majority of these cases within 30 minutes. Hardware replacement only becomes necessary when a SMART health check confirms a failing drive, or when symptoms persist after a clean Windows installation on tested, working hardware.