
Quick Answer
When Startup Repair fails, the built-in recovery tool hit a problem it cannot solve on its own. The most common causes are a corrupted Boot Configuration Data (BCD) file, damaged system files, or a failing SSD. Open Command Prompt from the Windows Recovery Environment and run CHKDSK, SFC, and the bootrec commands in order. Most laptops boot again after those steps.
Introduction
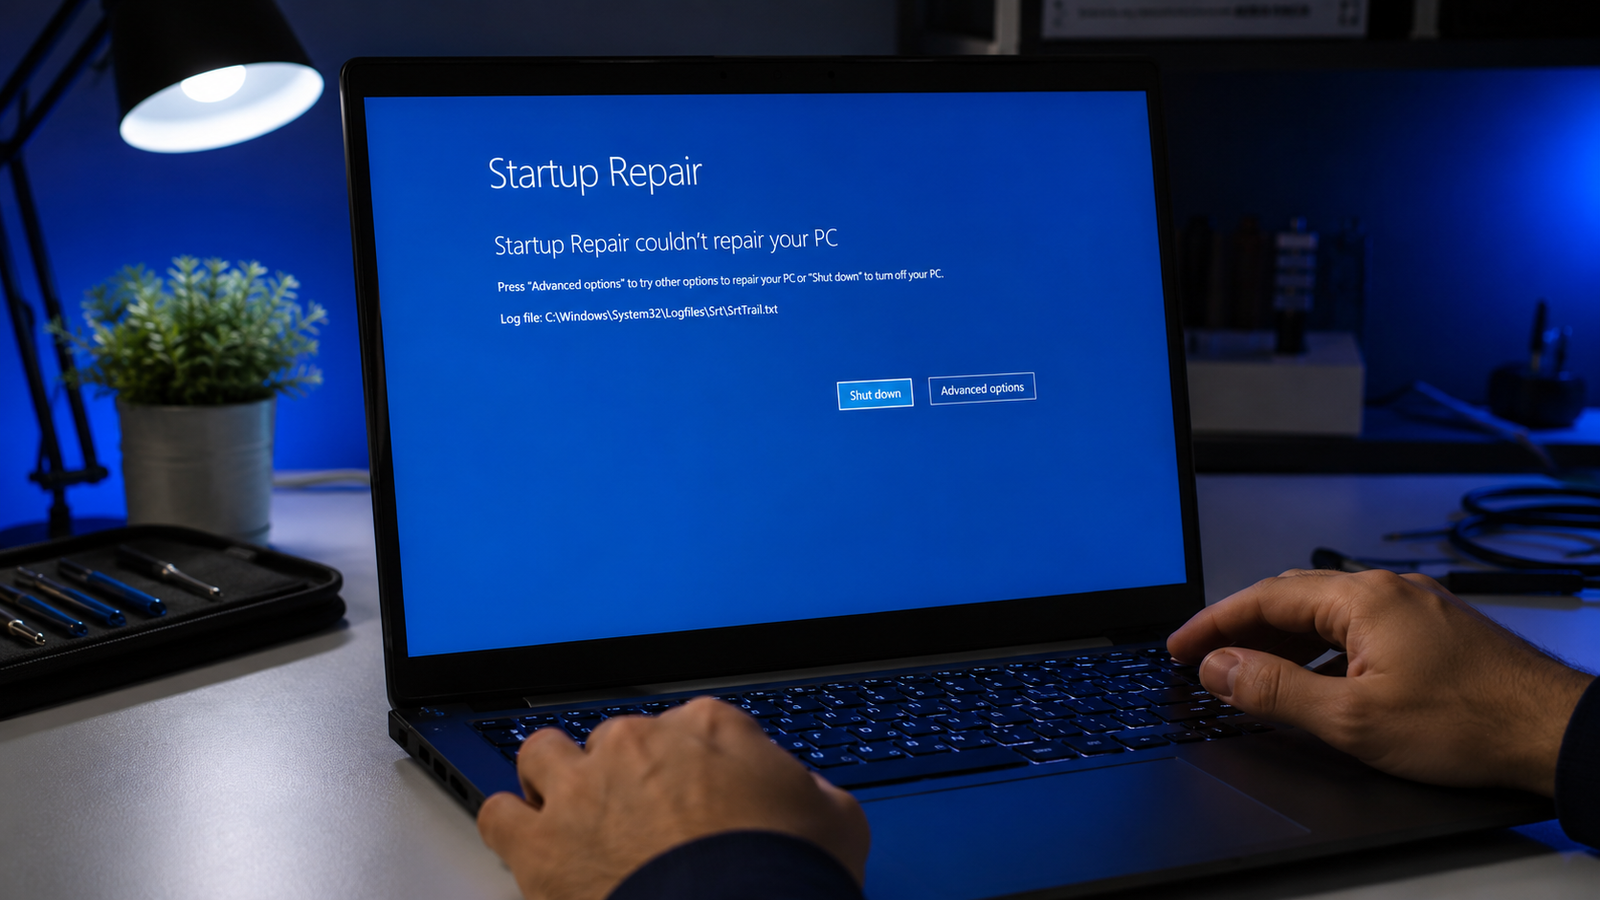
You powered your laptop on, Windows tried to repair itself, and then you got the screen that nobody wants to see: “Startup Repair couldn’t repair your PC.” It feels like a dead end but it is not. Startup Repair is just one tool in the Windows Recovery Environment, and it is actually the weakest one available. When it fails, it leaves every other repair option still waiting for you to use.
This happens because Startup Repair is designed to fix a narrow range of problems automatically. Anything more complex, such as a corrupted BCD store, damaged system files, or a drive error, requires manual commands that Startup Repair does not run on its own.
This guide walks through every real fix in the correct order. You will learn how to read the failure log to identify your exact problem before running anything, then work through the command-line repairs that actually solve the issue. Hardware failure signs are covered at the end so you know when to stop troubleshooting and call a technician.
Symptoms of the Problem

- Screen shows “Automatic Repair couldn’t repair your PC” or “Startup Repair couldn’t repair your PC”
- A log file path appears on screen: C:\WINDOWS\System32\Logfiles\Srt\SrtTrail.txt
- Laptop loops back to the repair screen every time you restart
- The repair screen spins for a long time, then fails silently
- “Your PC did not start correctly” message with no path forward
- Safe Mode does not load after Startup Repair fails
- Black screen with cursor appears after the repair attempt ends
- The laptop powers on normally but Windows never actually loads
Start Here: Fast Diagnosis
Do not run any commands until you know which layer is broken. This decision tree takes two minutes and prevents wasted effort.
Laptop powers on and shows the repair screen: Yes, you are in the right place. Keep reading.
Can you get into Advanced Options from the repair screen? If yes, go to Troubleshoot > Advanced Options > Command Prompt. If no, force WinRE by holding the power button to shut down, then power on again. Repeat twice. Windows will load the repair screen automatically after repeated failed boots.
Does the Command Prompt open successfully? If yes, start with the SrtTrail.txt log step below. If no, you need a bootable USB with Windows installation media. Create one on another computer from Microsoft’s official Media Creation Tool, then boot from USB and choose “Repair your computer.”
Did the problem start right after a Windows update? If yes, your fastest fix is likely System Restore or Update Uninstall. Jump to Fix 5.
Did the problem start after overheating, a power cut, or a hard shutdown? If yes, CHKDSK and BCD rebuild are your most likely solutions. Start with Fix 1.
Did this start after installing new antivirus or security software? If yes, the anti-malware launch driver may be the issue. Jump to Fix 3.
Are there clicking sounds or very slow disk activity during the repair attempt? If yes, this is likely a hardware storage failure. Skip to the “When Hardware Replacement Is Necessary” section immediately.
Tools Needed
Built-in tools (no downloads required):
- Windows Recovery Environment (WinRE), accessed from the repair screen
- Command Prompt inside WinRE
- Startup Repair (already ran, already failed)
- System Restore (inside Advanced Options)
Software tools (may require a second computer):
- Windows Media Creation Tool (to create a bootable USB if WinRE is inaccessible)
- 8GB or larger USB drive
- CrystalDiskInfo (free, to check SSD/HDD health from Safe Mode if accessible)
Hardware tools (only for physical failures):
- USB-to-SATA or USB-to-NVMe enclosure (to access the drive from another computer)
- Replacement SSD if the drive is confirmed failing
Troubleshooting Matrix
| Symptom | Likely Cause | Fast Fix |
| Repair fails instantly with log file shown | Corrupted BCD or system files | Read SrtTrail.txt, then run bootrec |
| Loop restarts endlessly | Automatic restart enabled on failure | Disable auto-restart via Startup Settings |
| Black screen with cursor after repair | Driver conflict or display issue | Boot into Safe Mode |
| Repair fails after Windows update | Bad update or reverted driver | System Restore or uninstall updates |
| Fails after overheating or power loss | BCD corrupt or drive error | CHKDSK then BCD rebuild |
| “0xc000000e” or “0xc0000034” error codes | Missing or corrupt BCD | bootrec /rebuildbcd |
| “0xc0000098” error code | Windows not found in BCD | bootrec /scanos then rebuildbcd |
| Clicking noise from laptop during repair | Physical drive failure | Data backup first, replace SSD |
| Startup repair runs, then anti-malware scan shows | Anti-malware driver blocking boot | Disable early launch anti-malware |
What Causes Startup Repair to Fail

Corrupted Boot Configuration Data (BCD)
The BCD is a database Windows reads at startup to know where the operating system is and how to load it. A hard shutdown during an update, sudden power loss, or even a failed Windows feature update can corrupt the BCD entries. When BCD data is missing or wrong, Windows cannot start, and Startup Repair cannot rebuild it automatically.
How to identify it: Error codes 0xc000000e, 0xc0000034, or 0xc0000098 point directly to BCD problems. The SrtTrail.txt log will also mention “Boot configuration data” in the failure section.
What users misunderstand: Many people think running Startup Repair again will eventually fix a BCD problem. It will not. Startup Repair reads the same broken BCD every time. The fix requires manual bootrec commands.
Confirmation sign: Running “bootrec /scanos” in Command Prompt returns “Total identified Windows installations: 0” instead of 1.
Corrupted System Files
Windows depends on hundreds of core files to load properly. Malware, a failed update, a sudden power cut, or bad sectors on the drive can damage or delete these files. When key system files are missing, Startup Repair cannot put them back because it cannot connect to Windows Update from the recovery environment.
How to identify it: The SrtTrail.txt log shows failures under “System disk test” or “File system test.” Running SFC from Command Prompt will report that it found corrupt files it could not repair.
What users misunderstand: Running SFC from inside a booted Windows session sometimes misses corruption that the offline version finds. Always run SFC from WinRE Command Prompt using the offline flag for the most accurate results.
Confirmation sign: “sfc /scannow” reports “Windows Resource Protection found corrupt files but was unable to fix some of them.”
Failed or Interrupted Windows Update
A Windows update that gets cut off midway leaves the system in a broken in-between state. Some system files reflect the new version; others still match the old one. Windows cannot reconcile the difference at startup, so it sends the laptop into Startup Repair, which then fails because the file mismatch is too deep for the automated tool to sort out.
How to identify it: The problem started immediately after an update installed, or a notification for a pending restart appeared before the laptop last shut down normally.
What users misunderstand: Startup Repair does not undo updates. The only reliable path after a bad update is System Restore to a point before the update, or uninstalling the specific update from Advanced Options.
Confirmation sign: Check Windows Update history from a working device by signing into your Microsoft account, or look at the update history date versus when the problem started.
Anti-Malware Early Launch Driver Conflict
Windows 8 introduced a feature called Early Launch Anti-Malware (ELAM) that loads security drivers before any other drivers during startup. Some third-party antivirus tools install an ELAM driver that conflicts with the boot process after updates, driver changes, or certain system configurations. The result is that Windows cannot complete startup and cycles into Startup Repair.
How to identify it: The problem started right after installing, updating, or uninstalling an antivirus or security program.
What users misunderstand: Uninstalling the antivirus through normal means is not possible when Windows will not start. The fix is to disable the ELAM protection temporarily from Startup Settings, not to try to remove the software from Command Prompt.
Confirmation sign: Disabling early launch anti-malware protection from Startup Settings (press 8 or F8 after selecting “Restart” from Startup Settings) allows Windows to boot successfully.
Failing or Damaged SSD or Hard Drive
Startup Repair cannot fix hardware. If the drive that holds Windows has bad sectors, controller issues, or is physically failing, Startup Repair will attempt to diagnose the problem, fail to resolve it, and show the failure screen. Every fix in this guide assumes the storage drive is physically healthy. If the drive is bad, no software command will produce a lasting solution.
How to identify it: CHKDSK reports large numbers of bad sectors. The SrtTrail.txt log shows failures under “Disk failure diagnosis.” The repair process is unusually slow or freezes at certain points. Clicking or grinding sounds come from the drive area (only on older HDDs).
What users misunderstand: A drive that passes a basic Startup Repair disk test can still be partially failing. CHKDSK with /r does a much more thorough surface scan and catches problems the automated repair misses.
Confirmation sign: CHKDSK reports bad sectors, or CrystalDiskInfo shows a drive health status of “Caution” or “Bad” with reallocated sector counts above zero.
Corrupted Windows Registry
The Windows registry holds configuration data for the operating system, drivers, and installed software. Severe registry corruption can prevent Windows from loading even when the BCD and system files are intact. This is less common than BCD corruption but tends to appear after failed system optimizations, registry cleaner tools, or malware infections.
How to identify it: The SrtTrail.txt log shows failures during the registry check. Startup Repair may complete its scan but report “Root causes found: Registry hive is corrupted” in the log.
What users misunderstand: Registry “cleaner” tools are a frequent cause of this exact problem. They delete entries the tool considers unnecessary but that Windows actually needs at boot time.
Confirmation sign: Restoring the registry from its backup using Command Prompt produces an immediate improvement on the next boot attempt.
What We See Most Often
In a repair shop, corrupted BCD is the leading cause of Startup Repair failures by a wide margin. It shows up after sudden power loss, after updates that require multiple restarts, and sometimes after failed antivirus scans that run at boot time. The fix is almost always the same three-command bootrec sequence run from Command Prompt, and most laptops boot immediately after.
The second most common scenario is a bad Windows update. Customers often bring laptops in after an automatic update ran overnight. Startup Repair started, failed, and left them at the failure screen in the morning. System Restore to the day before the update resolves this cleanly in the majority of cases.
Drive failure is the scenario that catches people off guard. The symptoms look identical to BCD corruption at first, CHKDSK is the step that reveals the truth. When CHKDSK reports significant bad sectors, no amount of software repair will produce a stable machine. The only real path is replacing the drive and reinstalling Windows.
One pattern worth knowing: laptops that fail immediately after overheating are usually dealing with a BCD problem caused by an unsafe shutdown, not actual hardware damage from the heat. Run CHKDSK and the bootrec sequence before assuming the worst.
How to Diagnose the Problem

Step 1: Read the SrtTrail.txt Log
Expected Result: The log shows which specific test failed and gives you the root cause.
From WinRE Command Prompt, type:
notepad C:\WINDOWS\System32\Logfiles\Srt\SrtTrail.txt
Press Enter. Notepad opens with the repair log. Scroll to the bottom. Find the line that says “Root cause found:” and note exactly what it says. This tells you which section of fixes to go to.
If Failed: If the drive letter C:\ gives an error, try D:\ instead. The drive letter changes in the recovery environment on some systems.
Next Action: Match the root cause text to the fixes below.
Step 2: Run CHKDSK
Expected Result: CHKDSK scans the drive and reports whether file system errors or bad sectors exist.
In WinRE Command Prompt, type:
chkdsk C: /f /r /x
This takes 10 to 60 minutes depending on drive size. Let it complete without interrupting.
If Failed: If C: gives an error, first run “diskpart” then “list volume” to find your Windows drive letter in the recovery environment. Use that letter instead of C:.
Next Action: If CHKDSK fixes errors and reports no bad sectors, restart and see if Windows loads. If bad sectors are found, read the hardware failure section before continuing.
Step 3: Run SFC Offline
Expected Result: SFC scans Windows system files and repairs any that are corrupted or missing.
In WinRE Command Prompt, first find where Windows is installed by running:
bcdedit
Look for “osdevice” or “device” to find the drive letter. Then run:
sfc /scannow /offbootdir=C:\ /offwindir=C:\Windows
Replace C: with your actual Windows drive letter.
If Failed: If SFC reports it found corrupt files but could not fix them, move to DISM in the next step.
Next Action: If SFC completes with no issues, try rebooting. If it found and fixed issues, reboot and test.
Step 4: Run DISM
Expected Result: DISM repairs the Windows component store that SFC pulls from when replacing damaged files.
In WinRE Command Prompt, type:
DISM /Online /Cleanup-Image /RestoreHealth
Note: In WinRE, replace /Online with:
DISM /Image:C:\ /Cleanup-Image /RestoreHealth /Source:C:\Windows
This takes 15 to 30 minutes. Let it complete fully.
If Failed: If DISM returns errors about not being able to connect to source files, you may need to point it at Windows installation media. Mount the USB and use /Source:E:\Sources\install.wim (where E: is the USB drive letter).
Next Action: After DISM completes, run SFC again to let it replace any files it could not fix earlier. Then reboot.
Which Fix Usually Works?
| Fix | Typical Success Likelihood | Cost | Difficulty |
| Rebuild BCD with bootrec | Very Common | Free | Medium |
| CHKDSK + SFC + DISM | Very Common | Free | Medium |
| System Restore | Common | Free | Easy |
| Disable early launch anti-malware | Common | Free | Easy |
| Uninstall recent Windows update | Common | Free | Easy |
| Registry restore from backup | Occasional | Free | Hard |
| Repair install (keep files) | Occasional | Free | Medium |
| Clean install | Occasional | Free | Medium |
| SSD replacement + reinstall | Rare | $40 to $120 | Hard |
Step-by-Step Fixes

Fix 1: Rebuild the BCD with Bootrec Commands
Cost: Free Time: 5 to 10 minutes Difficulty: Medium
Steps:
Open WinRE Command Prompt (Troubleshoot > Advanced Options > Command Prompt).
Run these commands one at a time, pressing Enter after each:
bootrec /fixmbr
bootrec /fixboot
bootrec /scanos
bootrec /rebuildbcd
When prompted by rebuildbcd, type Y and press Enter to add the Windows installation to the boot list.
Close Command Prompt and restart the laptop.
Expected Result: Windows boots normally.
If Failed: If “bootrec /fixboot” returns “Access is denied,” your system uses UEFI/GPT rather than legacy BIOS/MBR. In that case, skip fixboot and instead run:
diskpart
list disk
select disk 0
list partition
Find the EFI partition (usually around 100MB, Type: System). Note its partition number, then type:
select partition [number]
assign letter=V
exit
Then run:
bcdboot C:\Windows /s V: /f UEFI
Technician Tip: Most laptops made after 2015 use UEFI. If bootrec /fixboot gives “Access is denied,” go straight to the bcdboot route. Do not keep retrying fixboot.
Fix 2: Disable Early Launch Anti-Malware Protection
Cost: Free Time: 2 minutes Difficulty: Easy
Steps:
From the repair screen, go to Advanced Options > Troubleshoot > Advanced Options > Startup Settings > Restart.
After the laptop restarts and the Startup Settings menu appears, press 8 or F8 to select “Disable early launch anti-malware protection.”
Let Windows attempt to start normally.
Expected Result: Windows loads successfully.
If Failed: This confirms the anti-malware driver is not the primary cause. Boot back into WinRE and continue with other fixes. Once Windows is running, uninstall or update the security software that caused the conflict before re-enabling anti-malware protection.
Technician Tip: This fix is temporary. Once Windows is running, go to Settings > Apps and uninstall the problematic security software, or check the vendor’s website for an updated driver that is compatible with your current Windows version.
Fix 3: Use System Restore
Cost: Free Time: 15 to 30 minutes Difficulty: Easy
Steps:
From WinRE, go to Troubleshoot > Advanced Options > System Restore.
Select your user account and enter your password when prompted.
Choose a restore point dated before the problem started. If multiple points exist, choose the oldest one that predates the issue.
Confirm the restore and let it complete. The laptop will restart automatically.
Expected Result: Windows starts in the state it was in before the restore point date.
If Failed: If no restore points appear, System Restore was turned off or restore points were deleted. Skip to Fix 4. If the restore completes but the problem returns, the restore point was after the corruption already existed. Try an earlier point if available.
Technician Tip: System Restore does not touch personal files. Documents, photos, and downloads remain untouched. Installed programs may be rolled back.
Expert Warning: If you suspect a failing drive, do not rely on System Restore. The restored state will fail again if the underlying drive has bad sectors.
Fix 4: Uninstall Recent Windows Updates
Cost: Free Time: 10 to 20 minutes Difficulty: Easy
Steps:
From WinRE, go to Troubleshoot > Advanced Options > Uninstall Updates.
Choose “Uninstall latest quality update” first. If that does not work, return and choose “Uninstall latest feature update.”
Follow the prompts and restart when complete.
Expected Result: Windows rolls back the update and boots into the previous working state.
If Failed: The update is not the root cause, or the update was not recent enough for this option to catch it. Return to WinRE and continue with other fixes.
Technician Tip: After successfully uninstalling the update and getting Windows to boot, go to Settings > Windows Update > Advanced Options and pause updates for 7 days. This gives Microsoft time to release a patched version of the problematic update.
Fix 5: Restore the Registry from Backup
Cost: Free Time: 5 to 10 minutes Difficulty: Hard
Steps:
Open WinRE Command Prompt.
Type the following command and press Enter:
copy C:\Windows\System32\config\RegBack\* C:\Windows\System32\config\
When prompted about overwriting files, type All and press Enter.
Close Command Prompt and restart.
Expected Result: Windows loads using the registry backup, bypassing the corrupted registry hive.
If Failed: The RegBack folder may be empty on Windows 10 version 1803 and later, as Microsoft changed the behavior so automatic backups are no longer made by default. If the folder is empty, this option is not available.
Technician Tip: If the RegBack files are present but zero bytes in size, the backup was disabled by a group policy or registry setting. In that case, a repair install is the next logical step.
Fix 6: Repair Install (In-Place Upgrade)
Cost: Free (requires Windows installation media) Time: 45 to 90 minutes Difficulty: Medium
Steps:
Download the Windows 10 or Windows 11 Media Creation Tool from Microsoft’s official site on another computer. Create a bootable USB (minimum 8GB).
Boot the problem laptop from the USB. At the setup screen, choose “Repair your computer” rather than “Install now.”
Go to Troubleshoot > Advanced Options > Startup Repair, or return to the main setup and choose to install while keeping files.
If choosing to install: select “Upgrade: Install Windows and keep files, settings, and apps.” This reinstalls Windows system files without touching personal data.
Expected Result: Windows reinstalls its core files, resolves file corruption, and the laptop boots normally with all personal files and most programs intact.
If Failed: If the installer cannot complete because it cannot find a valid Windows partition, the drive may be failing or the partition structure is damaged. Run CHKDSK before attempting this again.
Technician Tip: A repair install resolves nearly every software-level boot failure that individual commands cannot fix. It is not as drastic as a clean install. Think of it as a deep system file replacement that leaves your data alone.
Expert Warning: BitLocker-encrypted drives require the BitLocker recovery key before the repair install can proceed. Have your recovery key ready before starting. The key can be retrieved from your Microsoft account at account.microsoft.com/devices/recoverykey.
Fix 7: Full Clean Install
Cost: Free (with valid Windows license) Time: 30 to 60 minutes Difficulty: Medium
Steps:
Back up all personal files first if any access to the drive is possible. Even from WinRE Command Prompt you can copy files to a USB drive using xcopy.
Boot from Windows installation media and choose “Install now.”
Select “Custom: Install Windows only (advanced)” and follow the prompts.
After installation, reinstall your programs and restore your files.
Expected Result: Windows is completely fresh. All boot problems are resolved.
If Failed: If the installer cannot see the drive, the SSD may have failed or the NVMe driver is not included on the USB. For NVMe drives, download the correct RST or NVMe driver from your laptop manufacturer’s site and load it during the installer’s “Load driver” prompt.
Technician Tip: Use this as the final software fix. If even a clean install fails to complete or the problem returns within days, the issue is hardware.
Mistakes That Make the Problem Worse
Running bootrec commands blindly without checking the drive type first. On UEFI/GPT systems, “bootrec /fixmbr” and “bootrec /fixboot” do not apply to the boot process the same way. Running them wastes time and in rare cases can create new complications. Always check whether your system uses BIOS/MBR or UEFI/GPT before starting.
Interrupting CHKDSK before it finishes. CHKDSK marks bad sectors and moves data during the scan. Stopping it midway can leave the file system in a partially repaired state that is harder to fix than the original problem.
Repeating Startup Repair multiple times hoping for a different result. Startup Repair runs the same diagnostic checks every time. If it failed once, it will fail every subsequent attempt unless something changes between attempts. Running it repeatedly wastes time.
Deleting the SrtTrail.txt file. Some guides suggest removing this log file as part of the fix. The log itself is not the cause of any problem. It is a record of what went wrong. Deleting it removes the only clue about what is actually broken.
Performing a clean install without checking for drive health first. Installing a fresh copy of Windows onto a failing drive just delays the inevitable. The laptop will fail to boot again within days or weeks. Always confirm drive health with CHKDSK before investing time in a reinstall.
Using registry cleaner software to “fix” the problem. Registry cleaners are one of the most common causes of boot failures in the first place. Running one from a different computer’s registry or from within WinRE is likely to make things significantly worse.
Assuming the wrong drive letter in Command Prompt. The drive letter assigned to your Windows partition inside the recovery environment is often D: or E:, not C:. Running commands against C: when Windows is on D: does nothing useful. Always confirm the correct letter with “diskpart > list volume” before running repairs.
Skipping data backup before aggressive repairs. CHKDSK /r and full reinstalls are generally safe for personal files, but when a drive is already behaving erratically, any write operation carries risk. Copy important files to a USB before starting if the drive is accessible at all.
Brand-Specific Considerations
Dell
Dell laptops include SupportAssist OS Recovery, accessible by pressing F12 at startup and selecting SupportAssist Recovery. This environment runs diagnostics and can perform an OS recovery while preserving personal files. On newer Dell XPS and Inspiron models, SupportAssist can reinstall Windows directly from Dell’s servers without needing a USB.
Dell also places the WinRE access key at F12 (boot menu) or by holding Ctrl+F11 on older models. The BIOS setup utility is F2. Secure Boot must remain enabled for Windows 11 systems; disabling it to troubleshoot is not recommended on Dell systems that shipped with Windows 11 preinstalled.
HP
HP systems offer HP Cloud Recovery, accessible from the BIOS Boot Menu (F9) on supported models. This downloads a fresh Windows image directly to the laptop without requiring external media. The recovery key combination on older HP laptops is typically pressing and holding the Windows key + B, then pressing the power button.
HP Sure Start technology can sometimes interfere with manual BCD repairs on business-class laptops (EliteBook, ProBook). If bootrec commands complete but the issue persists, enter the BIOS (F10) and check the Sure Start or System Security settings.
Lenovo
Lenovo laptops include OneKey Recovery, accessed by pressing the Novo button (a small pinhole button, usually near the power button) or pressing F11 during startup. This launches a recovery environment separate from WinRE that can perform a factory reset or a system restore from Lenovo’s partition.
ThinkPad models use F1 for BIOS and F12 for boot selection. Lenovo Vantage, when accessible, includes a built-in hardware diagnostics tool that can verify drive health before you commit to repairs. IdeaPad models may require entering BIOS to disable Secure Boot before booting from external USB.
ASUS
ASUS Recovery Partition is accessed at startup by pressing F9. The BIOS key is F2 or Delete. ASUS laptops with MyASUS installed include a Cloud Recovery feature that can restore Windows over a network connection.
On ASUS ROG and TUF gaming laptops, the Armoury Crate software sometimes installs a service that conflicts with the early launch sequence. If startup repair fails on a gaming ASUS laptop right after a driver update, the Armoury Crate service is a likely cause. Disable it through Safe Mode or remove it via Command Prompt using “sc delete ArmouryCrateService.”
Acer
Acer Recovery Management is accessed by pressing Alt+F10 at startup on most models. This provides access to a restore-to-factory option. The BIOS key is F2 and the boot menu is F12.
Acer Aspire and Nitro laptops running Windows 11 require Secure Boot and TPM 2.0 to be active. Disabling Secure Boot in the BIOS to try to solve a boot failure on these models typically makes the issue worse by breaking the Windows 11 boot requirements. Check BIOS settings and ensure they match the default values before doing anything else.
MSI
MSI laptops use the Delete key for BIOS and F11 for the boot menu. MSI includes a recovery partition on most gaming laptops but accessing it requires the drive to be healthy enough to read from the partition.
MSI Dragon Center and MSI Center applications occasionally install startup services that conflict with the boot sequence after Windows updates. If an MSI gaming laptop fails after a feature update, disabling startup services from Safe Mode is worth trying before moving to more aggressive repairs.
Repair Shop Diagnosis

When a laptop comes into a shop with a Startup Repair failure, the first thing a technician does is read the SrtTrail.txt log from Command Prompt. This takes about 30 seconds and narrows the problem down significantly before any commands are run.
The second check is a basic drive health test using CHKDSK. If bad sectors appear immediately, the technician redirects to data recovery first before attempting any Windows repair. A laptop with a failing drive is handled entirely differently from one with software corruption.
If the drive is healthy, most technicians run the bootrec sequence, then SFC, then DISM in that order. This resolves the majority of startup failures without needing to wipe the drive.
Diagnostic tools commonly used in shops include CrystalDiskInfo for drive health, MemTest86 for RAM (if the laptop exhibits random crashes alongside boot failures), and the manufacturer’s own diagnostics partition when available.
Typical repair costs for this type of issue range from $50 to $150 for software-only repairs at a shop, depending on labor rates. If the drive needs replacement, add $40 to $120 for the SSD plus installation time. A shop-level repair install or clean install with data backup included typically runs $80 to $200.
Professional repair is justified when CHKDSK reports physical bad sectors, when the laptop has already been to a failed power event, when you are uncomfortable with Command Prompt work, or when the data on the drive is critical and you cannot risk further damage.
When Hardware Replacement Is Necessary
SSD or HDD Failure
Signs: CHKDSK reports bad sectors, the repair process freezes at specific points every time, or the drive disappears from the system during the repair environment. A drive that passes the automated Startup Repair disk test but fails CHKDSK /r is often in early-stage failure.
Replacement cost: $40 to $100 for a 256GB to 512GB NVMe SSD. Most laptops made after 2018 use M.2 NVMe drives that are straightforward to swap.
RAM Failure
Signs: Startup Repair fails even after a clean install on a healthy drive, or the laptop shows random restarts alongside the boot failure. RAM issues can prevent Windows from loading even when every other component is intact.
Test with MemTest86 from a bootable USB. One or more errors on any pass confirms RAM failure. On laptops with soldered RAM, replacement means a motherboard swap.
Motherboard Failure
Signs: The laptop powers on but no display appears, the power button does not respond, or the laptop shuts off within seconds of powering on. Startup Repair never even gets a chance to run in this case.
This is beyond software repair. A motherboard replacement is typically $150 to $400 or more depending on the model. On older laptops, replacement may not be cost-effective.
Stop Troubleshooting and Seek Professional Repair If
You notice a burning smell during or after boot attempts. This indicates electrical damage. Stop powering the laptop on immediately.
The battery is visibly swollen. A swollen lithium battery can rupture or ignite. Do not charge or use the laptop. Remove the battery if safely possible and get it serviced.
Liquid damage is present. Water and laptop internals are incompatible at every level. Software repairs cannot undo corrosion on the motherboard. A technician needs to clean and assess the board before power is applied.
CHKDSK reports hundreds of bad sectors on the first run. The drive is in active failure. Stop running repair commands and focus on data recovery before the drive becomes completely unreadable.
The laptop shuts off during the repair process repeatedly. This is a sign of power delivery problems, a failing battery, or thermal shutdown. The issue is not the operating system.
You already performed a clean install and the laptop is failing to boot again within 24 hours. The hardware is failing. No amount of software work will produce a stable machine on failing hardware.
Visible burn marks, corrosion, or damaged connectors are present. Physical inspection is required before any further steps.
Prevention Tips

Enable System Restore and verify restore points exist every few months. Go to Control Panel > System > System Protection and confirm that protection is turned on for the Windows drive. Check that at least one restore point exists. Without this, one of the most reliable recovery options is unavailable.
Never force a shutdown during a Windows update. If the update screen says “Do not turn off your computer,” it means exactly that. Forced shutdowns during update installation are the leading cause of corrupted system files and BCD damage.
Keep a Windows recovery USB always available. Create one from a working Windows computer using the Media Creation Tool. Store it somewhere safe. When Startup Repair fails and WinRE cannot be reached, this USB is the only way in.
Check drive health quarterly with CrystalDiskInfo. A drive showing early warning signs, such as reallocated sectors or pending sectors climbing, should be replaced before it fails completely. Catching a failing drive early means data can be saved and Windows can be moved to a healthy drive.
Avoid registry cleaner tools entirely. No registry cleaner is worth the risk it introduces. Windows manages its own registry adequately without third-party intervention.
Use a quality surge protector or UPS. Sudden power loss during Windows operation is one of the most reliable ways to corrupt the BCD. A UPS gives the laptop time to shut down cleanly during a power failure.
Back up personal data to an external drive or cloud storage weekly. This does not prevent Startup Repair from failing, but it ensures that no repair approach, including a clean install, results in permanent data loss.
Frequently Asked Questions

What does it mean when Startup Repair fails?
It means the automated recovery tool could not identify or fix the specific cause of the boot failure. Startup Repair handles a limited set of problems. When the cause is outside that range, such as a corrupted BCD, damaged system files, or a hardware issue, it reports failure and stops. This does not mean the laptop is beyond repair. It means manual intervention is needed.
Can I fix a Startup Repair failure without a Windows USB?
Yes, in most cases. As long as you can access WinRE (the Windows Recovery Environment) from the repair screen, you have Command Prompt, System Restore, and the option to uninstall recent updates. These tools cover the majority of failure scenarios. A bootable USB is only required if WinRE itself is inaccessible.
Will I lose my files if I fix Startup Repair failure?
Not from CHKDSK, SFC, DISM, bootrec commands, System Restore, or a repair install. These operations do not delete personal files. Only a clean install removes everything. Even then, files remain on the drive until the partition is formatted. If the drive is accessible from another computer, files can be recovered before formatting.
Why does Startup Repair loop endlessly?
The automatic restart on failure setting is enabled by default. When Windows cannot start, it reboots and tries again, creating an infinite loop. To break out of it, enter WinRE and go to Troubleshoot > Advanced Options > Startup Settings > Restart, then press 9 or F9 to disable automatic restart. This lets Windows stay on the failure screen instead of rebooting, which gives you access to the repair environment.
What is SrtTrail.txt and why does it appear on the screen?
SrtTrail.txt is the log file that Startup Repair writes during every repair attempt. It records every test performed and every result, including the root cause that stopped the repair. When Startup Repair fails, Windows shows the path to this file on screen so you can open it and read what went wrong. It is one of the most useful diagnostic tools available for this type of problem and should always be read before running any repair commands.
Can a Startup Repair failure mean my laptop is dead?
Rarely, but it is possible in cases of severe hardware failure. If the motherboard has failed, the RAM has completely died, or the SSD has failed to a point where even the recovery environment cannot read it, the laptop may be beyond a DIY repair. The clearest sign is when the laptop cannot complete any command in WinRE, when every read or write operation fails, or when the laptop powers off within seconds of starting.
How long does the BCD rebuild take?
The bootrec sequence itself runs in under two minutes. The reboot after the commands is what takes the most time, typically 2 to 5 minutes as Windows reconfigures. The total process from opening Command Prompt to a booted desktop is usually under 10 minutes.
Should I try Startup Repair again after it failed once?
Running it one additional time is reasonable in case of a transient issue. Running it three or more times is not useful. Startup Repair does not change its approach between attempts. If it failed, the fix requires a different tool. Use the SrtTrail.txt log and the manual steps in this guide instead.
Conclusion
Startup Repair failure is not the end of the road. It is the starting point for manual repairs that are more targeted and effective than the automated tool. Read the SrtTrail.txt log first to identify the exact failure, then work through CHKDSK, the bootrec sequence, and SFC in that order. Most laptops recover from this sequence without any data loss. If the drive is physically failing or the motherboard is damaged, software repairs will not hold and professional service is the appropriate next step.