Quick Answer
The most common cause is a loose RAM stick, a failing AC adapter, or a battery that can’t sustain power. Remove the battery, reseat the RAM, and try booting on AC power alone. Most laptops recover within minutes. If the shutdown repeats after that, the motherboard or charging circuit usually needs bench testing.
Introduction
You press the power button. The fans spin up, the lights flash on, and for a second it looks like a normal boot. Then everything just dies, sometimes before the screen even shows a logo.
This is different from a laptop that won’t turn on at all, and it’s different from one that freezes mid boot. A laptop that powers on and then cuts out within a few seconds is telling you something specific: it has enough power to start the boot sequence, but something is forcing it to shut down before that sequence can finish.
That “something” is almost always one of a short list of culprits: a RAM stick that lost contact with its slot, a charger that can’t deliver enough current, a battery that’s failed internally, or a safety shutdown triggered by heat or a short. In this guide you’ll learn how to tell those apart in minutes, which fixes are free, and which symptoms mean it’s time to stop testing and get the unit on a bench.
Symptoms of the Problem

- Power light comes on, then goes dark within 1 to 10 seconds
- Fan spins briefly, then stops completely as the unit shuts off
- Keyboard backlight flashes on and off with each power attempt
- No image appears on the built in screen or an external monitor
- Laptop stays on only while the charger is connected, and dies the moment it’s unplugged
- The shutdown is intermittent, working on some attempts and failing on others
- A faint burning smell, popping sound, or visible smoke accompanies the shutdown
- The laptop ran fine before but started doing this after being moved, dropped, or opened for cleaning
Start Here: Fast Diagnosis
Use this decision tree before trying any fix. It narrows down the cause in under two minutes.
If the laptop shows zero lights, zero fan movement, and zero sound → This isn’t a “shuts off immediately” issue, it’s a power delivery failure. Check the charger and outlet first.
If lights and fan turn on but there is no display at all, even on an external monitor → Likely RAM, a failed display controller, or a deeper motherboard fault.
If an external monitor shows a picture but the built in screen stays black → The shutdown itself is probably unrelated to the display. Treat it as a power or thermal issue and check RAM, battery, and adapter.
If the laptop only shuts off while running on battery, and stays on with the charger plugged in → Battery fault. Skip straight to the battery fixes below.
If the laptop shuts off even with the charger plugged in and the battery removed → Motherboard, power circuit, or a dead CMOS battery. This needs the deeper diagnostic steps.
If the shutdown only happens after the laptop has been running for several minutes, not within the first 10 seconds → That’s a different problem (thermal throttling under load), not a true “turns on then shuts off immediately” case. Our laptop overheating guide covers that scenario in more depth.
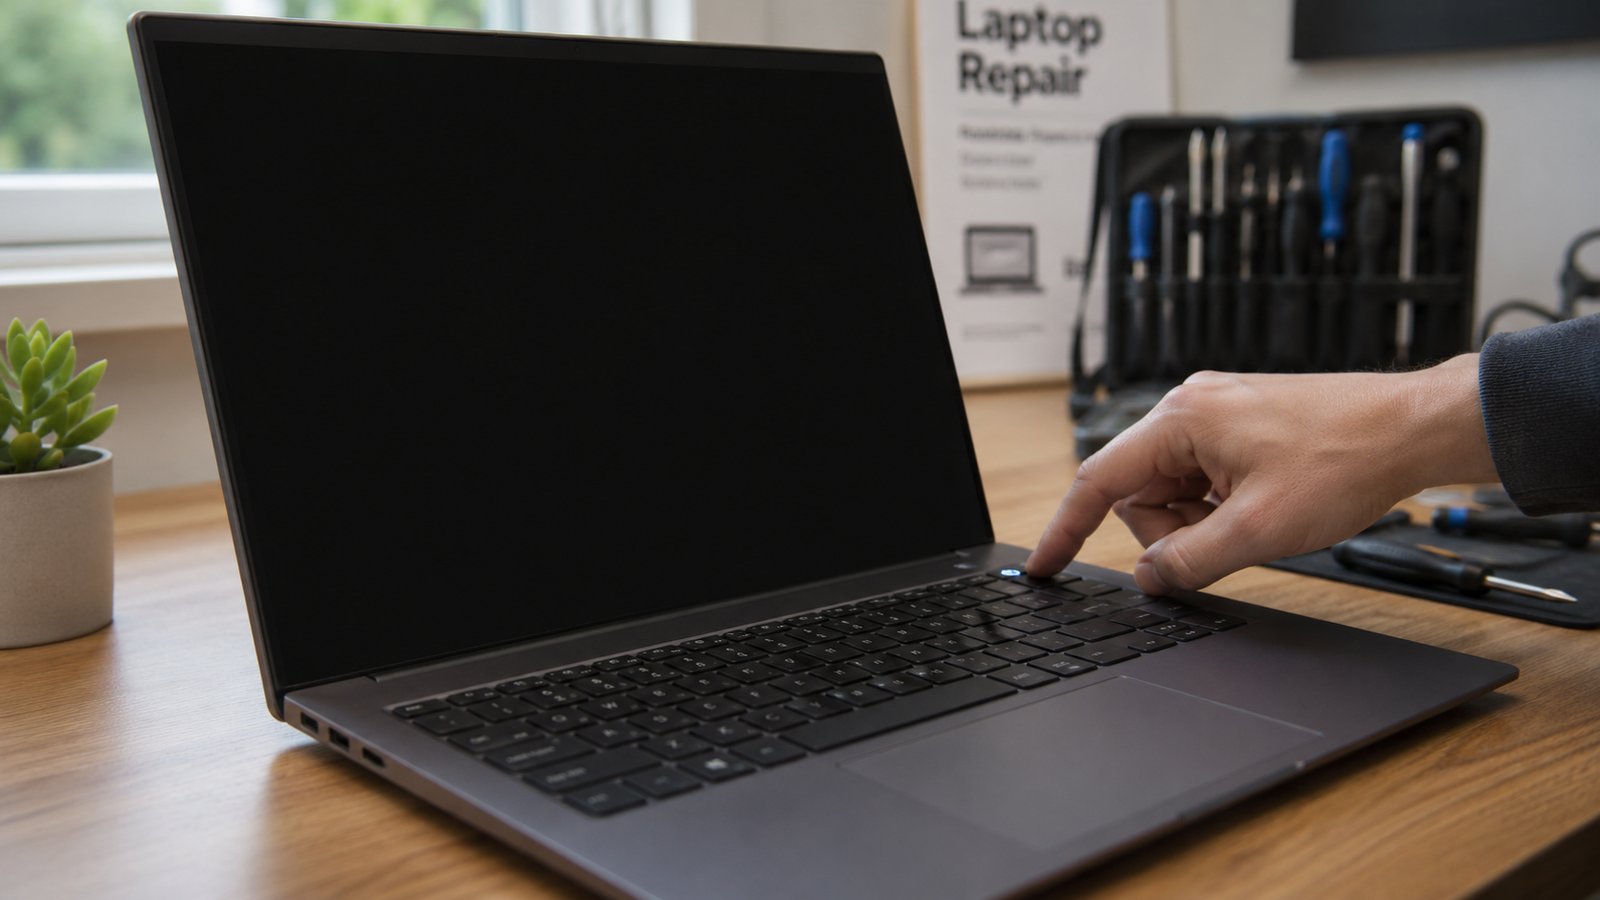
Tools Needed
Built in tools
- BIOS/UEFI access (usually F2, F10, F12, or Delete at power on, varies by brand)
- Windows Memory Diagnostic (only usable if the laptop boots far enough)
- Event Viewer, specifically the Kernel-Power log under Windows Logs > System
Software tools
- Manufacturer diagnostics: Dell SupportAssist, HP PC Hardware Diagnostics, Lenovo Vantage, ASUS MyASUS Diagnostics, Acer Care Center, MSI Center
powercfg /batteryreportcommand (run from an elevated Command Prompt if the unit boots at all)
Hardware tools
- A second, known-good charger with matching or higher wattage
- A multimeter, for checking adapter output voltage
- An external monitor with an HDMI or USB-C cable
- A small Phillips screwdriver set and a plastic pry tool
- An anti-static wrist strap
- Compressed air for vents and the fan intake
Troubleshooting Matrix
| Symptom | Likely Cause | Fast Fix |
|---|---|---|
| No lights, no fan, no sound at all | Dead adapter, bad outlet, or failed charging port | Test with a known-good charger and a different outlet |
| Fan runs briefly, no display anywhere | Loose or failed RAM | Reseat or reset RAM modules |
| Shuts off only on battery, fine on AC | Failed or worn out battery | Run battery report, replace if health is low |
| Shuts off even with battery removed and AC connected | Motherboard or power circuit fault | Bench diagnosis required |
| Random, intermittent shutdowns, sometimes boots fine | Marginal connector or early motherboard fault | Reseat all connectors, monitor pattern, escalate if it continues |
| Burning smell, popping sound, or smoke | Electrical short or capacitor failure | Stop use immediately, professional repair only |
| Shuts off after several minutes, not instantly | Thermal protection shutdown | Clean vents, check fan, see our overheating guide |
| Only shuts off after the laptop was opened or dropped | Loose internal connector | Reopen carefully and reseat the connector that was last touched |
What Causes a Laptop to Turn On Then Shut Off Immediately

Loose or Failing RAM
RAM that has lost contact with its slot is one of the most common causes, and also one of the easiest to fix. The system tries to initialize memory during POST (Power On Self Test), fails, and the motherboard cuts power as a protective measure rather than letting the system run with bad memory.
You’ll know this is the cause if reseating the stick, or trying just one stick at a time in different slots, changes the behavior at all. Most owners assume RAM problems show up as blue screens or random restarts. In reality, a fully dead or badly seated module often prevents the system from getting past POST at all, which looks exactly like an immediate shutdown.
The confirmation sign: if you have two RAM sticks, remove one and try booting on the other alone, then swap. If the laptop boots normally with one specific stick removed, you’ve found your faulty module.
Failing or Underpowered AC Adapter
A charger that can no longer deliver its rated wattage will let the laptop power on briefly before the motherboard detects insufficient voltage and shuts everything down to protect the battery and components. This gets worse over time as the adapter ages, and it gets worse instantly if you’ve been using a generic or mismatched charger.
Most people don’t suspect the adapter because the charging light still turns on. A failing adapter can supply enough current to light an LED while still falling short of what’s needed to actually run the system.
The confirmation sign: try a second charger with the same or higher wattage rating. If the laptop suddenly stays on, the original adapter was the problem.
Battery Fault or Swelling
A battery that’s failed internally can pull the whole system down the moment it’s asked to supply current, even briefly during the boot sequence. This is especially common in laptops that are several years old or that were left fully depleted for long stretches.
What users misunderstand here is that a “dead” battery doesn’t always mean zero charge. A battery can show 40% in Windows and still be incapable of delivering the burst of current needed during boot, especially if individual cells inside the pack have degraded unevenly.
The confirmation sign: remove the battery completely and run the laptop on AC power only. If the shutdowns stop, the battery is the cause, and a swollen or bulging battery needs immediate replacement regardless of what the percentage reads.
Overheating or Thermal Protection Shutdown
Modern laptops have a hard thermal cutoff built into the firmware. If a temperature sensor reports a dangerous reading immediately at power on, usually due to a fan that’s seized or a heatsink with no thermal paste left, the system can shut down within seconds of boot rather than waiting for heat to build up.
This is different from the slower thermal throttling that happens after several minutes under load. An instant thermal shutdown at the very start of boot almost always means the fan isn’t spinning at all, not that it’s just running slow. Our guide on a laptop fan not working covers how to confirm and fix this specific failure.
The confirmation sign: listen closely during the brief window before shutdown. If you hear no fan noise whatsoever, even for a second, suspect a seized or disconnected fan before anything else.
Motherboard or Power Circuit Failure
When none of the simpler causes check out, the issue usually sits on the motherboard itself: a failed voltage regulator, a blown capacitor, or damage to the power delivery circuit from a surge or a prior liquid spill. The system gets just enough power to start the boot process, then the damaged circuit can’t sustain the load and everything cuts out.
People often assume a motherboard fault means total silence and zero lights. In practice, a partially failed board can produce exactly the “turns on for a few seconds” symptom, because some power rails still work while others fail under load.
The confirmation sign: the shutdown happens consistently even with the battery removed, a known-good charger connected, and only the bare minimum of RAM installed.
Corrupted BIOS or Dead CMOS Battery
A corrupted BIOS, often from an interrupted update, or a completely dead CMOS battery can prevent the system from completing POST, triggering a shutdown that looks identical to a hardware fault. This is more common after a failed firmware update or after a laptop has sat completely unused for a very long time.
The confirmation sign: try a BIOS reset using the manufacturer’s recovery key combination (varies by brand, covered below) before assuming hardware failure.
Sticking Power Button
A power button that’s started to physically stick, often from years of use or a spill that got into the keyboard deck, can register as a continuous “held down” signal. Many laptops interpret a held power button as a forced shutdown command, so the unit appears to power on and immediately shut itself back off as if you’d long pressed the button.
The confirmation sign: tap the power button quickly and release versus a firmer press. If a very light, quick tap behaves differently than a normal press, the switch itself is likely failing.
Loose Internal Connector After Disassembly or Drop
If this started right after the laptop was opened for cleaning, had RAM upgraded, or took a fall, a connector that was bumped loose, commonly the battery connector, the power board ribbon cable, or the display cable, is the most likely cause. These connectors are small and don’t always seat with an obvious click.
The confirmation sign: the timing lines up exactly with the last time the case was opened or the laptop was dropped.
What We See Most Often
In the repair shops we work with, RAM and charger issues account for the largest share of “turns on then shuts off” cases that walk in the door, mostly because they’re also the easiest for an owner to misdiagnose as something far more serious. People assume the worst and bring in a unit expecting a dead motherboard, and it turns out to be a $0 fix: reseating a stick of memory.
Battery related shutdowns are the second most common pattern, especially in laptops past the three year mark. The giveaway is almost always that the unit behaves perfectly on AC power alone.
The case we see misdiagnosed most often is the thermal shutdown caused by a seized fan. Owners hear the fan “running” because it spins for that first second on its own momentum, then assume the fan is fine and start looking at RAM or the motherboard instead.
How to Diagnose the Problem

Step 1: Listen and watch closely during the failed boot
Pay attention to whether the fan spins at all, whether any lights stay on longer than others, and whether you smell anything unusual.
Expected Result: You’ll be able to place the laptop into one of the decision tree branches above. If Failed: If you genuinely can’t tell what’s happening because it’s too fast, move to Step 2 and let the hardware tests do the work instead.
Step 2: Remove the battery and test on AC power only
On laptops with a removable battery, take it out completely and connect only the charger.
Expected Result: If the laptop now boots normally, the battery is the cause. If Failed: The laptop still shuts off, move to Step 3.
Step 3: Swap the charger
Connect a second, known-good adapter with matching or higher wattage.
Expected Result: If the laptop boots normally, the original adapter was failing. If Failed: Still shuts off, move to Step 4.
Step 4: Reseat the RAM
Power off completely, remove the battery, and reseat each RAM stick. If there are two sticks, test with only one installed at a time, alternating slots.
Expected Result: If the laptop boots normally on one specific configuration, you’ve isolated a bad stick or a bad slot. If Failed: Still shuts off with all combinations tried, move to Step 5.
Step 5: Check for a thermal shutdown
Listen specifically for fan noise during the brief power on window. Open the bottom panel if you’re comfortable doing so and confirm the fan blade isn’t physically stuck.
Expected Result: If the fan doesn’t spin at all, you’ve found a thermal protection shutdown caused by a failed fan. If Failed: Fan spins normally and the shutdown still happens, move to Step 6.
Step 6: Attempt a BIOS or CMOS reset
Use your model’s recovery key combination (see Brand-Specific Considerations below) or remove the CMOS battery for 60 seconds if you’re comfortable opening the case.
Expected Result: If the laptop boots normally afterward, a corrupted BIOS or dead CMOS battery was the cause. If Failed: Still shuts off after all of the above, this points to a motherboard or power circuit fault that needs bench level testing with a multimeter or POST diagnostic card. This is the point to involve a repair shop.
Which Fix Usually Works?
| Fix | Typical Success Likelihood | Cost | Difficulty |
|---|---|---|---|
| Remove battery, test on AC only | Common | Free | Easy |
| Swap to a known-good charger | Common | Free (if you have a spare) to $30 | Easy |
| Reseat RAM modules | Very Common | Free | Easy |
| Replace a faulty RAM stick | Common | $20 to $60 | Easy |
| Clean vents and free up a seized fan | Occasional | Free to $15 | Moderate |
| Replace the cooling fan | Occasional | $15 to $50 part, more with labor | Moderate |
| BIOS or CMOS reset | Occasional | Free | Easy |
| Replace the battery | Common | $40 to $100 | Easy to Moderate |
| Replace the AC adapter | Common | $20 to $60 | Easy |
| Reseat internal connectors | Occasional | Free | Moderate |
| Motherboard repair or replacement | Rare | $120 to $350+ | Hard, shop recommended |
Step-by-Step Fixes

Fix: Battery Removal and AC-Only Test
Cost: Free Time: 2 minutes Difficulty: Easy
Steps:
- Power the laptop off completely and unplug it.
- If your model has a removable battery, take it out. If it’s sealed, skip to a forced power drain instead: hold the power button for 30 seconds with the laptop unplugged.
- Plug in the charger and power the laptop on with the battery left out (or after the forced drain on sealed-battery models).
Expected Result: The laptop boots and stays on normally. If Failed: Move on to the charger swap test below. Technician Tip: This single test eliminates or confirms the battery as a cause faster than any other step, and it costs nothing.
Fix: Charger Swap Test
Cost: Free if you have access to a second charger, $20 to $60 for a replacement Time: 2 minutes Difficulty: Easy
Steps:
- Borrow or buy a charger that matches your laptop’s voltage and has equal or higher wattage than the original.
- Connect it directly to the laptop, bypassing any old or worn extension cables.
- Power on and observe whether the shutdown still happens.
Expected Result: Laptop boots and stays powered. If Failed: Original charger wasn’t the cause, move to RAM reseating. Technician Tip: A multimeter check on the adapter’s output pins, if you have one, will confirm a failing adapter even before you buy a replacement. Expert Warning: Never use a charger with lower wattage than the original spec. It can cause exactly this symptom and may stress the charging circuit further over time.
Fix: RAM Reseat and Single-Stick Test
Cost: Free, or $20 to $60 if a replacement module is needed Time: 10 to 15 minutes Difficulty: Easy
Steps:
- Power off, unplug, and remove the battery.
- Open the RAM access panel (or the full bottom case on unibody designs) using a Phillips screwdriver.
- Gently spread the side clips and remove each RAM stick, then firmly reinsert at roughly a 30 degree angle until it clicks flat.
- If you have two sticks, test booting with only one installed, then swap to test the other.
Expected Result: Laptop boots normally with at least one working configuration identified. If Failed: All combinations still shut off, move to the thermal check below. Technician Tip: Gold contacts that look slightly tarnished can be cleaned gently with a pencil eraser before reseating; this resolves more “bad RAM” cases than people expect. Expert Warning: Always use an anti-static wrist strap or touch a grounded metal surface before handling RAM. Static discharge can cause a fault that mimics this exact symptom.
Fix: Clear a Seized Fan and Clean Airflow Paths
Cost: Free with compressed air, $15 to $50 for a fan replacement Time: 15 to 30 minutes Difficulty: Moderate
Steps:
- Power off and remove the battery.
- Open the bottom panel to expose the fan and heatsink assembly.
- Hold the fan blade still with a fingertip (carefully) and use short bursts of compressed air to dislodge dust and debris from the blades and housing.
- Spin the fan blade gently by hand to confirm it now moves freely.
- Reassemble and test a normal power on.
Expected Result: Fan spins immediately and consistently at power on, no further instant shutdown. If Failed: Fan still won’t spin freely, the fan motor itself has likely failed and needs replacement. Technician Tip: A fan that’s merely dusty often makes a faint grinding or clicking sound right before it seizes. If you’ve heard that recently, this is very likely your cause. Expert Warning: Never run the laptop with the bottom panel off for extended testing near liquids, pets, or static-prone carpet.
Fix: BIOS or CMOS Reset
Cost: Free Time: 5 to 10 minutes Difficulty: Easy to Moderate
Steps:
- Unplug the laptop and remove the battery.
- Locate your model’s reset method: many Dell and HP models use a small pinhole reset button, Lenovo often uses an emergency reset hole near the SIM slot, and most ASUS, Acer, and MSI boards require briefly removing the CMOS coin cell battery for 60 seconds.
- Reconnect power and battery, then boot normally.
Expected Result: Laptop completes POST and boots into Windows or the BIOS setup screen. If Failed: A corrupted BIOS wasn’t the cause, this points toward the motherboard itself. Technician Tip: If the laptop was mid-update when this started, a BIOS reset combined with a USB recovery flash (available from most manufacturer support pages) resolves the majority of update-related shutdowns.
Fix: Battery Replacement
Cost: $40 to $100 depending on model Time: 15 to 30 minutes for removable batteries, longer for sealed designs Difficulty: Easy for removable batteries, Moderate for internal ones
Steps:
- Confirm the fault with the AC-only test above first.
- Order a replacement matched to your exact model number, not just a “compatible” generic listing.
- Power off, unplug, remove the old battery, and install the new one following the same orientation.
Expected Result: Laptop boots normally on both battery and AC power. If Failed: If shutdowns continue even after a confirmed battery swap, the charging circuit on the motherboard itself may be damaged. Expert Warning: A swollen battery should be handled carefully and disposed of properly. Never puncture it or continue charging it while waiting for a replacement.
Mistakes That Make the Problem Worse
- Repeatedly forcing the power button: users assume one more try will work, but repeated power cycling on a failing power circuit can accelerate damage to capacitors and voltage regulators.
- Ignoring a burning smell because “it still turns on”: any electrical smell means stop testing immediately. Continuing to power cycle a unit with a short can turn a $40 repair into a full motherboard replacement.
- Using a lower wattage charger “because it fits the same port”: the connector fitting doesn’t mean the wattage is adequate, and an underpowered charger reproduces this exact symptom.
- Charging a visibly swollen battery to “see if it still works”: swollen lithium batteries are a fire risk. They need removal and proper disposal, not another charge cycle.
- Skipping anti-static precautions while reseating RAM: a static discharge during this process can damage the very component you’re trying to fix.
- Assuming a spinning fan for one second means the fan is fine: a fan that spins briefly off residual momentum and then seizes will fool a quick glance every time.
- Leaving a dead CMOS battery unaddressed for months: a system that intermittently fails to POST due to a dying CMOS battery will eventually fail completely, and the part costs under $5.
- Opening a sealed-battery ultrabook without the right tools: prying with the wrong tool risks cutting the internal battery cable, turning a simple diagnosis into a more expensive repair.
Brand-Specific Considerations
Dell Most Dell laptops have a small pinhole reset button on the bottom panel for a hardware reset, separate from the standard BIOS reset key (usually F2 at boot). Dell SupportAssist’s pre-boot diagnostics (accessible by tapping F12 at startup) can run a hardware test even when Windows itself won’t load.
HP HP’s hard reset combination is typically holding the power button alone for 15 seconds with the charger unplugged and battery removed where possible. HP PC Hardware Diagnostics, accessible from the BIOS boot menu, is one of the more thorough built-in test suites for isolating RAM versus motherboard faults.
Lenovo Many Lenovo ThinkPad and IdeaPad models include a small emergency reset hole, often near the SIM card slot, that forces a full power drain when pressed with a paperclip for a few seconds. Lenovo Vantage offers a hardware scan that’s worth running the moment the laptop boots successfully even once.
ASUS ASUS boards generally require removing the CMOS battery directly for a firmware level reset, since most consumer models don’t expose a dedicated reset pinhole. MyASUS includes a diagnostic tool, but it only runs once Windows has loaded, so it’s most useful for the intermittent shutdown cases rather than a hard immediate failure.
Acer Acer’s BIOS access key is usually F2, and many models support an emergency BIOS recovery using a renamed firmware file on a USB drive if a failed update is suspected. Acer Care Center’s hardware diagnostics can be run from a recovery USB even without a working Windows install.
MSI MSI gaming laptops often run more aggressive thermal protection thresholds due to higher performance components, so an instant thermal shutdown is more common on these models than on typical productivity laptops. MSI Center includes fan and temperature monitoring that’s useful for confirming a fan fault once the system can stay on long enough to load it.
Repair Shop Diagnosis

A repair technician typically starts with the exact same battery removal and charger swap tests covered above, because they isolate the two most common causes in under five minutes with zero disassembly. From there, shops use a bench power supply to feed the motherboard a stable, known voltage directly, which immediately tells them whether the fault lies in the charging circuit or further downstream on the board itself.
For cases that get past that point, a POST diagnostic card or onboard LED/beep code reader is used to identify exactly which component is failing to initialize. Multimeter testing on the voltage regulator outputs follows if a motherboard fault is suspected.
Typical repair costs run from $0 to $40 for diagnosis alone (often waived if you proceed with the repair), $40 to $100 for battery or adapter replacement, and $120 to $350 or more for motherboard level repairs depending on whether the board can be repaired at the component level or needs full replacement. Professional repair becomes worth it once you’ve confirmed the issue isn’t a quick RAM, battery, or adapter fix, since accurate board level diagnosis genuinely requires equipment most people don’t own.
When Hardware Replacement Is Necessary
RAM: if a single stick consistently causes the shutdown across multiple slots, the module itself is the failure point and needs replacement rather than further reseating.
Battery: any battery that’s visibly swollen, that fails the AC-only test repeatedly, or that reports under 50% of its original design capacity in a battery report should be replaced rather than nursed along.
AC Adapter: an adapter that tests below its rated voltage on a multimeter, or one with a visibly frayed or damaged cable, needs replacement. Don’t continue using a charger that’s been run over, bent sharply, or exposed to liquid.
Cooling Fan: a fan that won’t spin freely even after cleaning, or that makes grinding noises, has a worn or failed motor and needs replacement to prevent repeated thermal shutdowns.
Motherboard: when every other component tests good and the shutdown persists with a bench power supply providing clean, stable voltage, the fault sits on the board itself. This is the most expensive replacement and the one most worth getting a second opinion on before committing.
Stop Troubleshooting and Seek Professional Repair If
- Liquid damage: any spill, even one that happened weeks ago, that precedes this symptom means internal corrosion is likely already in progress.
- Burning smell: stop testing immediately and disconnect all power sources. Continuing to power cycle a unit that smells like burning electronics risks a fire.
- Swollen battery: remove it from use immediately and have it disposed of properly. Don’t continue charging or testing with it installed.
- Visible motherboard damage: scorch marks, blown capacitors, or corrosion on the board are signs that go well beyond a DIY fix.
- Electrical short symptoms: sparking, a tripped circuit breaker when plugged in, or a charger that gets unusually hot are all signs of a short that needs professional attention.
- Repeated shutdowns under load that don’t match the patterns above: if you’ve worked through every step in this guide and the unit still won’t stay on consistently, a bench level diagnosis will save you more time than continued guesswork.
Prevention Tips

- Clean the intake and exhaust vents with compressed air every three to four months, more often if you have pets or work in a dusty environment.
- Replace your charger the moment the cable shows fraying or the connector feels loose, rather than waiting for it to fail completely.
- Avoid leaving a laptop battery at 0% for extended storage periods; aim to store it around 50% charge if it won’t be used for weeks.
- Use the laptop on a hard, flat surface rather than bedding or cushions, which block intake vents and accelerate thermal issues.
- Run your manufacturer’s hardware diagnostic tool every few months as a health check, not just after something breaks.
- Avoid generic, off-brand chargers; stick to OEM or reputable third-party adapters that match your laptop’s exact voltage and wattage.
- Handle the laptop gently when it’s open for cleaning or upgrades, and always reseat connectors fully rather than leaving them “close enough.”
- Keep the laptop away from direct sunlight or hot car interiors, both of which stress the battery and can trigger thermal protection on the very next boot.
Frequently Asked Questions

Why does my laptop turn on then immediately turn off?
The most common reasons are a loose RAM stick, a failing AC adapter, or a battery that can’t sustain the power draw needed during boot. Less commonly, it’s a thermal protection trigger from a stuck fan or a deeper motherboard fault.
Is it safe to keep trying to turn my laptop on if it keeps shutting off?
A few attempts to test and diagnose are fine, but repeated forced power cycling on a unit with an electrical fault can cause further damage. Stop immediately if you notice any burning smell or unusual sounds.
Can a laptop shut off immediately just from a software problem?
Genuine instant shutdowns at power on are almost always hardware related, since the system hasn’t loaded Windows yet at that point. A corrupted BIOS or firmware update is the closest thing to a “software” cause, and a BIOS reset usually resolves it.
Will removing the battery damage my laptop?
No, removing a battery on a model designed with a removable battery is completely safe and is one of the fastest ways to isolate the cause. Sealed-battery ultrabooks should not be opened without proper tools and should instead use the forced power drain method.
How do I know if it’s the charger or the battery?
Test on AC power with the battery removed. If it boots fine, the battery was the problem. If it still shuts off, swap to a different known-good charger next.
Is this worth repairing, or should I just replace the laptop?
RAM, battery, and adapter fixes are almost always worth doing, since parts are cheap and the rest of the laptop is fine. Motherboard level repairs are worth weighing against the laptop’s age and replacement cost before committing.
Why does my laptop only do this sometimes, not every time?
Intermittent shutdowns usually point to a marginal connection, a connector that’s almost seated correctly, or an early stage motherboard fault rather than a single clean failure. These tend to get worse over time, so it’s worth diagnosing now rather than waiting.
What does it mean if the fan runs but there’s no display at all?
This points toward RAM or a display controller fault rather than a power supply issue, since the system has enough power to spin the fan but can’t complete POST far enough to drive a display.
Conclusion
A laptop that turns on and shuts off within seconds is almost always pointing to one of a handful of causes: loose RAM, a failing charger, a worn out battery, or a thermal shutdown from a seized fan. Work through the battery removal and charger swap tests first, since they’re free and resolve the majority of cases in minutes. If the shutdown persists after reseating RAM and confirming the fan spins freely, the fault has moved to the motherboard or power circuit, and that’s the point where a professional bench diagnosis will save you more time than continued guesswork.